| View previous topic :: View next topic |
| Author |
Message |
Baxsie
Joined: 12 Apr 2012
Posts: 253
|
 Posted: Sat Jan 03, 2015 9:04 am Post subject: Installing Gab Fab Weber Windows Posted: Sat Jan 03, 2015 9:04 am Post subject: Installing Gab Fab Weber Windows |
 |
|
The engine compartment is very tight around the throttle bodies. We decided to add the Gab Fab Weber Windows, generally following ap_sand's"Installing GAB-FAB Weber Windows for Carb Access" excellent guide over on TheSamba. The deciding factor was when we could not get even the spark plug wire on #3 & #4 on and off without great difficulty . . . much less actually access the spark plug.
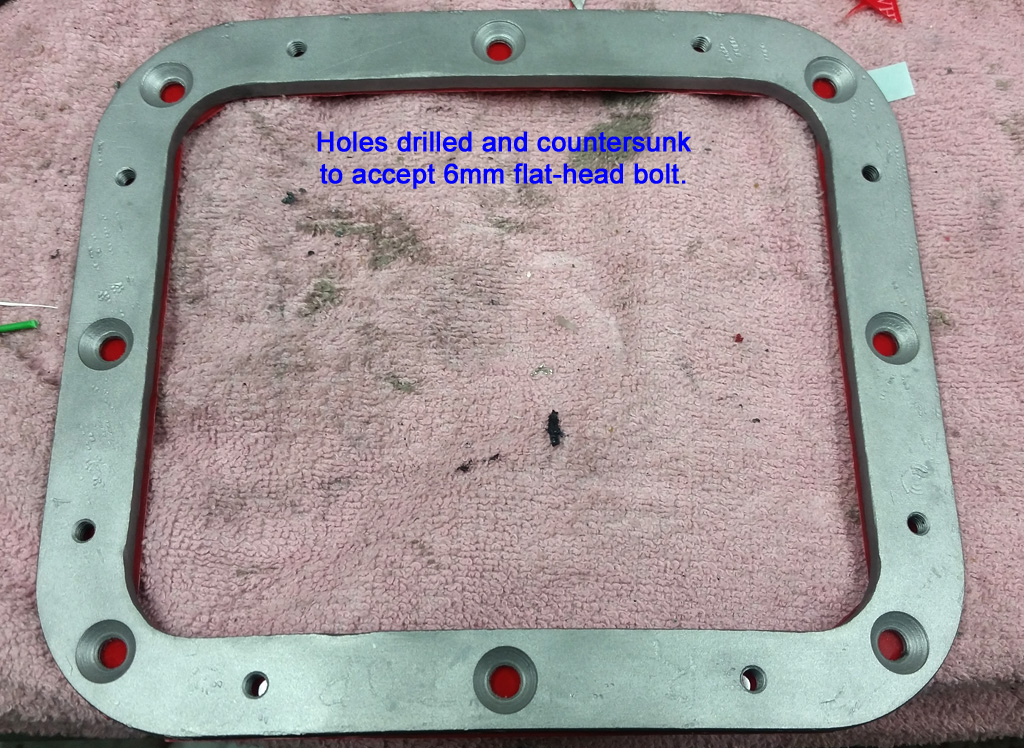
First off, since we are doing this with the engine in and fenders on, I was not about to attempt to mess around with rivets. Hopefully Gab Fab will one day make a version that includes the countersinks, adhesive and hardware to bolt it in. For now we got 6mm stainless flat-head allen bolts, and counter-sunk the frame to accept them:
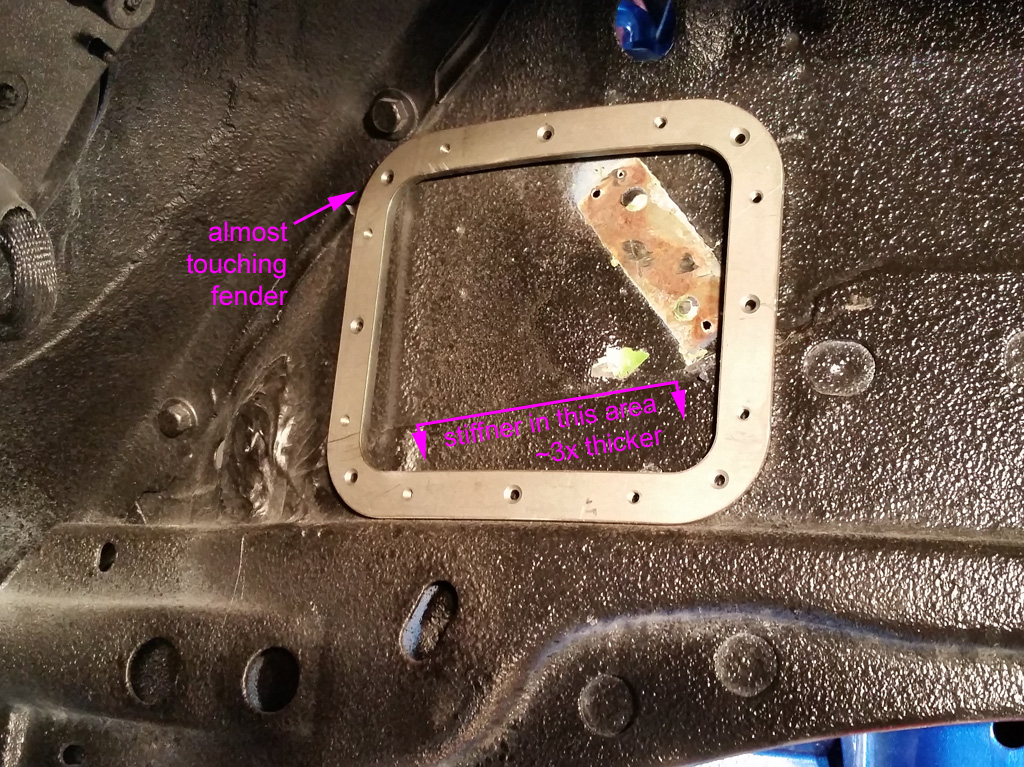
The 1975 Super Beetle 1303 has some beefy reinforcement for the bumpers. The window intersects the reinforcement quite deeply:
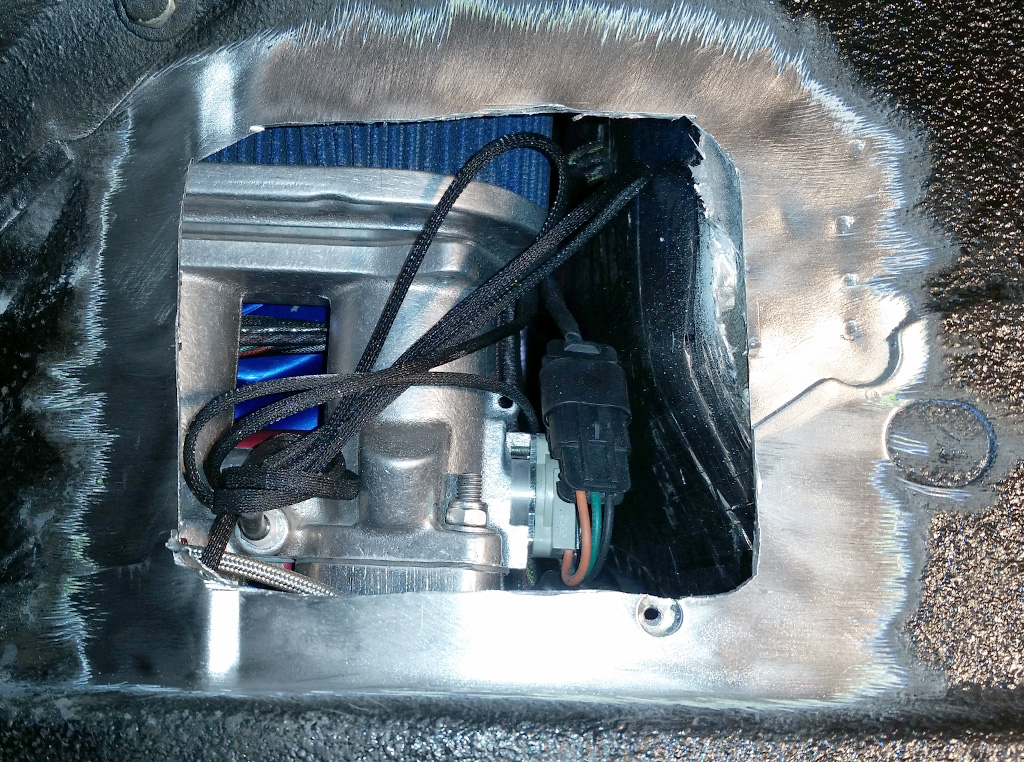
Hacking out the hole using an air hacksaw and die grinder with cutoff wheel:
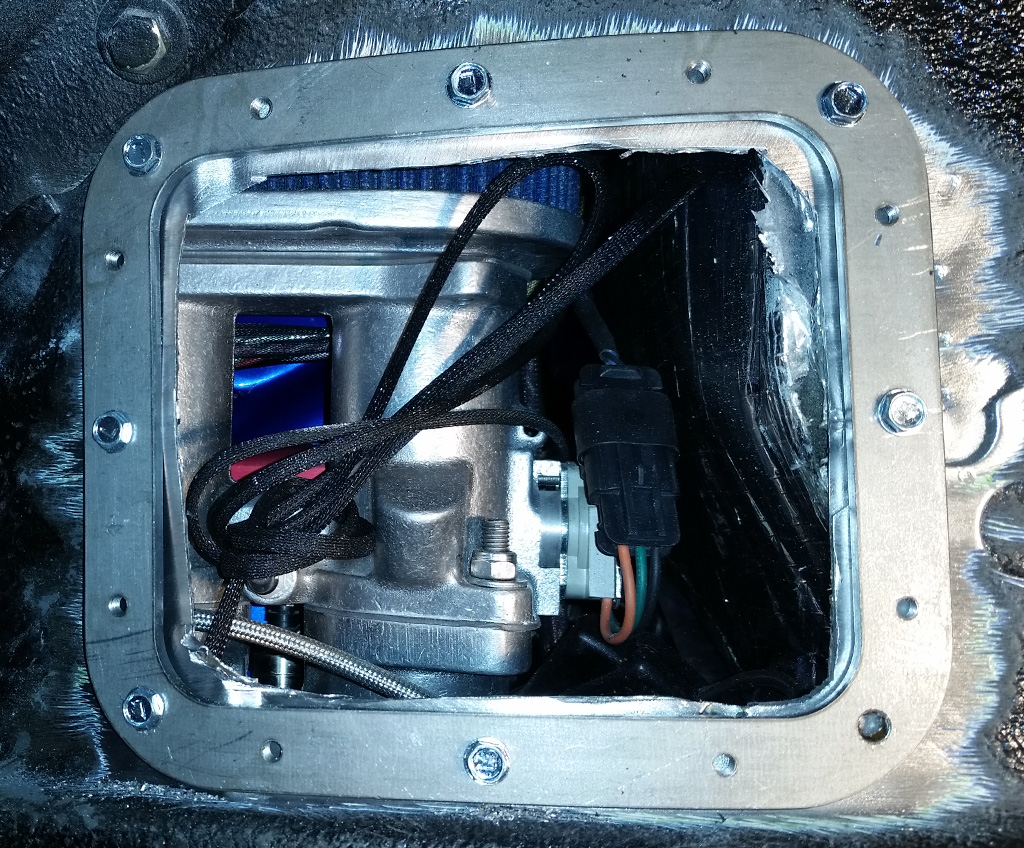
We then used self-taping screws to temporarily secure the frame:
and then trimmed the inside using carbide burr on the die grinder, followed by sanding the inner edge using a flap sander attachment on the drill:
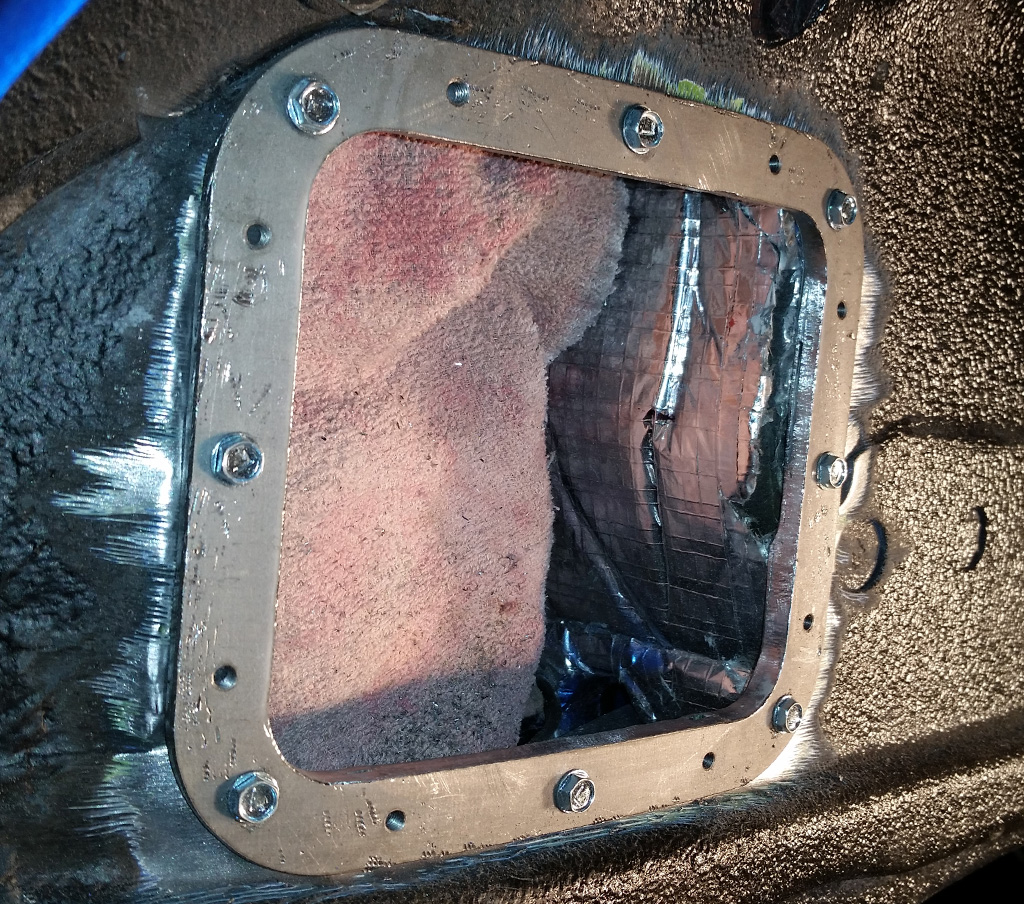
Here you can see how we formed the body metal to follow the heavy Gab-Fab frame, using vice grips. Gab Fab calls for folding a lip of body metal inside the frame. We did not do this because there was no way to fold the thick area at the bottom, and my cuts were not good enough at the top:
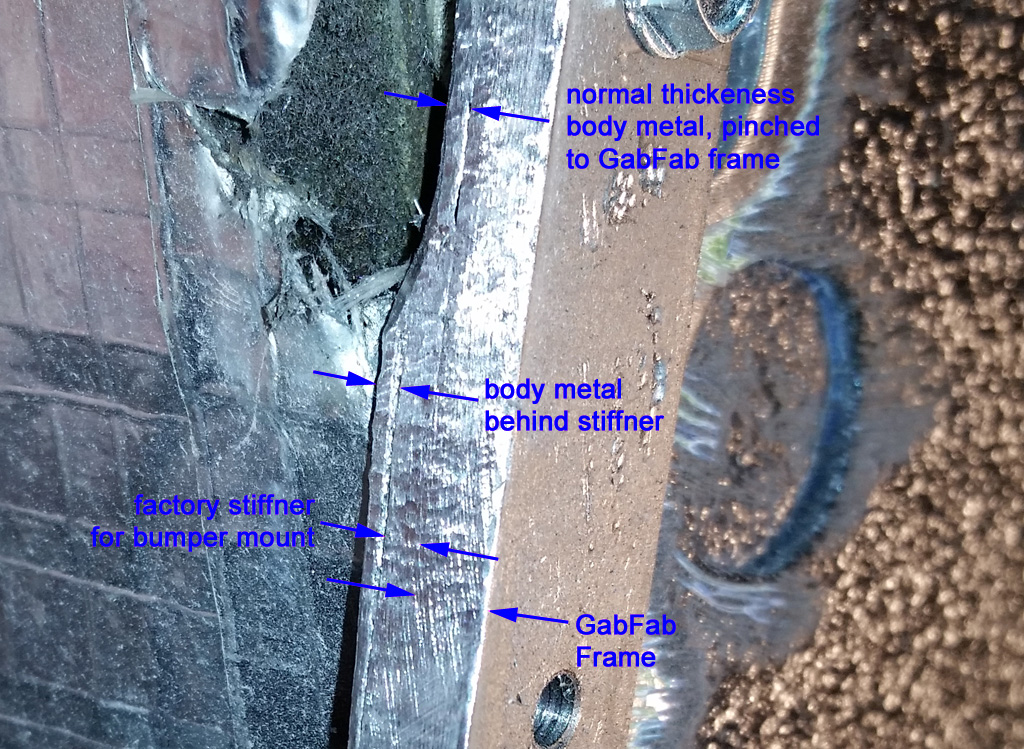
To assure that the heavy GabFab frame is able to reinforce the hole in the body as intended, we turned to the modern marvel of 3M VHB tape. This application is practically made for VHB and should be stronger than rivets:
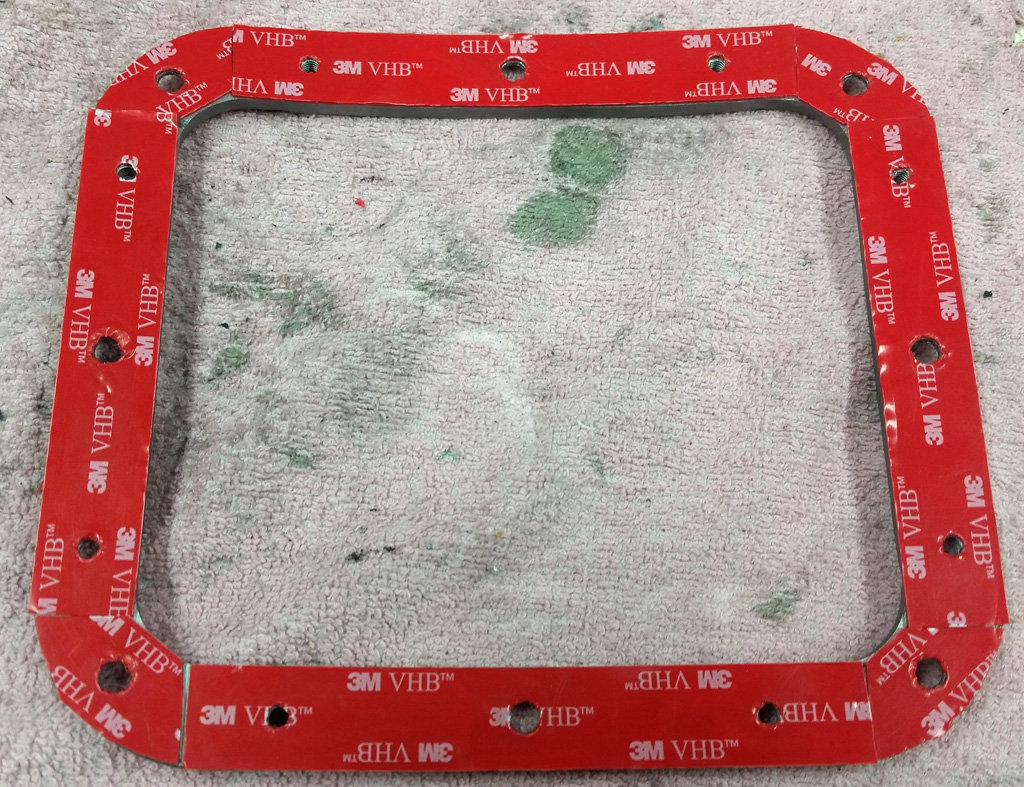
Here is what the frame looks like from inside the fender well:
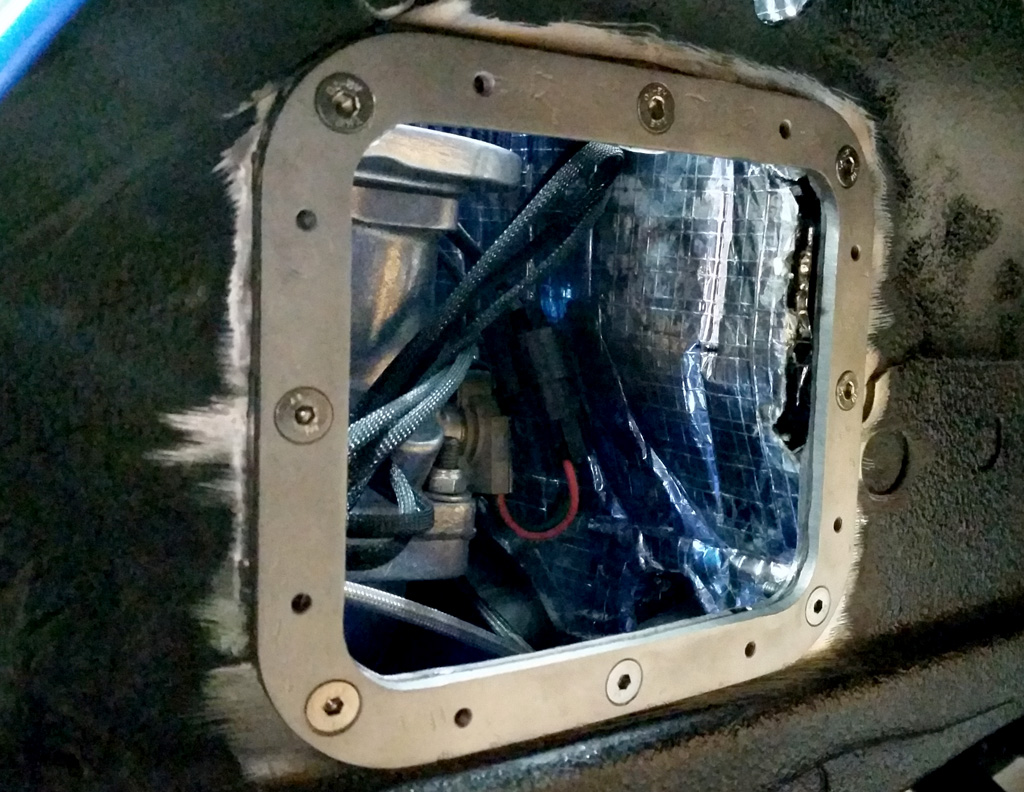
And from inside the engine compartment:
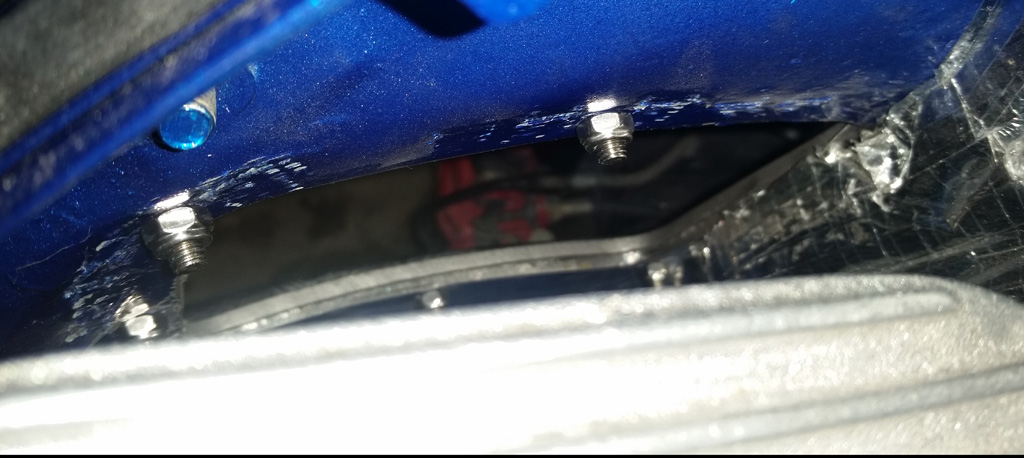
We then shot around the frame with undercoating:
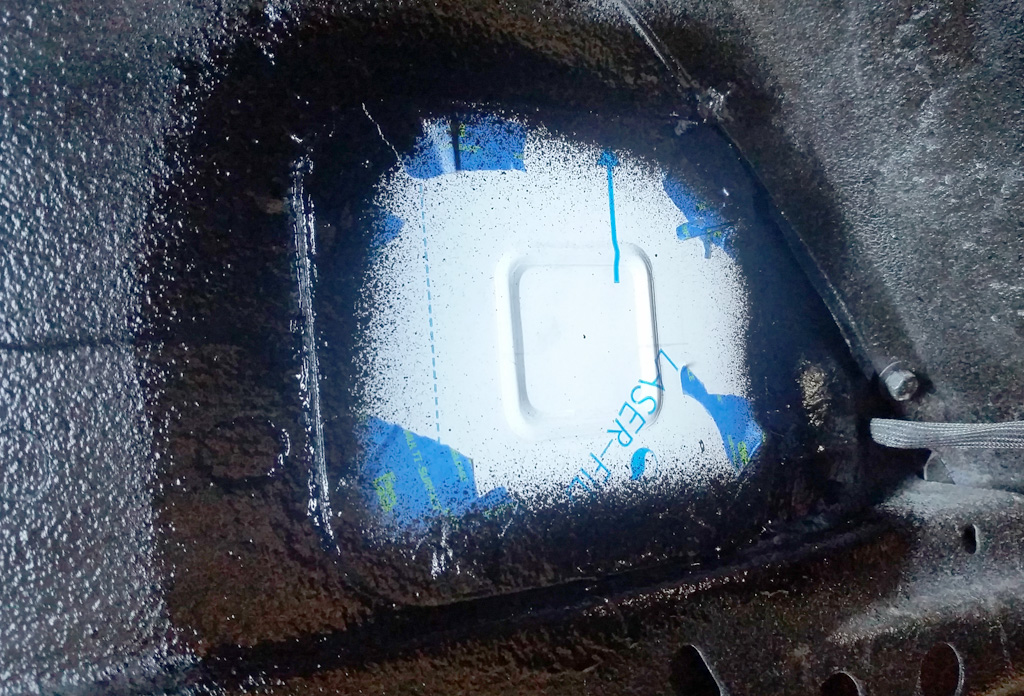
And added undercoating to the outside of the panels:
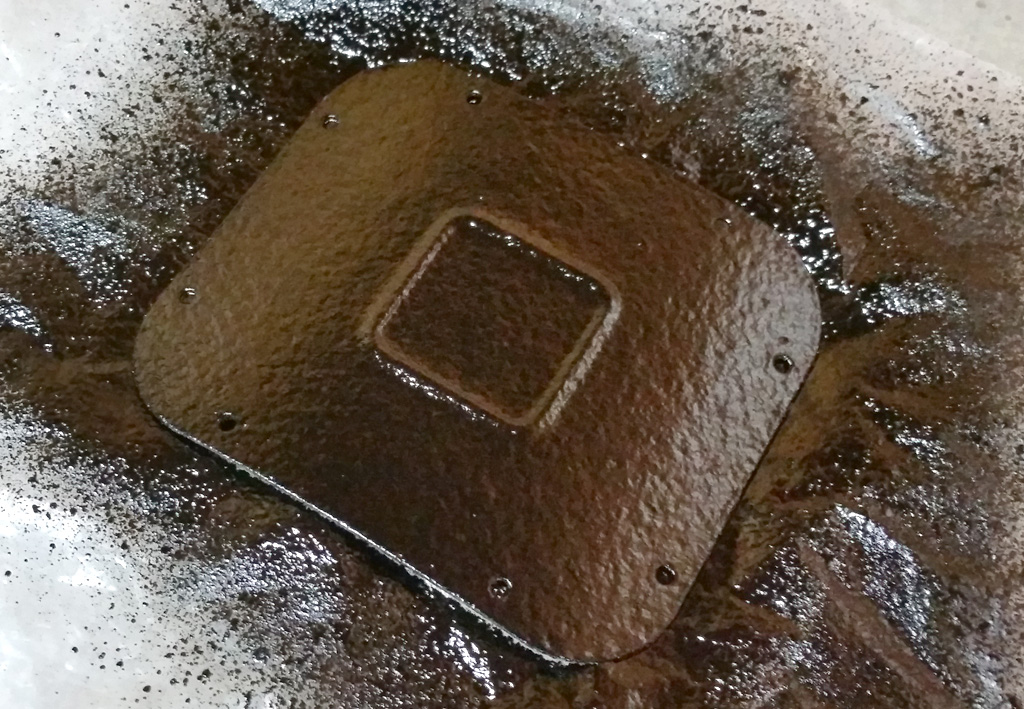
Inside the panel we used the thin, easily compressed, open-cell weatherstrip to seal between the window and the frame:
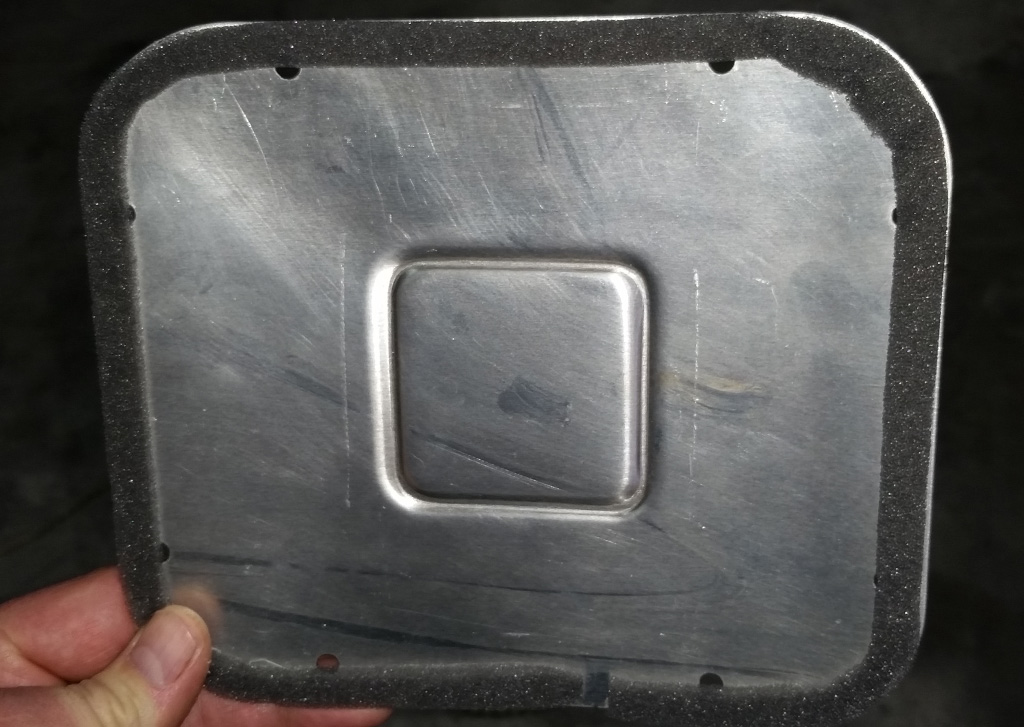
Last edited by Baxsie on Sat Jan 03, 2015 4:01 pm; edited 1 time in total |
|
| Back to top |
|
 |
Baxsie
Joined: 12 Apr 2012
Posts: 253
|
 Posted: Sat Jan 03, 2015 9:59 am Post subject: Dual NOS Bosch 335Hz 12v OEM Horns Posted: Sat Jan 03, 2015 9:59 am Post subject: Dual NOS Bosch 335Hz 12v OEM Horns |
 |
|
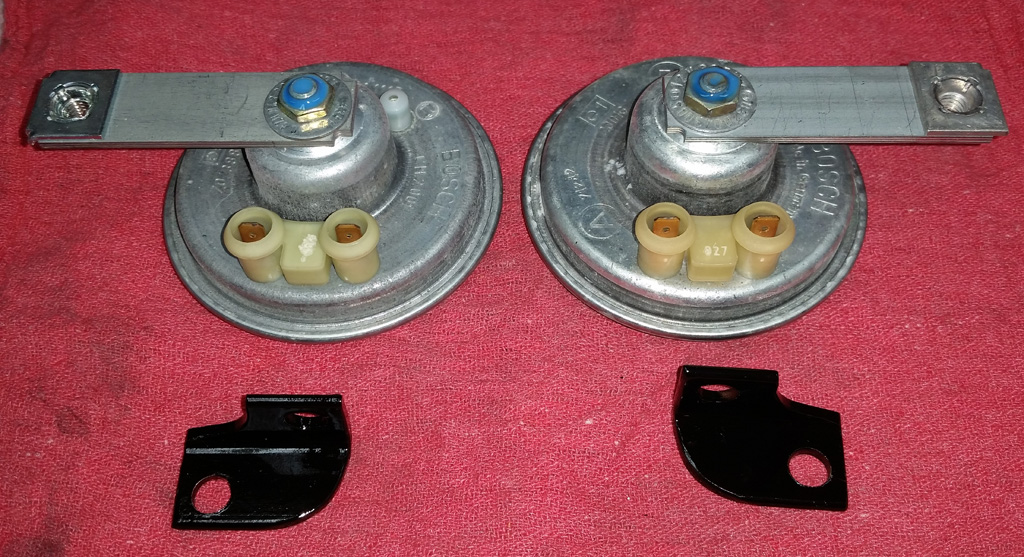
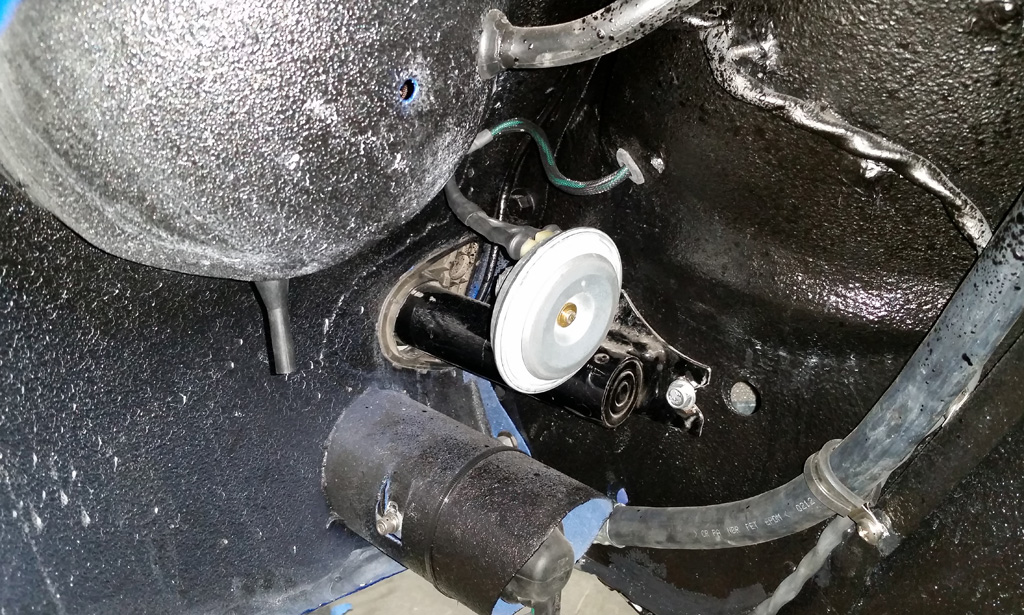
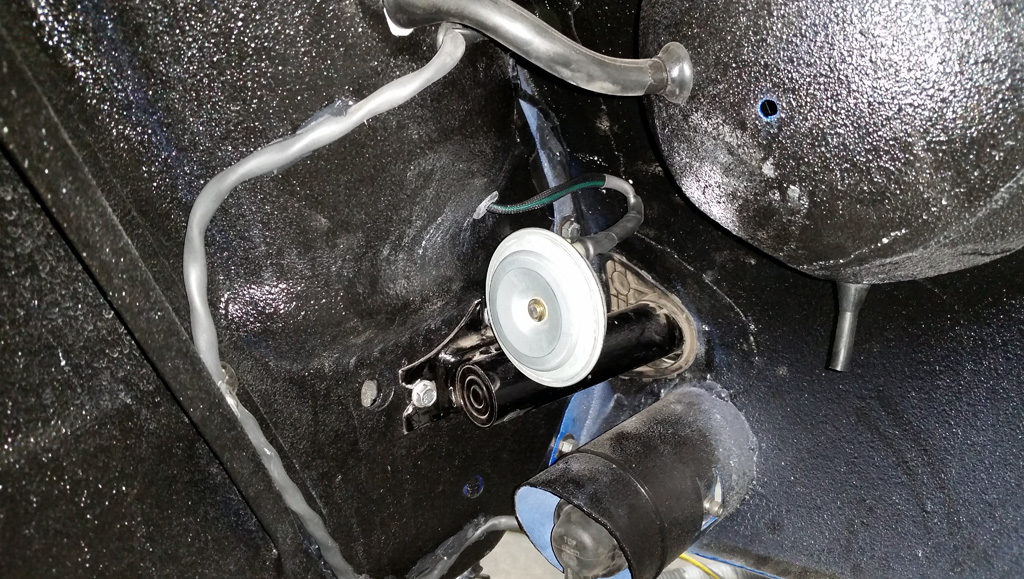
One of my goals of this car is to keep it as safe as possible -- while acknowledging that it is a 40 year old design. Since we have a total of 4 1303 bugs, I thought for sure we could find two working horns, but only one was functional. Since I am kind of a "matching" freak, we purchased two NOS Bosch 335Hz 12v horns. Then of course one was made in Germany, and one in Spain (oh noes -- match fail!), but other than that they are identical. We set them up as a mirror pair and made two 90 degree brackets from angle:
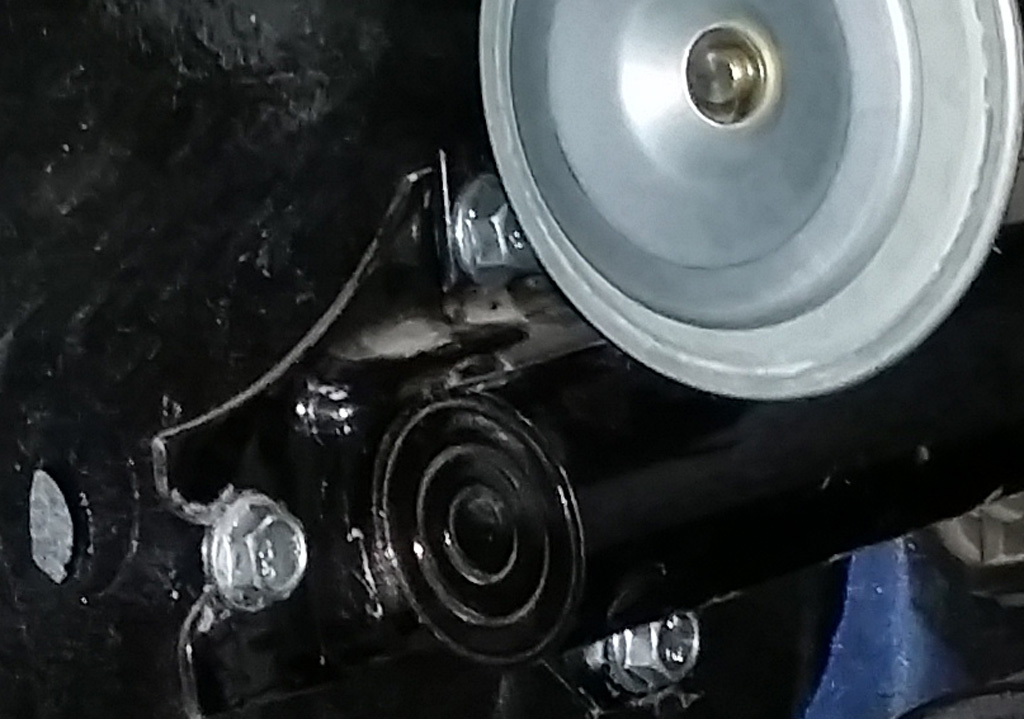
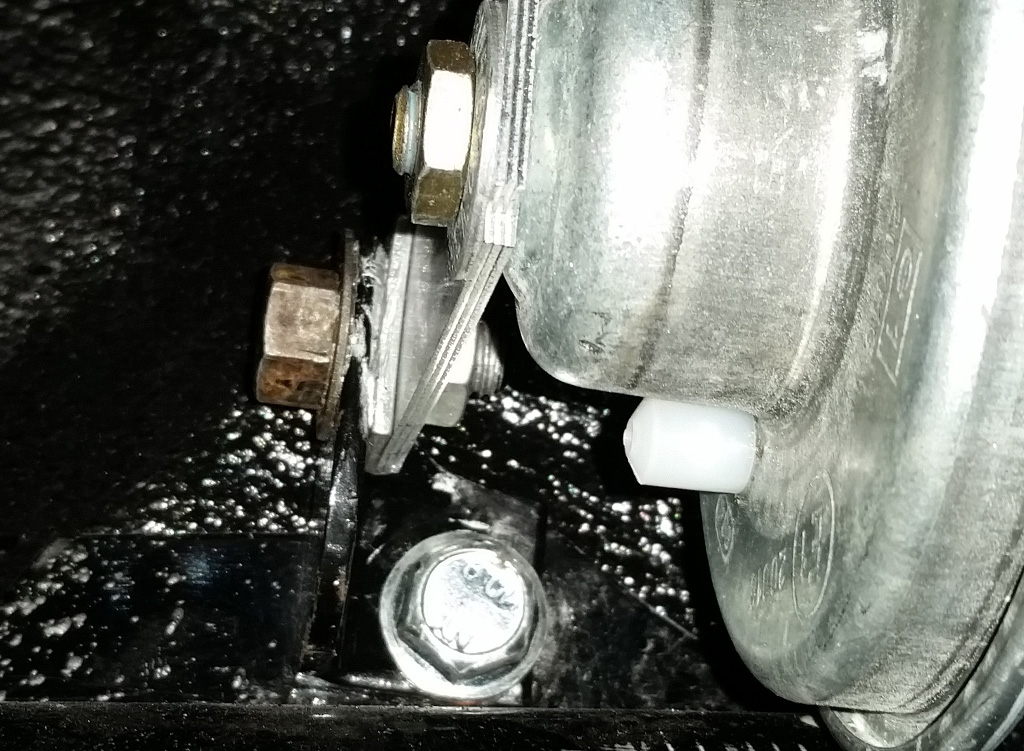
We use the top bumper shock mounting bolt:
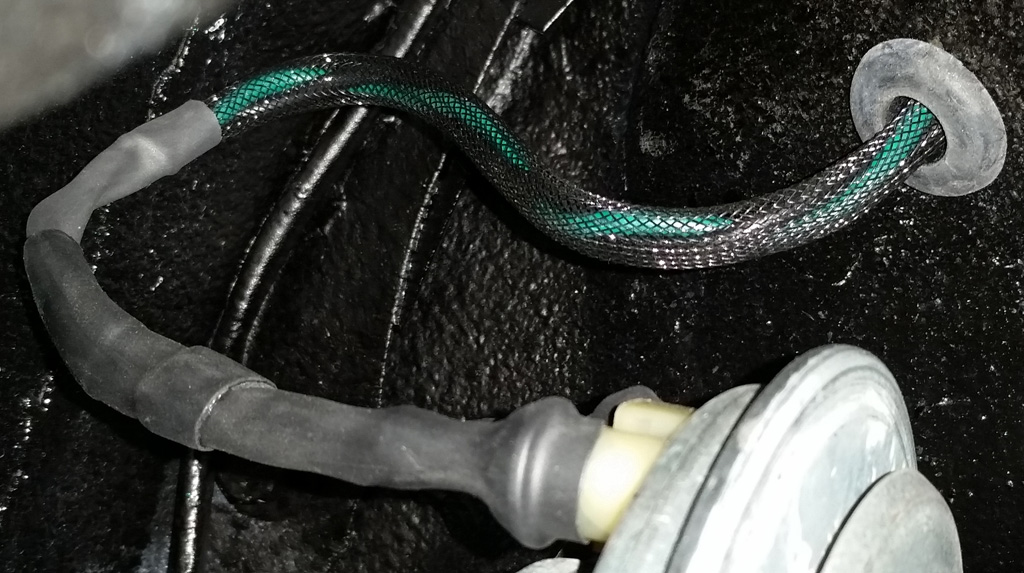
We ordered the rubber caps that went over the horn connection, but they split right away when we tried to make the hole a little bigger for the wire jacket. So instead we used the weather-proof hot-melt lined heat shrink to go over the plastic barb on the horn connector:
One on the driver side:
and one on the passenger side:
Since we have a sound level meter, we decided to see what the horns did:
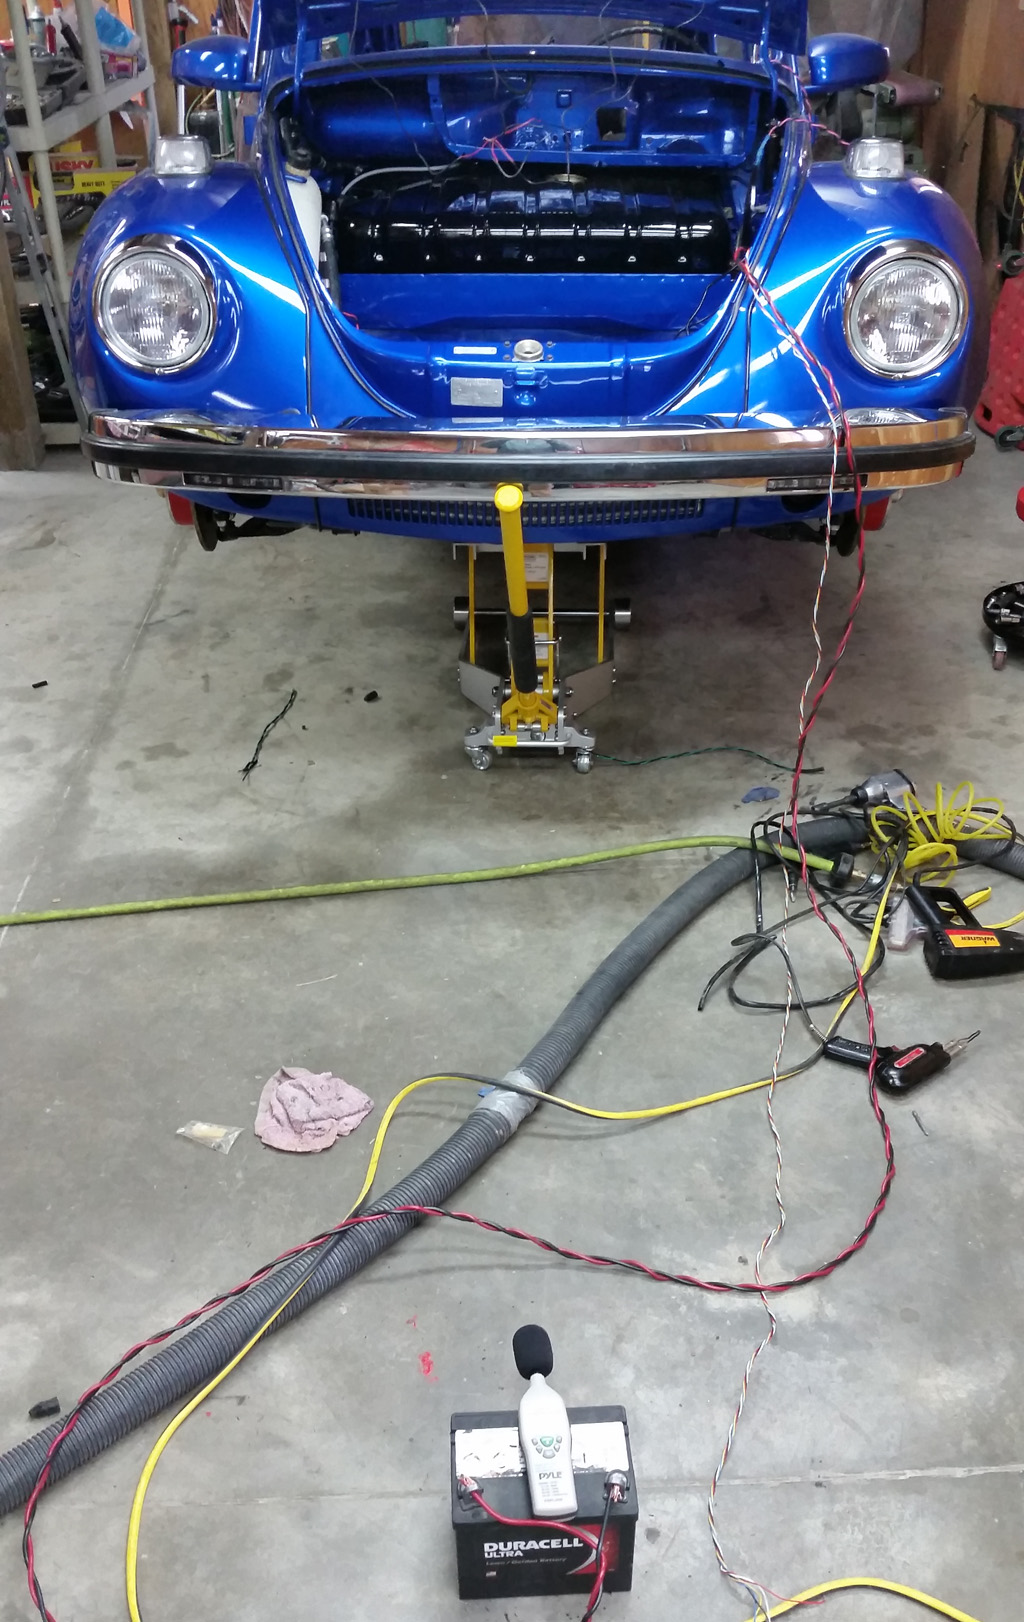
The numbers came our 37db ambient, and 106db horns actuated. Whatever, they are LOUD:
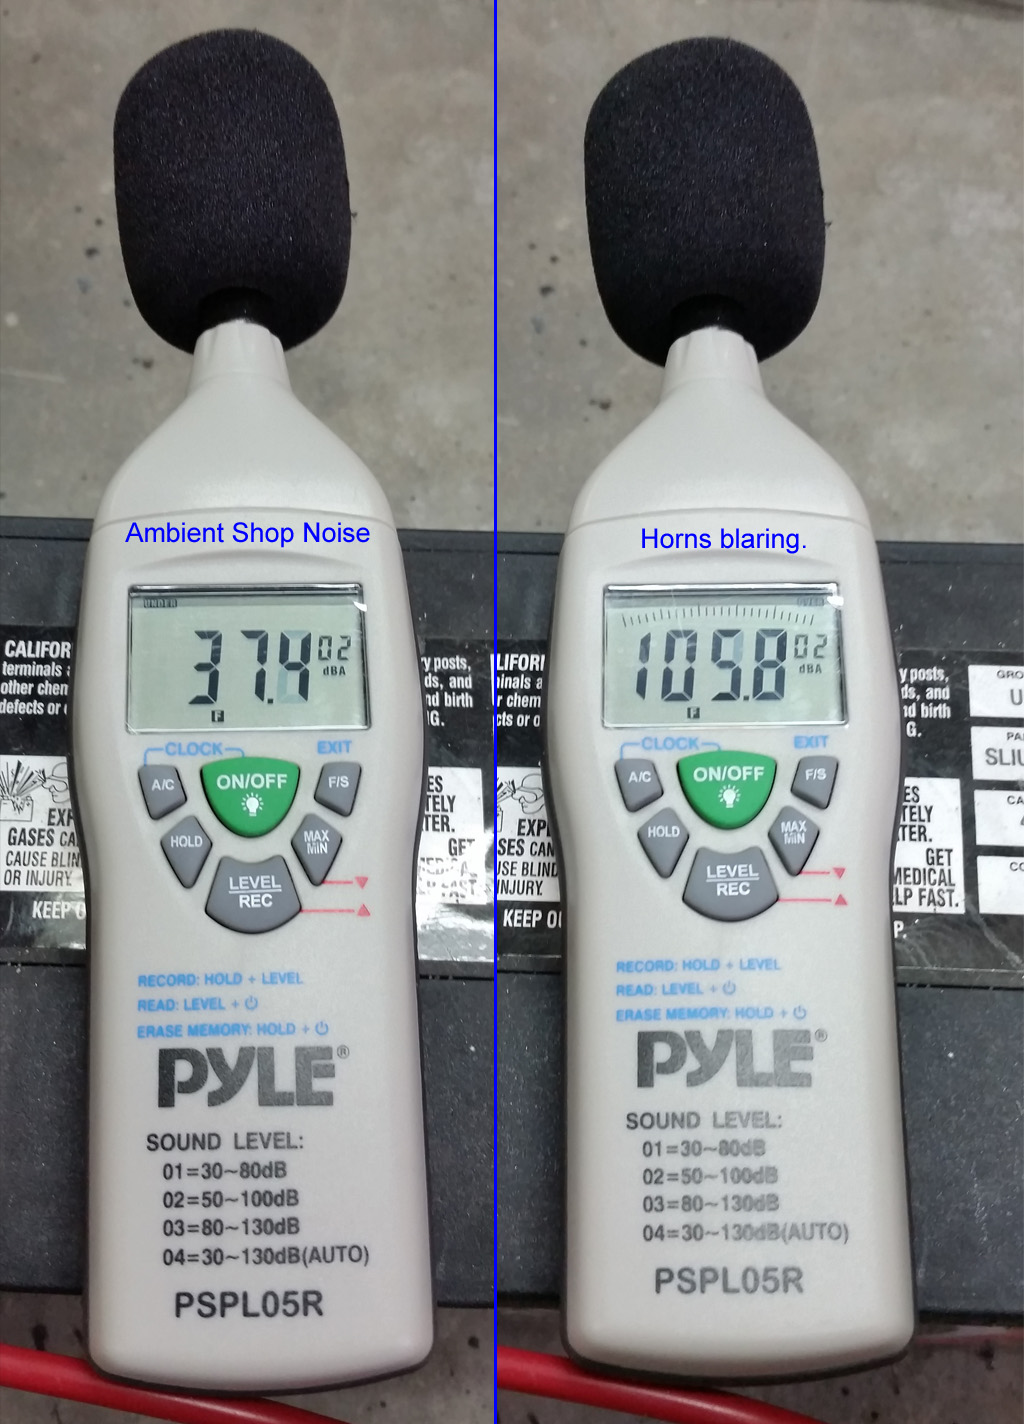
After hearing (with hearing protection) these new horns, I think that the horns age, maybe the contact gets old or the sound is dampened with paint or undercoating. These new ones are definitely louder than the old one we have.
Last edited by Baxsie on Sat Jan 03, 2015 4:08 pm; edited 1 time in total |
|
| Back to top |
|
 |
Baxsie
Joined: 12 Apr 2012
Posts: 253
|
 Posted: Sat Jan 03, 2015 10:20 am Post subject: Drive Shafts and CV joints Posted: Sat Jan 03, 2015 10:20 am Post subject: Drive Shafts and CV joints |
 |
|
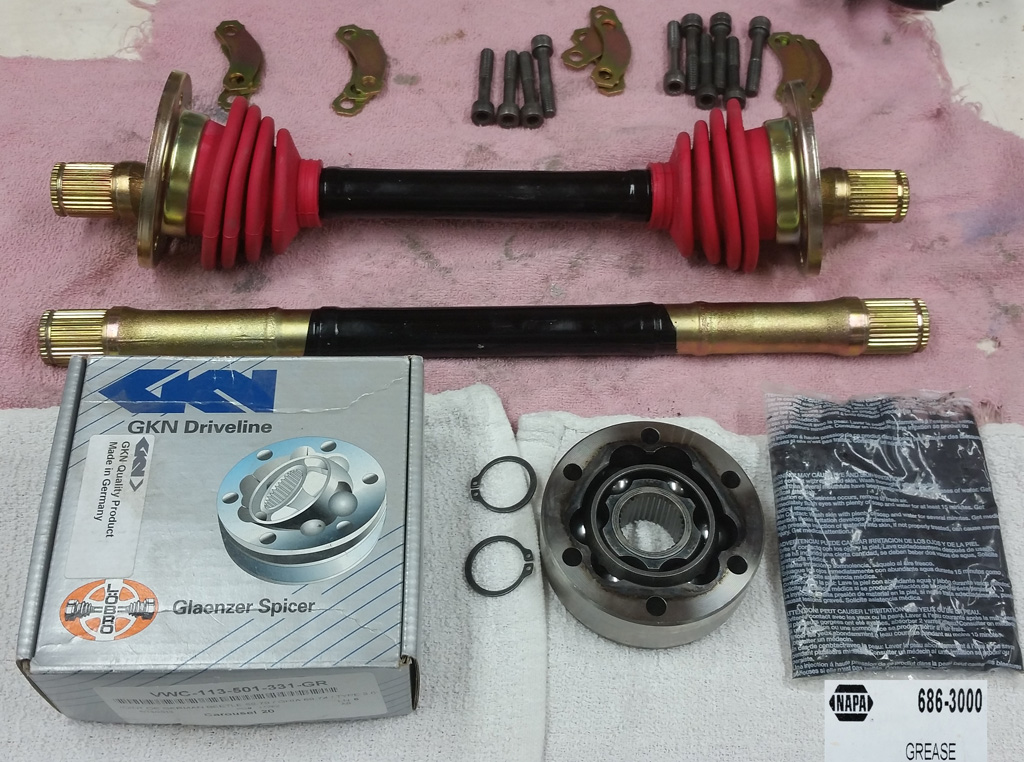
We have new German CV joints, and the sexy red BugPack boots (hope they are not a mistake!). Black moly grease made for CV joints from NAPA. Re-using original 12-point bolts. Axles and washer things are our original parts, bead blasted and zinc chromate treated:
Installed:
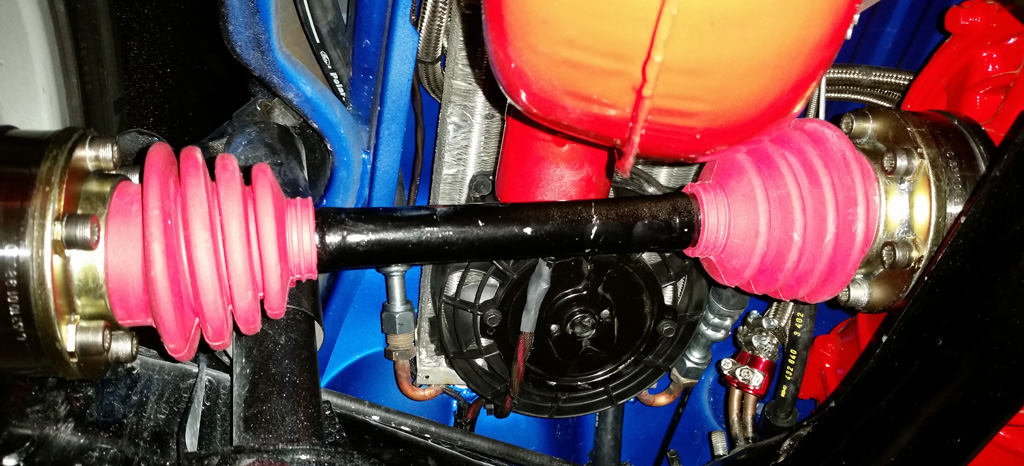
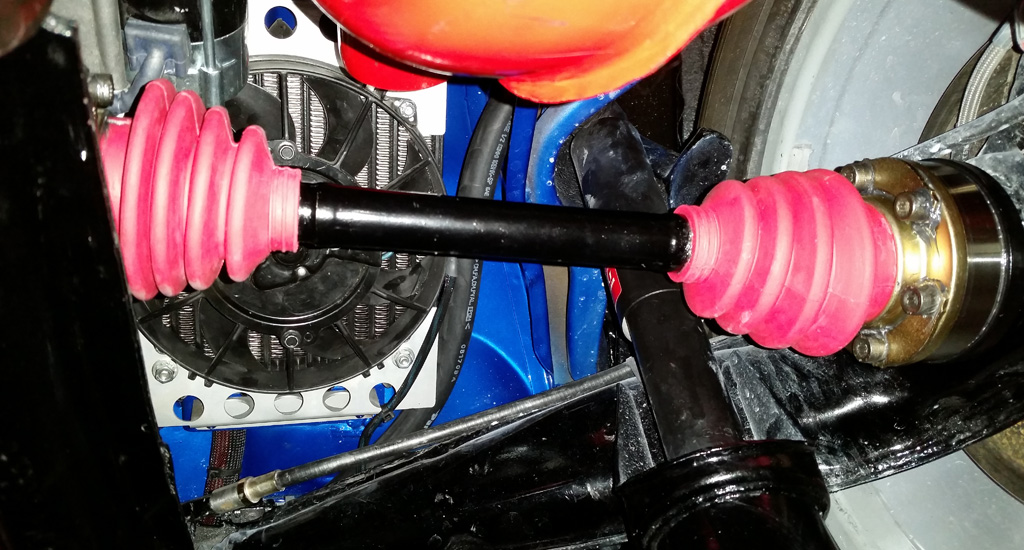
I was a bit surprised that the drive shafts need to be pressed into the CV joints. I definitely do not remember that, but Bently says that is how it is done. |
|
| Back to top |
|
 |
Baxsie
Joined: 12 Apr 2012
Posts: 253
|
 Posted: Sat Jan 03, 2015 4:58 pm Post subject: Air Conditioner 3d-printed metal outlet fitting Posted: Sat Jan 03, 2015 4:58 pm Post subject: Air Conditioner 3d-printed metal outlet fitting |
 |
|
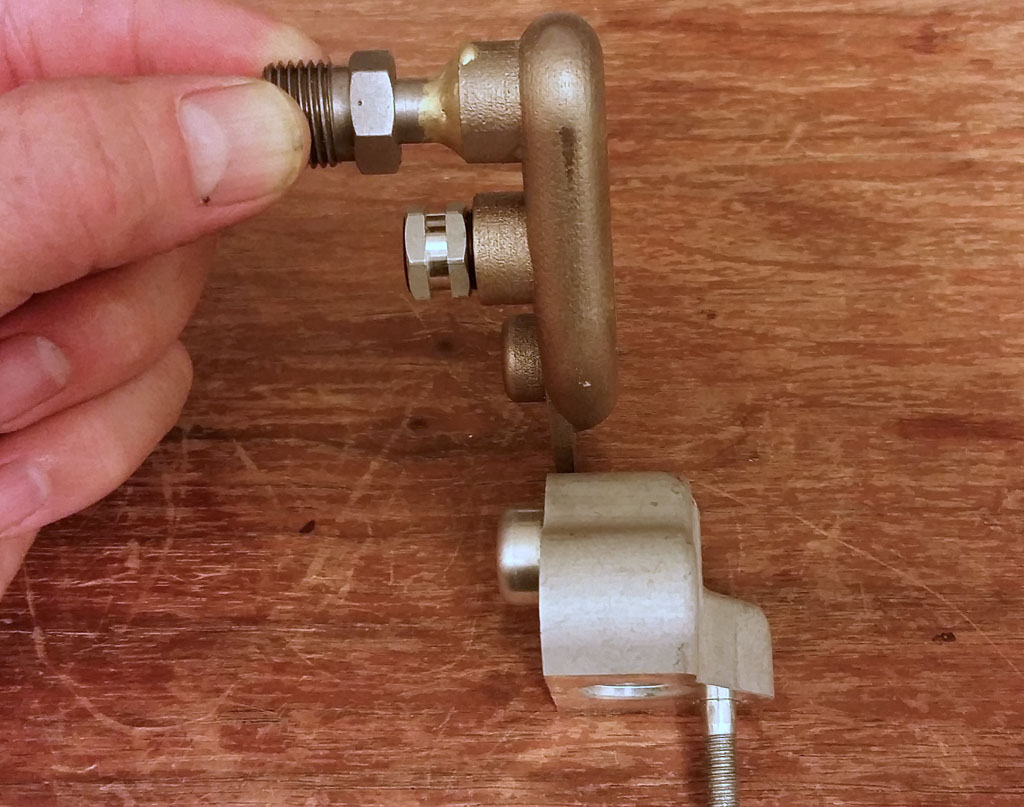
The air conditioner compressor (Sanden TRSE09: http://store.sanden.com/index.php/4921.html ) "D" (discharge) connection is on the back of the compressor and interferes with the fan shroud. We made a 3d model of a new fitting that will clear the fan shroud:
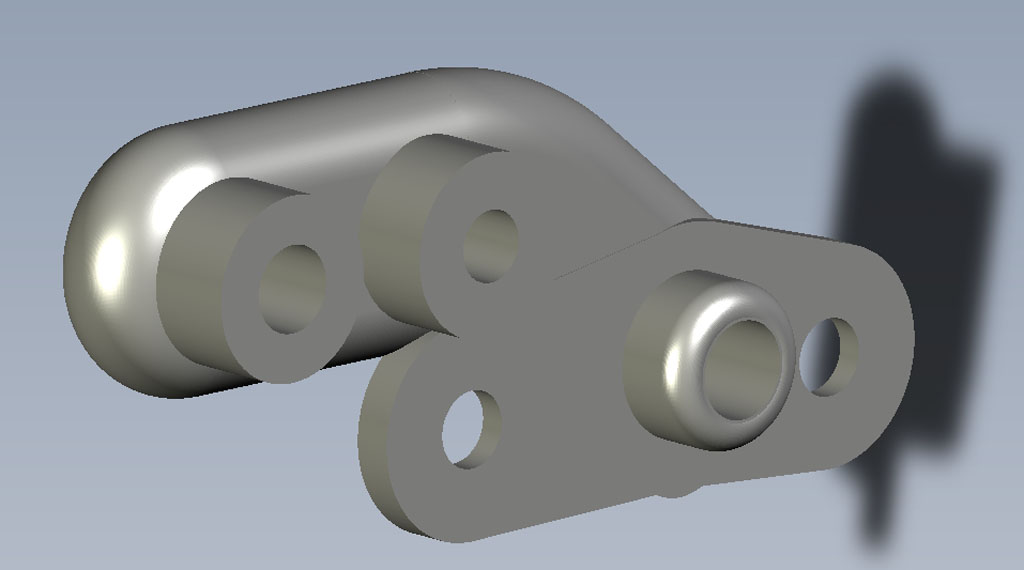
Here are the CAD files in case you are interested in that way:
http://baxsie.com/images/forum/bug/white_75/AC_Compressor_Mount/AC_Outlet.zip.zip
We had them built by http://www.shapeways.com in their bronze infused stainless steel. The new adapter is on the top, the original is below:
Here it is mounted to the compressor:
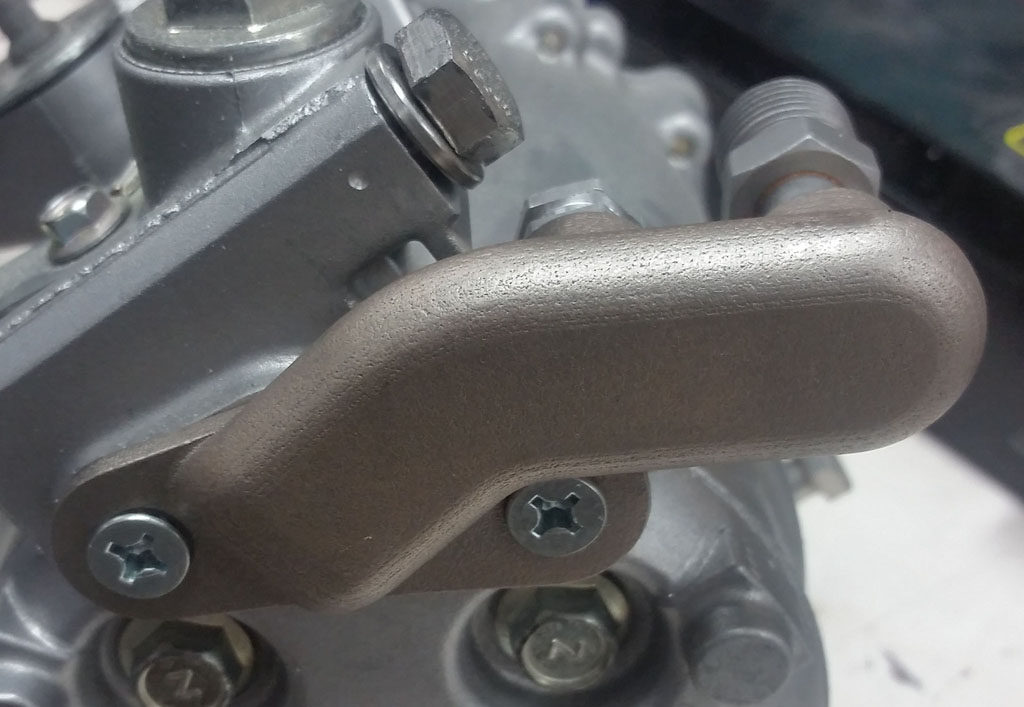
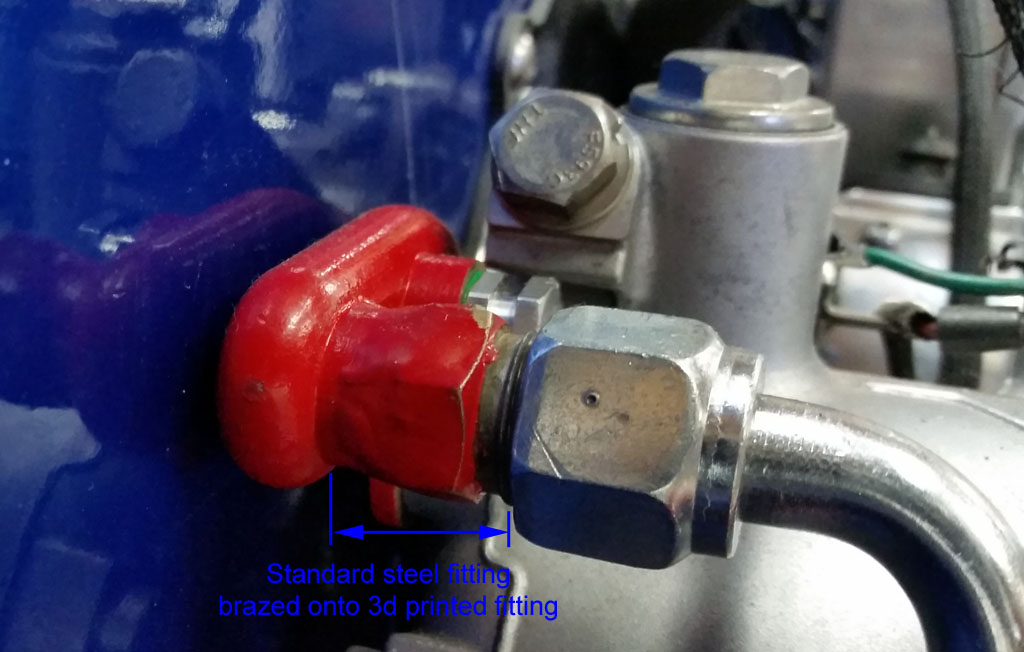
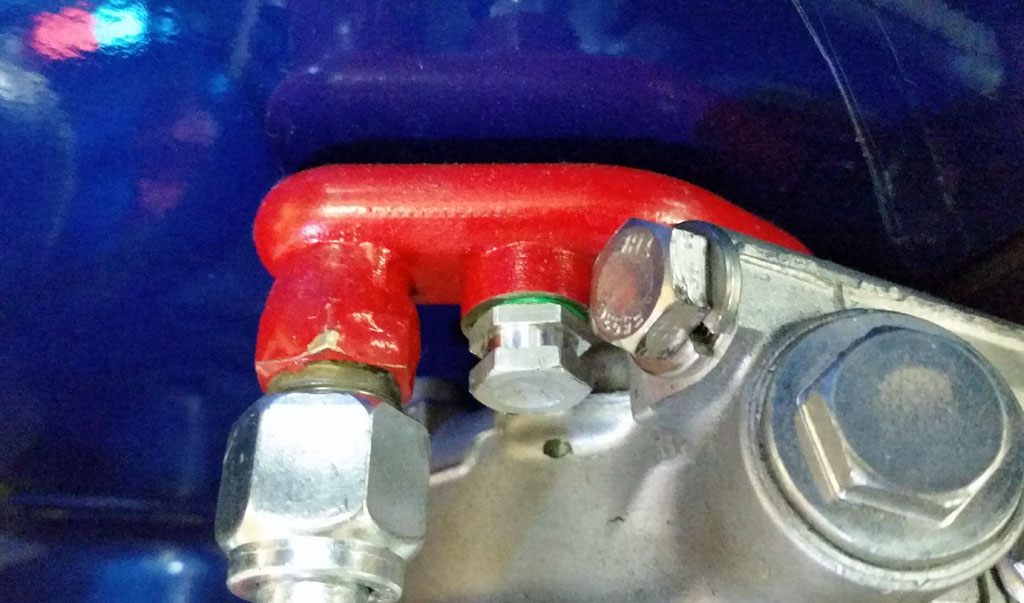
Be aware that the material is brutally hard to tap. I mean it is nasty. We smoothed the sealing surfaces, used green AC o-rings and nylog sealant. We have not tested the system so we do not know if it will actually work. Big darn experiment here. For the main connection. we brazed a standard steel fitting to the 3-printed metal:
The Sanden TRSE09 4921 compressor uses a "peanut" style connection. Through shear luck, we found a vendor at SEMA that had this beautiful little adapter:
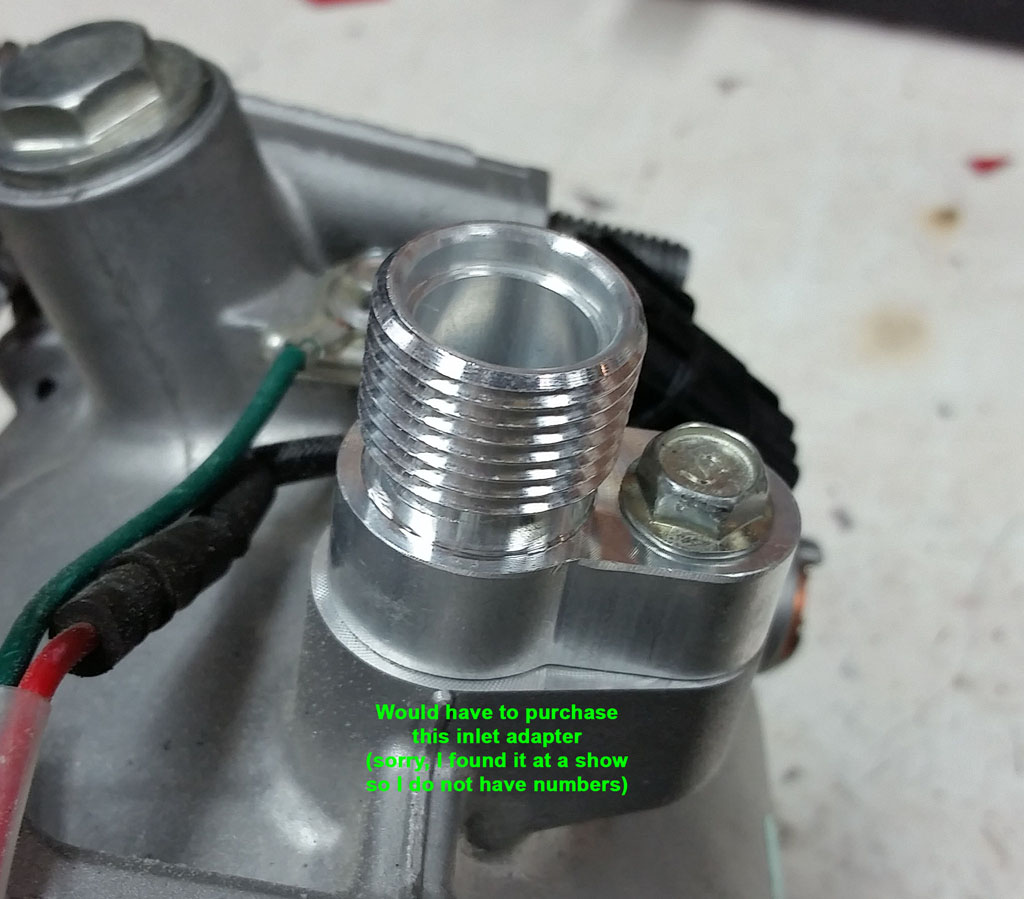
In theory it came together well, we shall see if it holds the refrigerant without leaking!
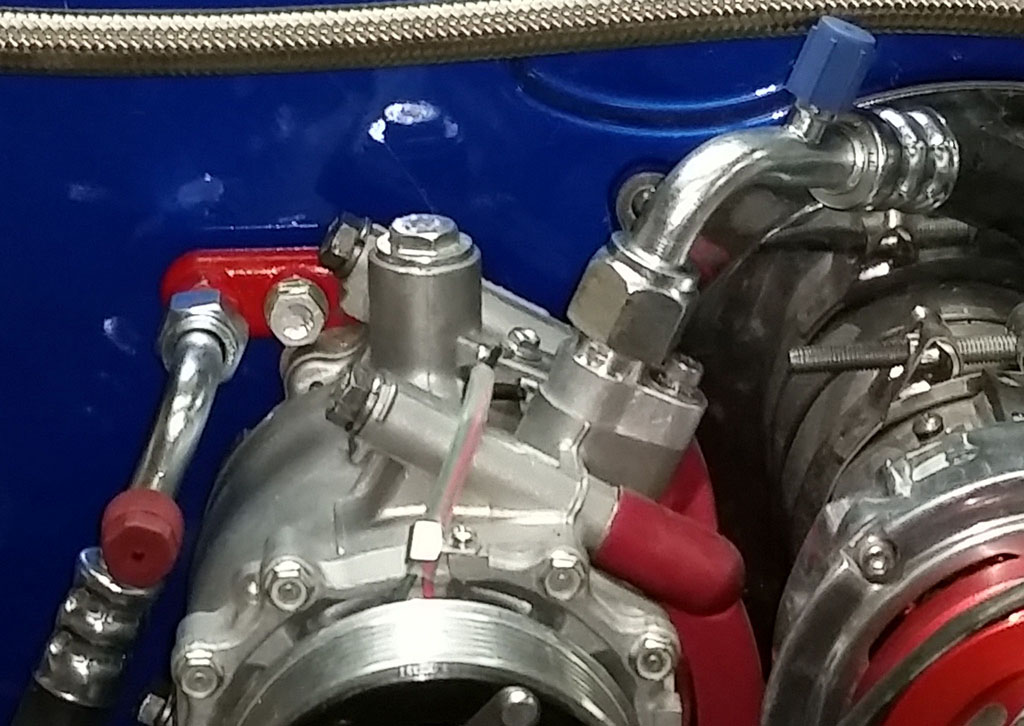 |
|
| Back to top |
|
 |
Baxsie
Joined: 12 Apr 2012
Posts: 253
|
 Posted: Sat Jan 03, 2015 5:18 pm Post subject: Fuel pump, filter and regulator Posted: Sat Jan 03, 2015 5:18 pm Post subject: Fuel pump, filter and regulator |
 |
|
We mounted the fuel pump and filter in up under the fuel tank. The pump ended up using the factory mounting bracket, the filter came with its own mounting clamp. Here is a view looking over the rack and pinion:
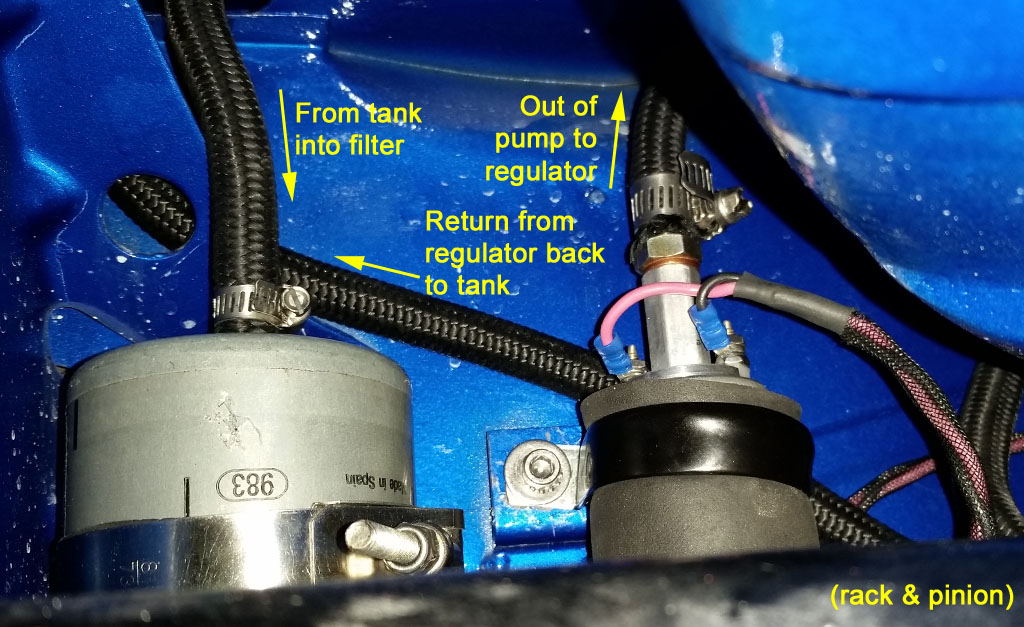
This is a view from under the rack and pinion:
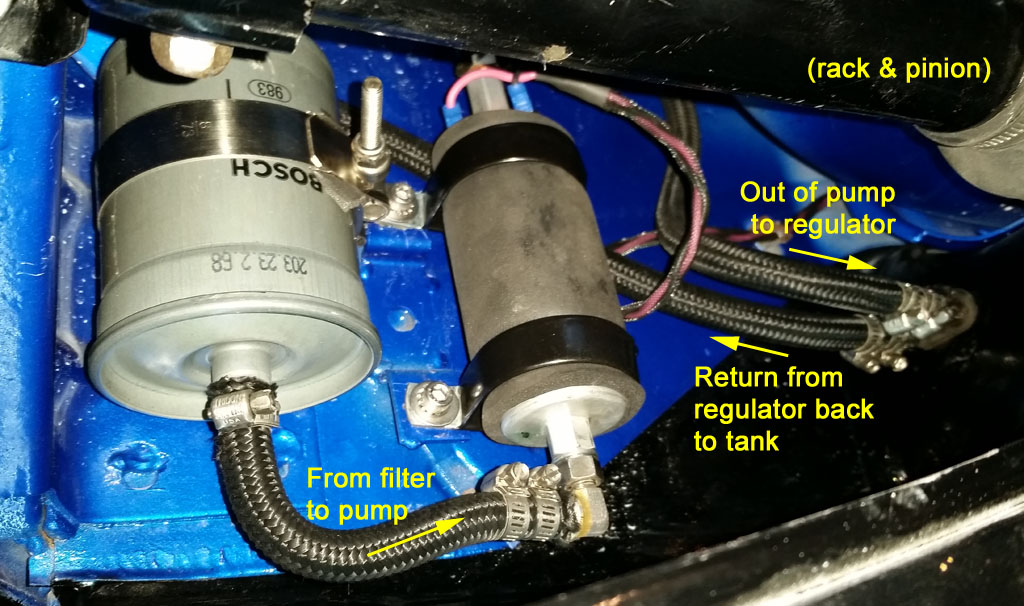
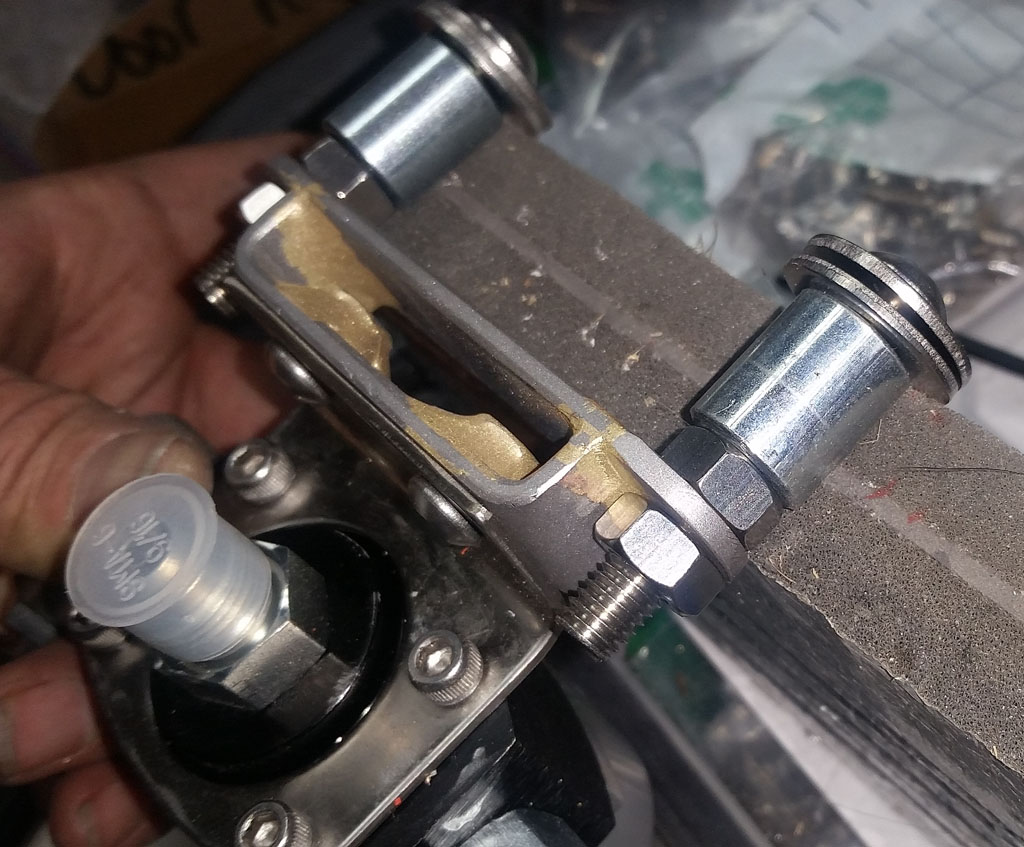
We fabbed up a bracket to mount the regulator to the firewall, standing off the insulation:
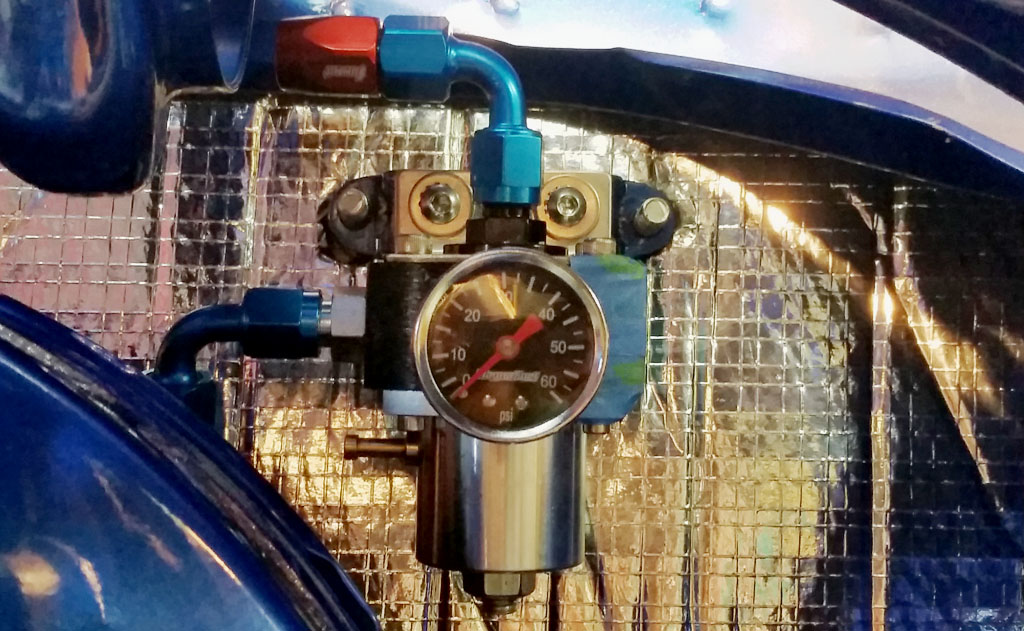
Here is a picture of the regulator mounted:
 |
|
| Back to top |
|
 |
Baxsie
Joined: 12 Apr 2012
Posts: 253
|
 Posted: Sat Jan 03, 2015 9:53 pm Post subject: Tail Lights: LEDs with Clear Lens Posted: Sat Jan 03, 2015 9:53 pm Post subject: Tail Lights: LEDs with Clear Lens |
 |
|
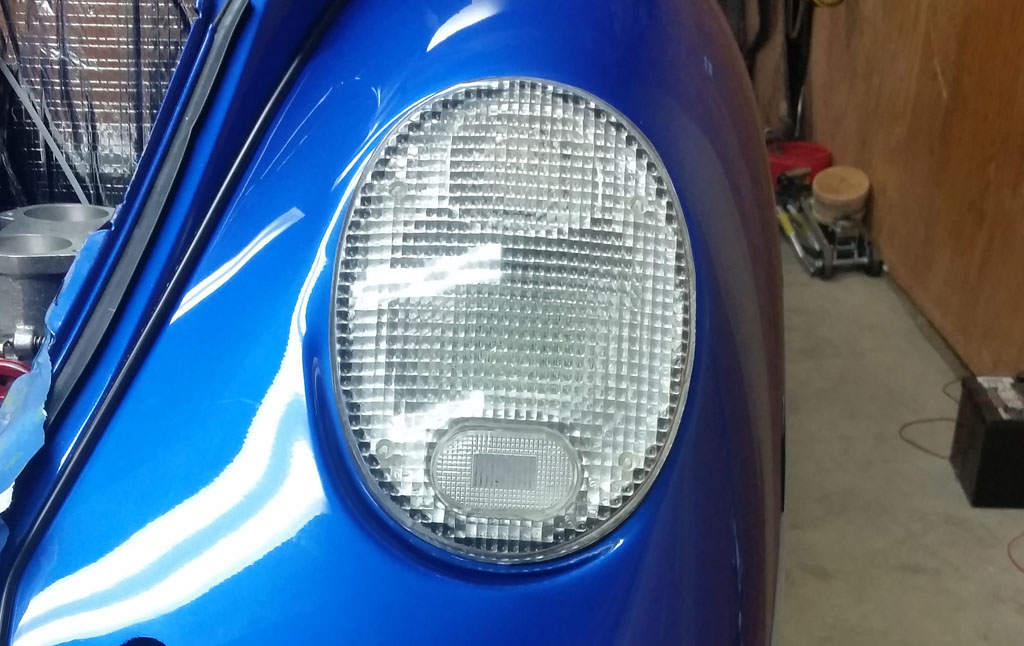
We liked the "monochrome" way the front blinkers turned out. So for the rear tail lights we started with some clear dome style aftermarket housings:
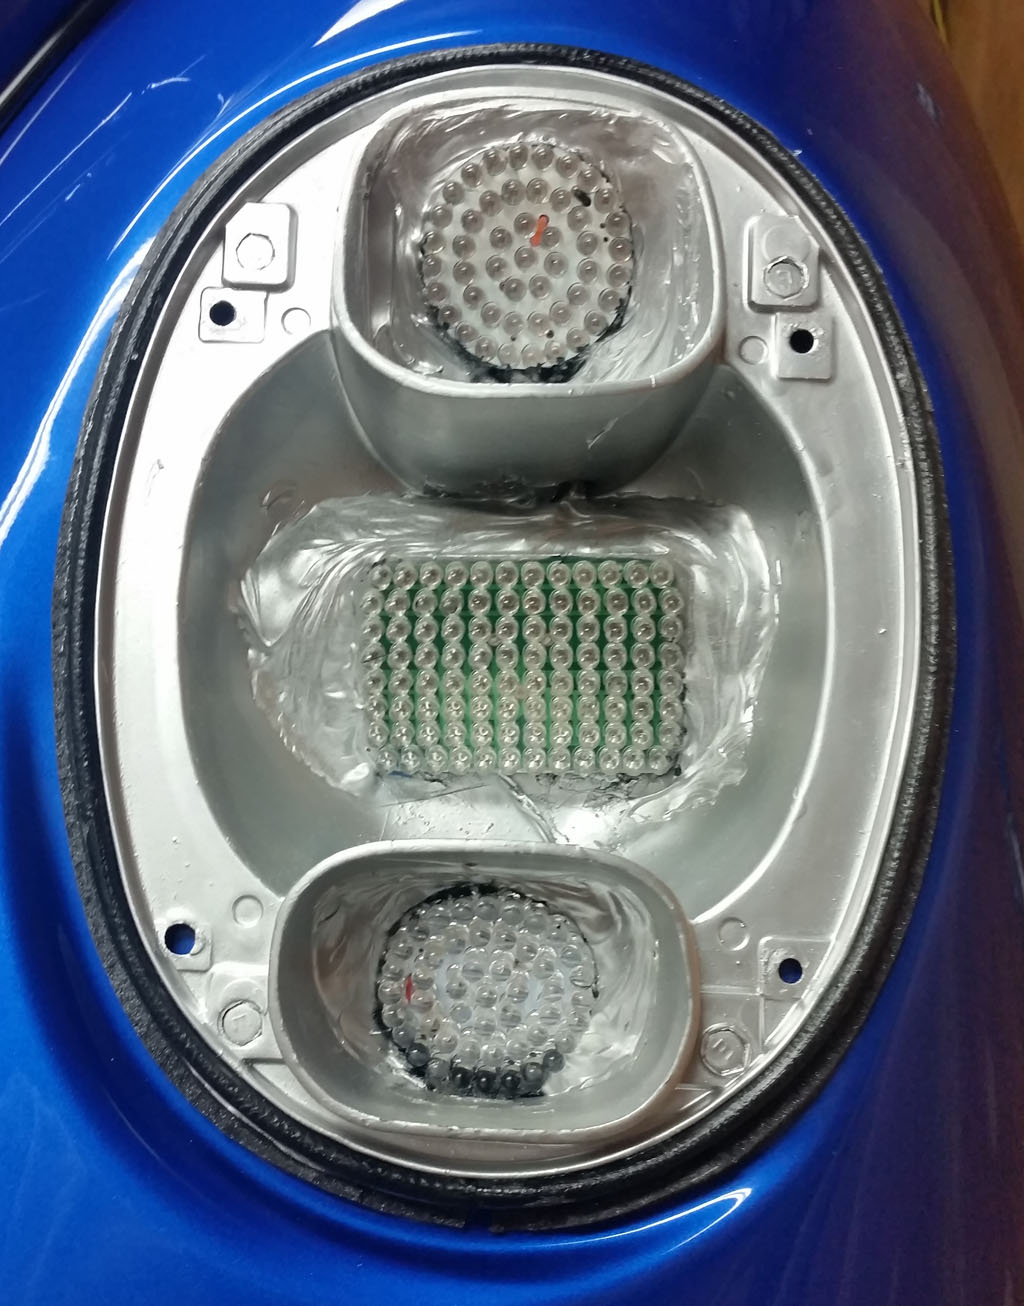
We then added the intensly bright LED pucks from Custom Dynamics:
It is pretty difficult to photograph the tail lights when on, here is a kind of collage of what they kinda look like:
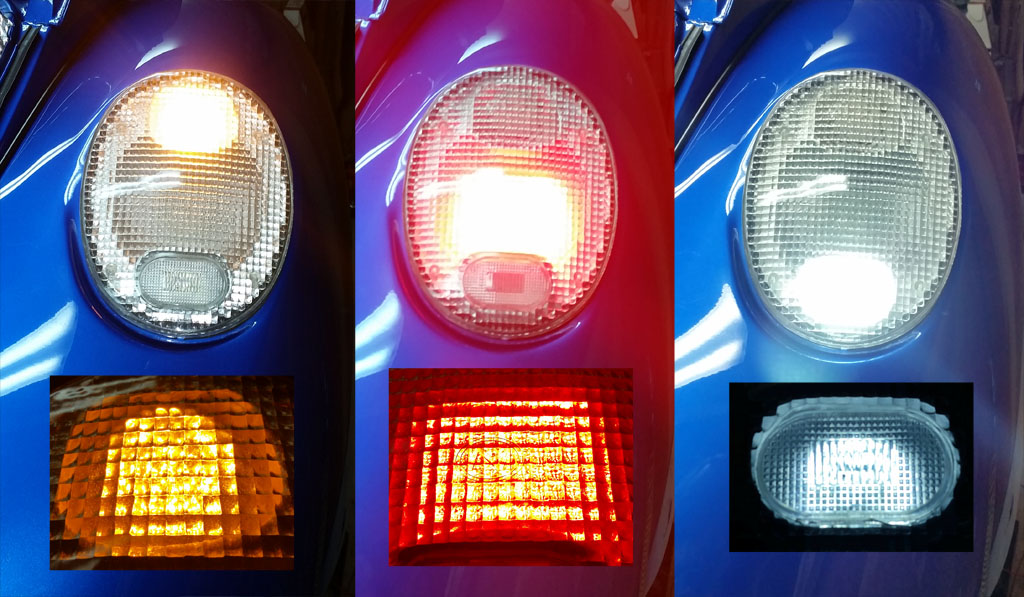
In real life, the colors are completely saturated since they are LEDs. |
|
| Back to top |
|
 |
Troy Hobbs

Joined: 05 Aug 2003
Posts: 766
|
 Posted: Fri Feb 13, 2015 4:56 pm Post subject: 1975 Super Beetle Project Posted: Fri Feb 13, 2015 4:56 pm Post subject: 1975 Super Beetle Project |
 |
|
Over a month, need more new pictures/updates!
_________________
TROY
current RCVW club Pres
ARR #3 |
|
| Back to top |
|
 |
Baxsie
Joined: 12 Apr 2012
Posts: 253
|
 Posted: Sun Feb 15, 2015 8:35 am Post subject: Throttle Splitter: Reinventing dual throttle body linkage Posted: Sun Feb 15, 2015 8:35 am Post subject: Throttle Splitter: Reinventing dual throttle body linkage |
 |
|
Because of where the compressor and generator are, we did not want to use the CB style / hex bar throttle linkage. Plus that stuff is ugly.
Because I always manage to make the most work of any given situation, I decided to make our own linkage. I'll give a nod to SlowTwitch's SyncLink, indeed the pulleys on the throttle body are from him. Pete is a super nice guy 
We made a little housing and a pulley to bring the cable from Pete's pulley around to heading to the front:
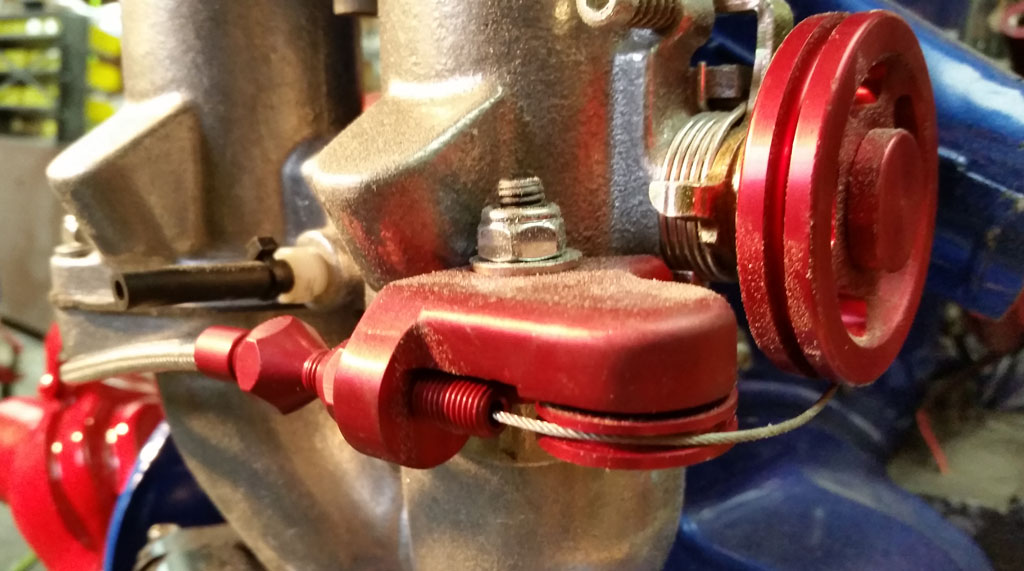
(ref: http://www.rcvwclub.org/phpBB2/viewtopic.php?p=9885⚝ )
Next time, I'll angle these down so they do not extend out so far, we had to nudge the tin out a bit to make clearance for them.
We want cruise control, so I imagined a splitter somewhat like would be used on a motorcycle or ultralight airplane:
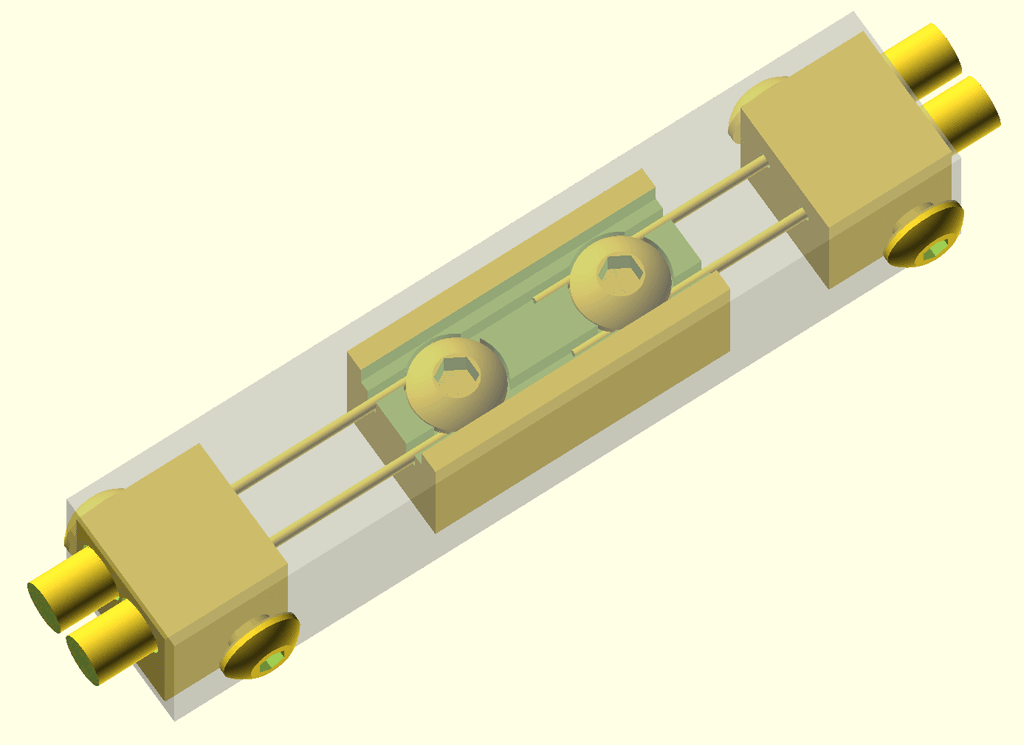
(ref: http://www.rcvwclub.org/phpBB2/viewtopic.php?p=9785☹ )
Simple in concept: gas pedal and cruise pull from one end of the splitter, the throttle body butterflys pull from the other side. Since it is basically inline, we could run flex from the TB, around the fan shroud, through the tin and this splitter could hang in space above the transmission somewhere.
In real life, the fairly sharp bend from behind the fan shroud through the tin ended up with too much friction  so we came up with a version that uses pulleys: so we came up with a version that uses pulleys:
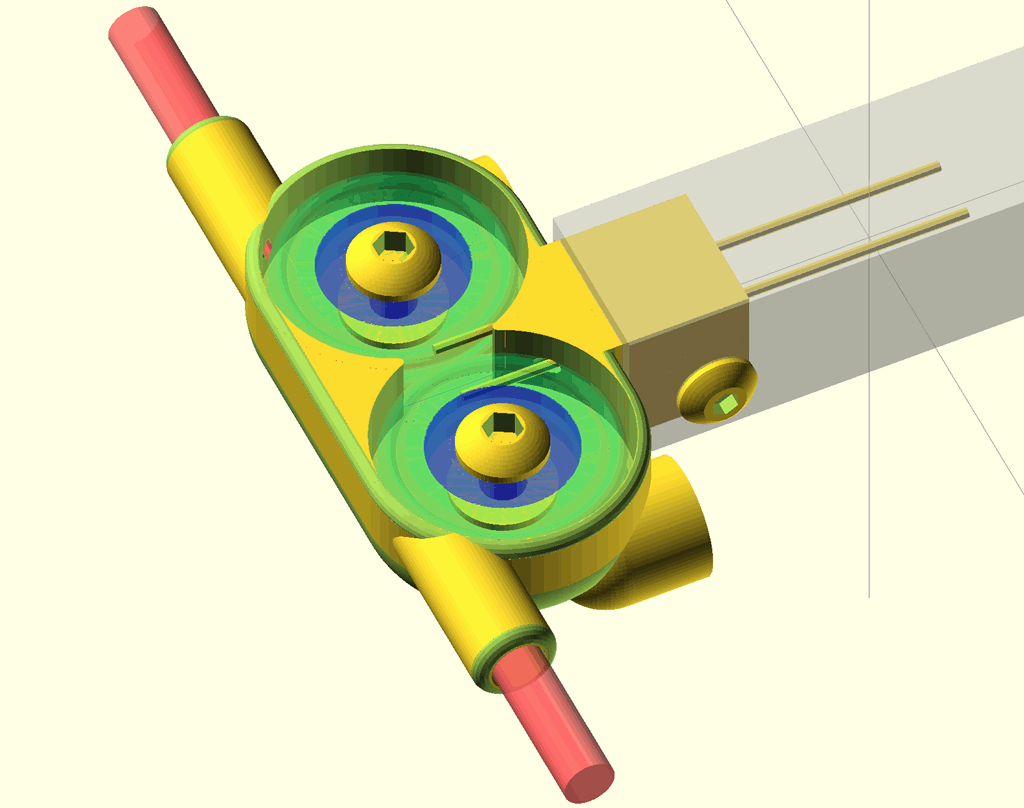
We had it made by Shapeways in their brass infused stainless process:
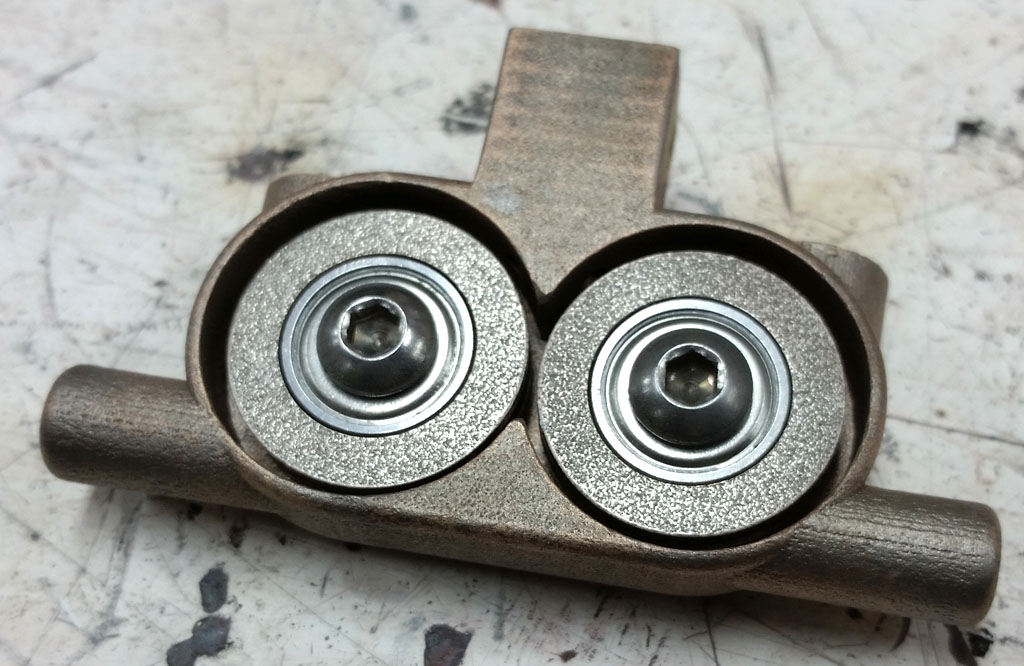
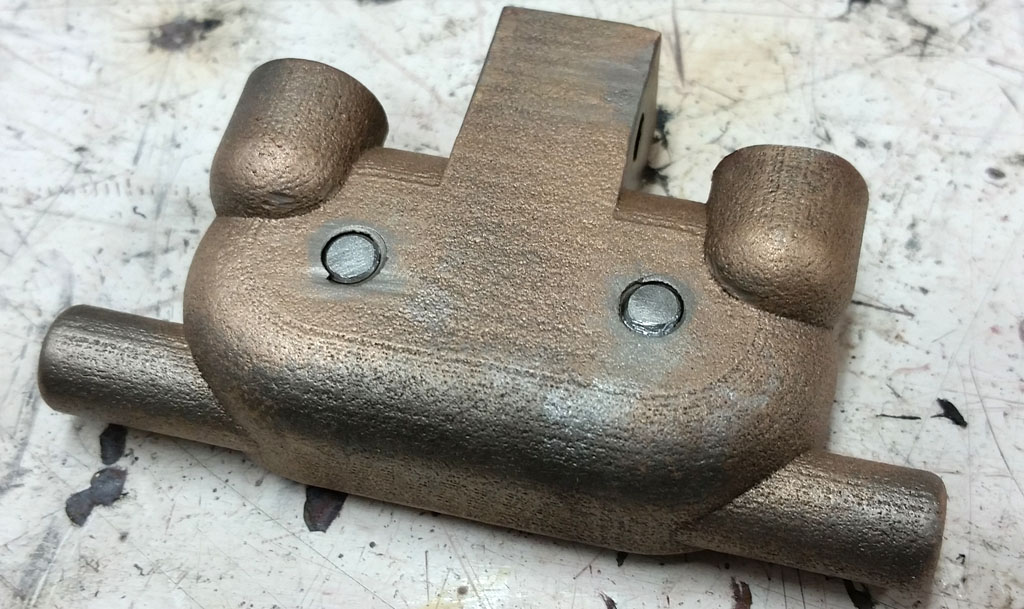
The Shapeways metal is pretty cool in a lot of ways. I will warn that it is a complete bitch to tap. It will dull even a good tap in just a couple of turns. Suposedly you can get a carbide tap that will work. Next time I'll just design the 3d printerd part with little hex recesses to hold standard nuts:
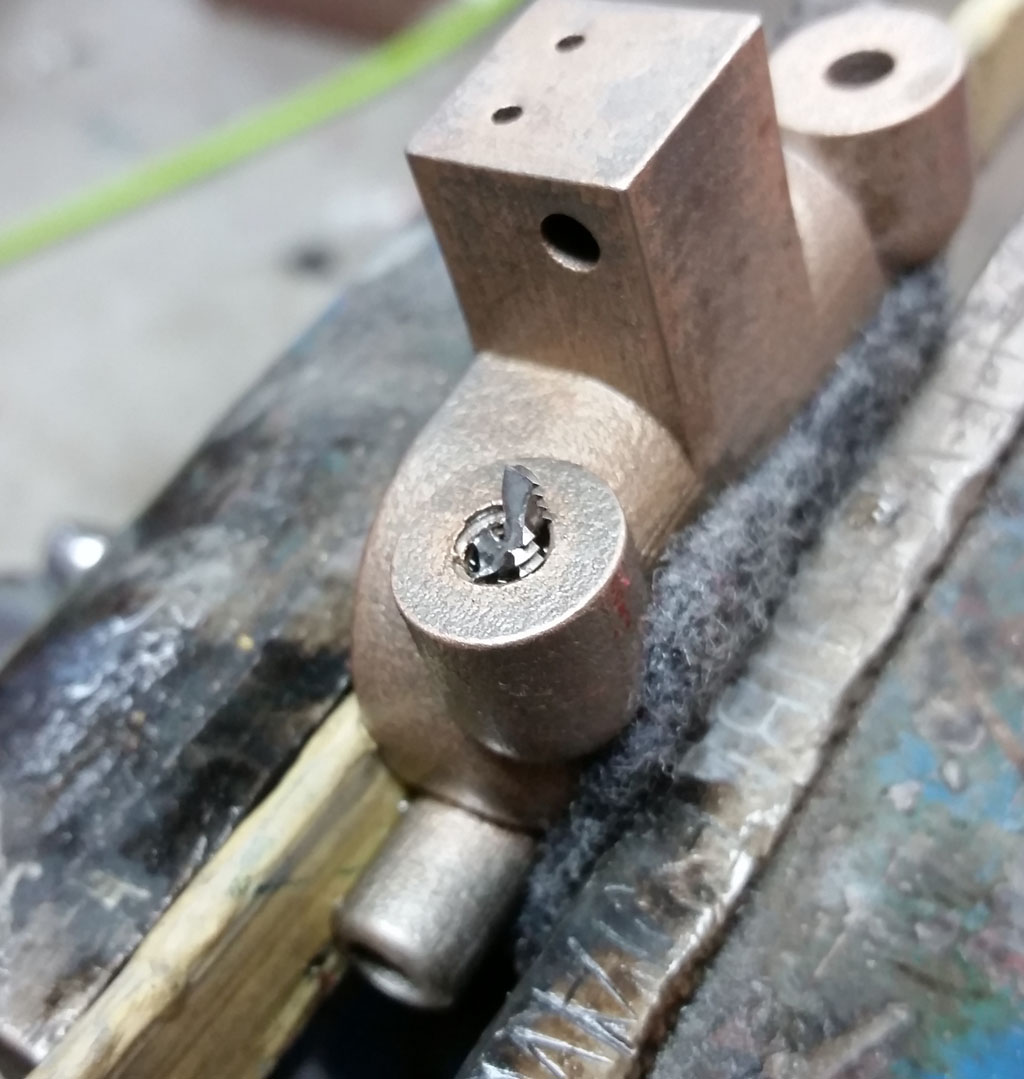
Tried to chase the broken tap out with a carbide bit, only to friction weld then break the carbide tip in the same hole. Plan B called for brazing ears on:
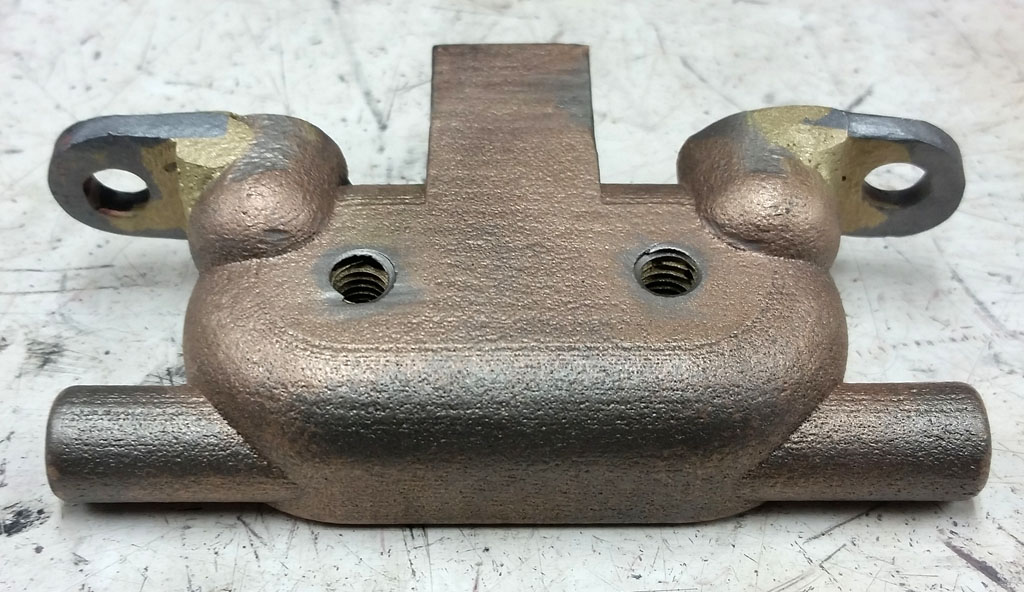
Here is a flipped over view of about where it will end up:
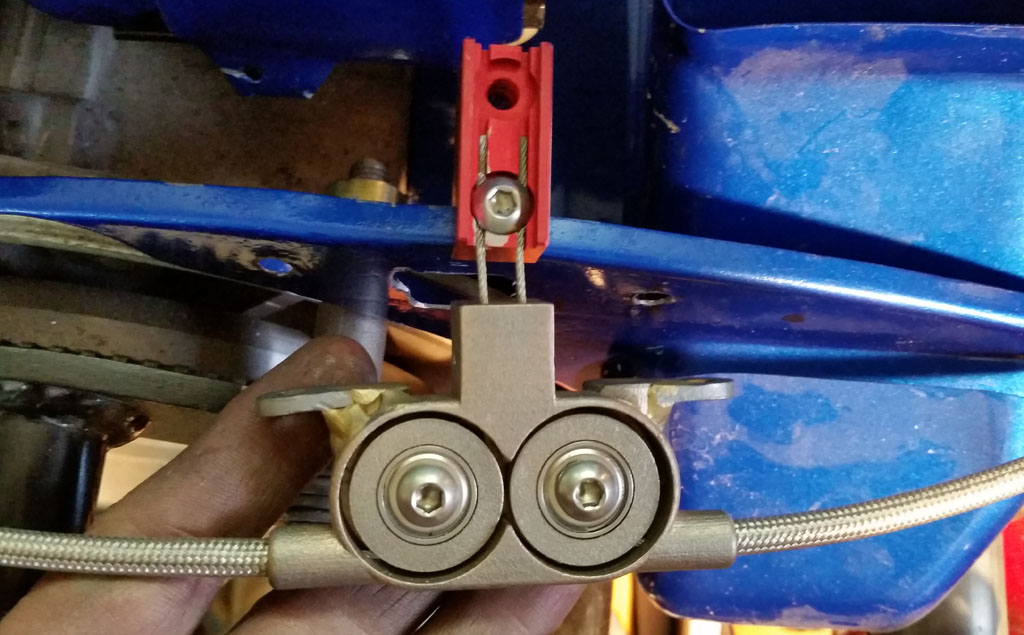
Then flipped over to the final orientation and screwed to the tin:
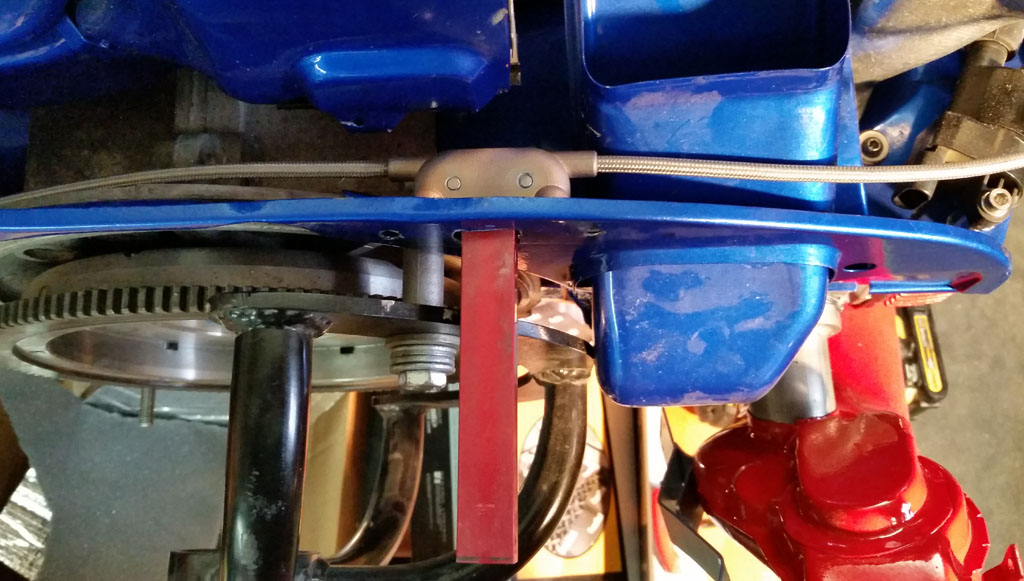
This placement was not to well thought out. It makes it problematic to put the engine in . . . ended up having to remove the passenger-side heat exchanger to wiggle it all into place 
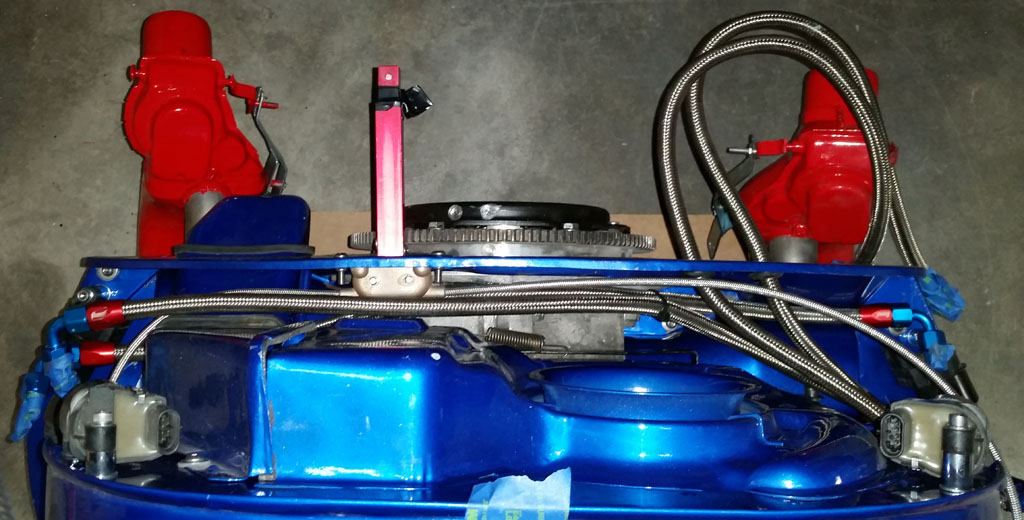
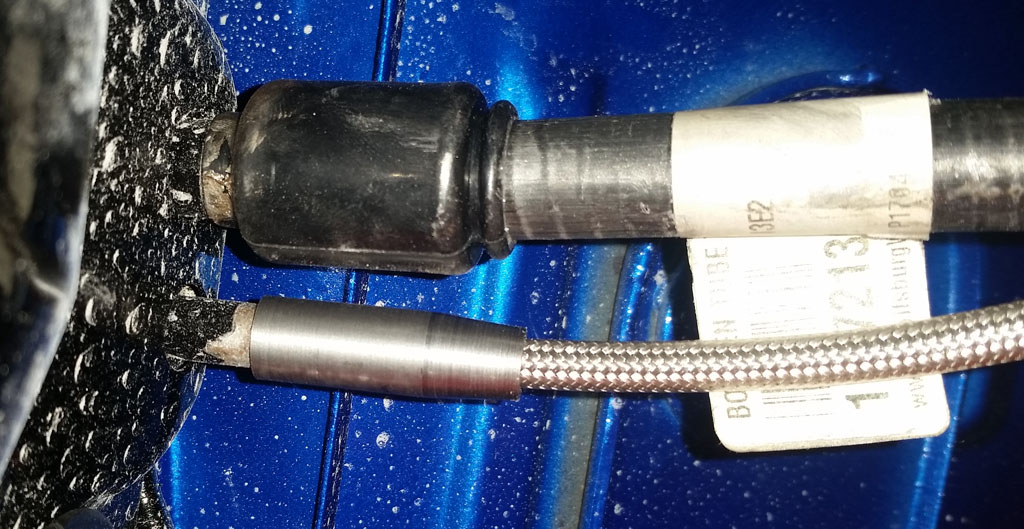
There is flex cable from the back of the splitter up to the tube in the chassis where the factory throttle cable exits. We made a little adapter to couple these:
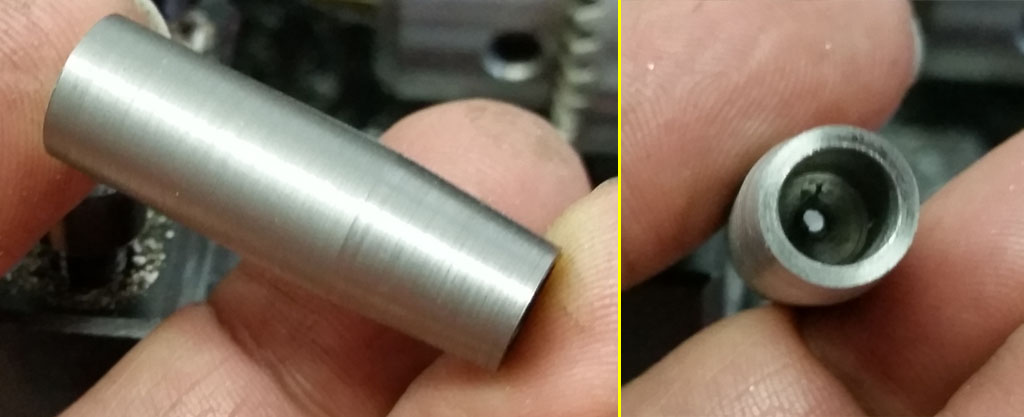
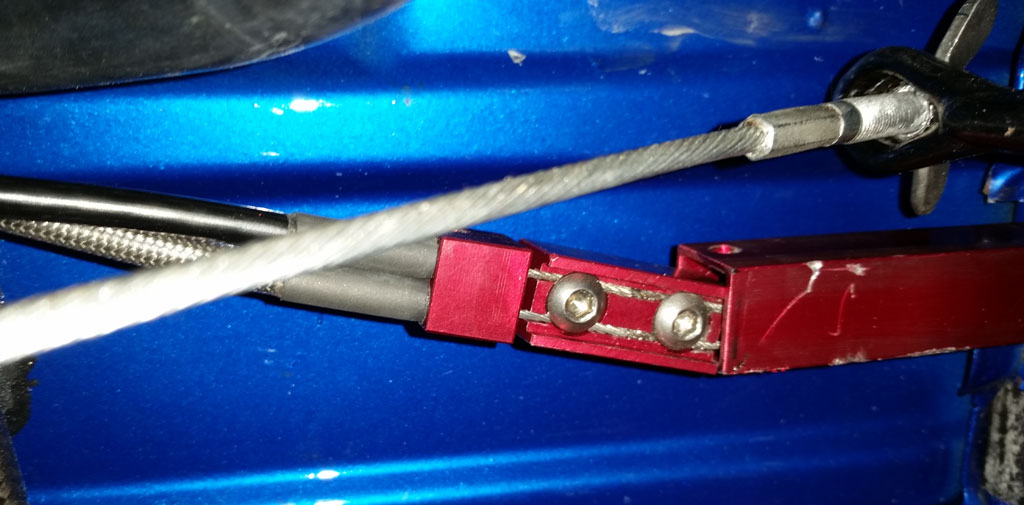
Then trim all the cables and anchor them to the shuttle inside the splitter:
Once it was all installed, it seems to work great. We have not done the tuning, so maybe we will find some trouble then, but visually and as far as feeling it seems to work great. |
|
| Back to top |
|
 |
Baxsie
Joined: 12 Apr 2012
Posts: 253
|
 Posted: Sun Feb 15, 2015 9:52 am Post subject: Rear Speakers & Subwoofer, mounting the amps, tweeters Posted: Sun Feb 15, 2015 9:52 am Post subject: Rear Speakers & Subwoofer, mounting the amps, tweeters |
 |
|
For amps, we used a Kenwood X450-4 eXcelon Asymmetrical 4 Channel Power Amplifier for the main speakers, and Kenwood X500-1 eXcelon Mono Digital Power Amplifier for the sub.
First off, we needed some brackets:
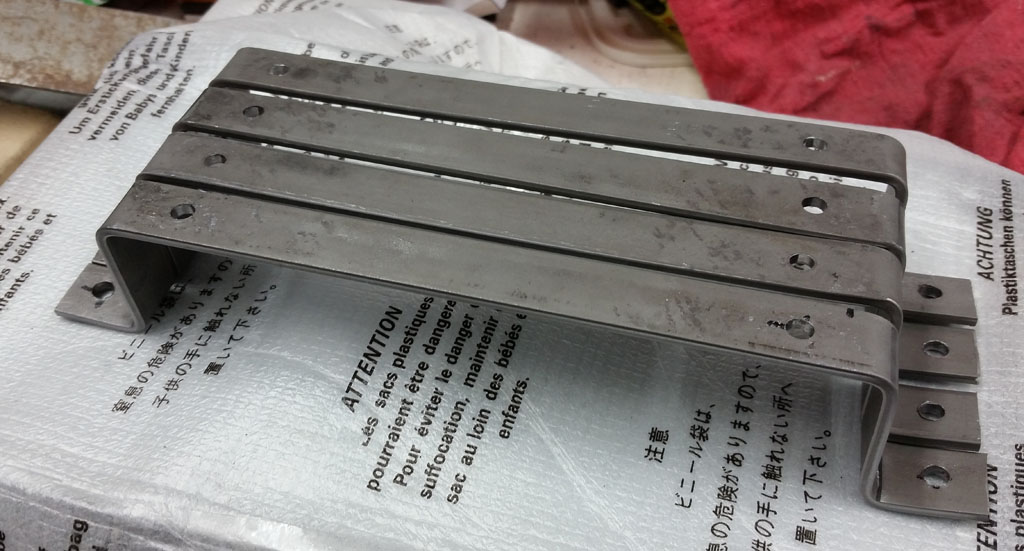
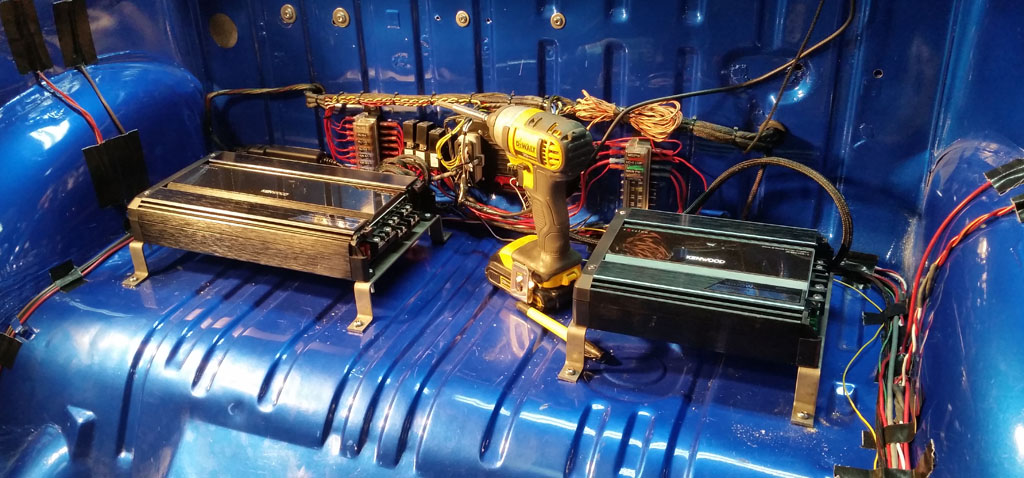
Then mounted the amps, you can see the Megasquirt EFI behind it. We plan to install DynaPad on the shelf under the amps:
For the sub, we used a Polk Audio DXi1240DVC 12" subwoofer. We went with the 12" because it looked like it would be pure horror to make it fit:
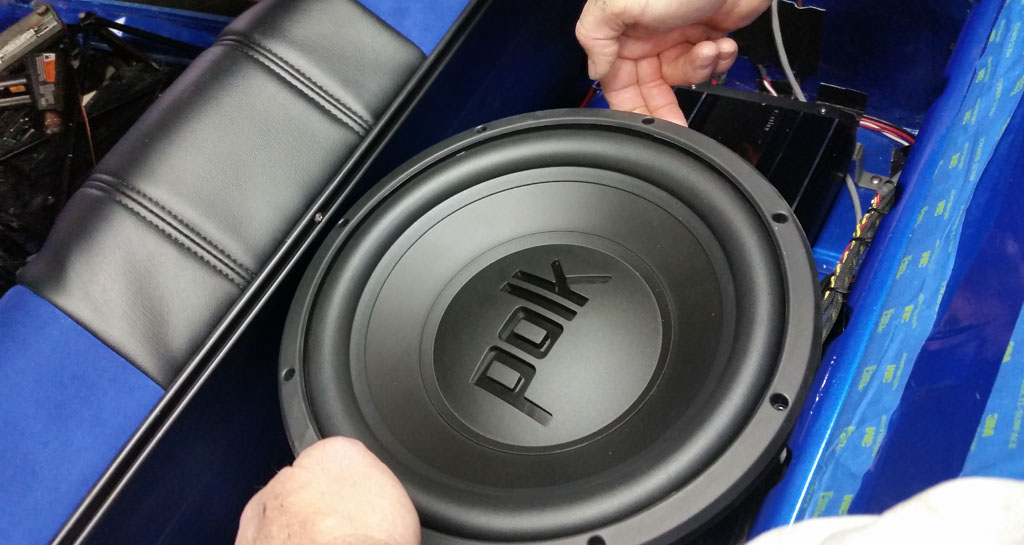
For the rest of the rear sound, we went with two Polk DXi691 6x9 three way speakers.
We made a cardboard template:
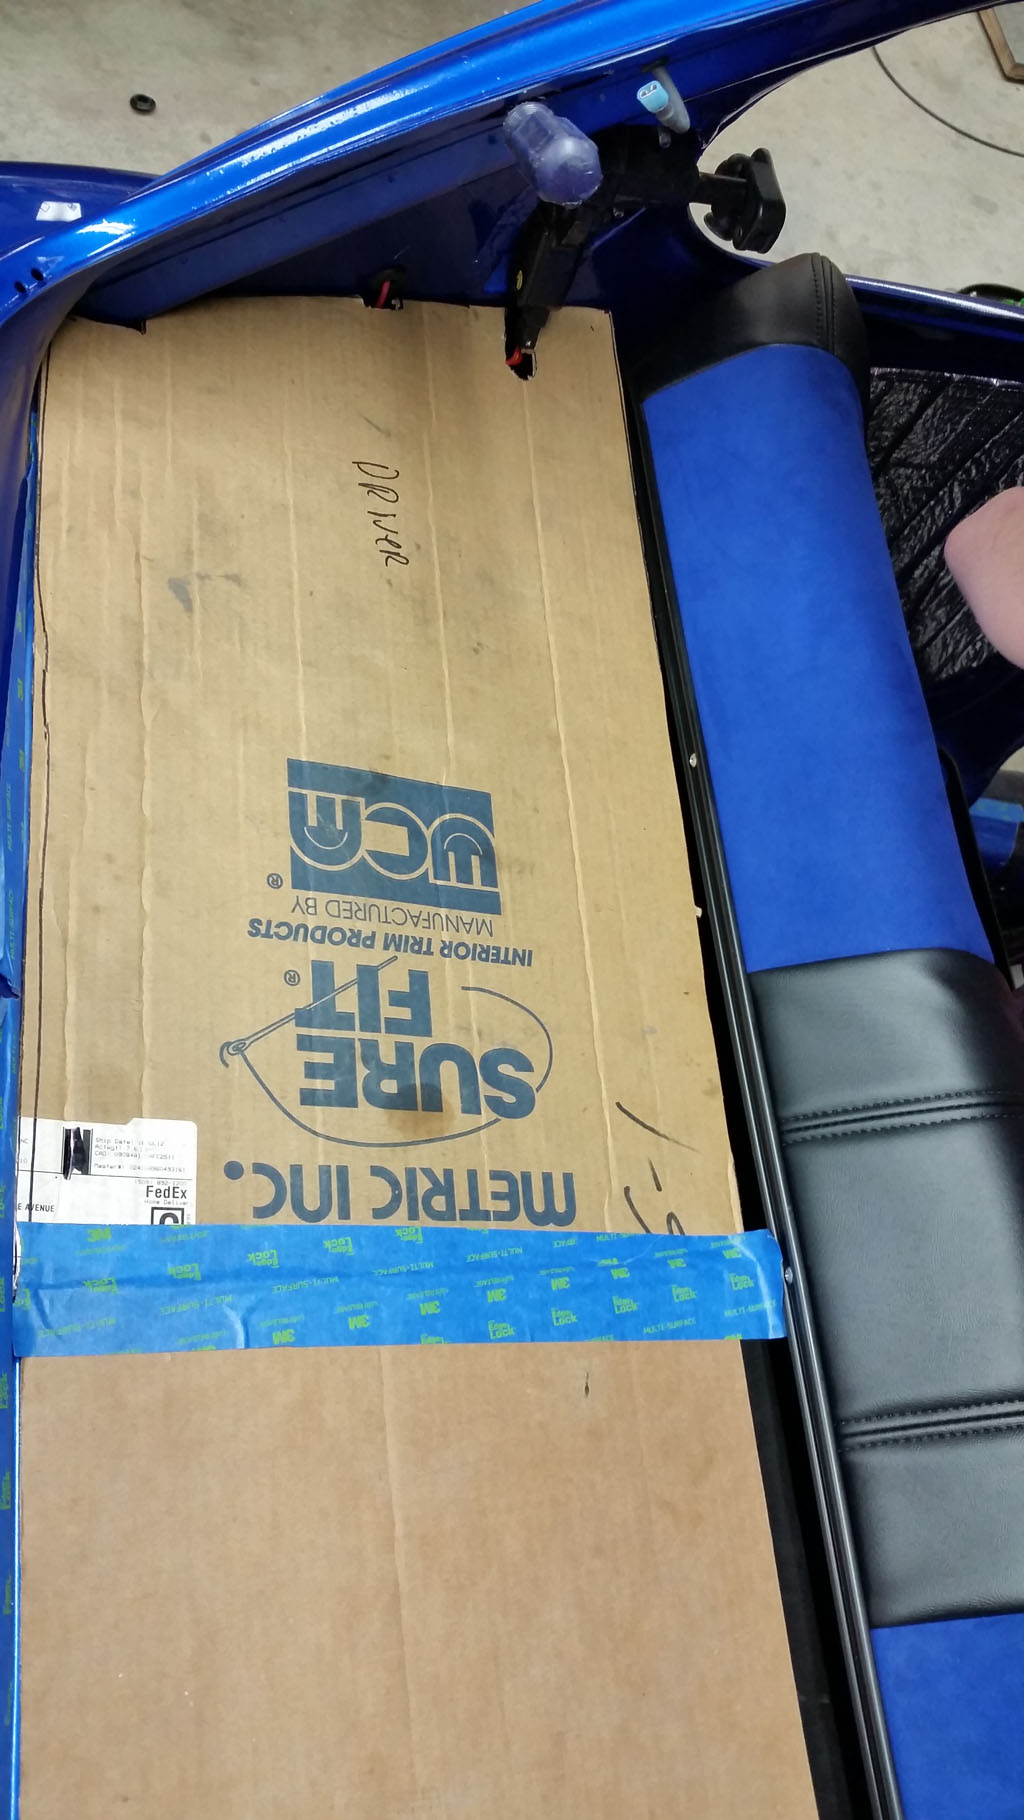
Transferred it to 3/4" MDF and did a test fit with the speaker grilles:
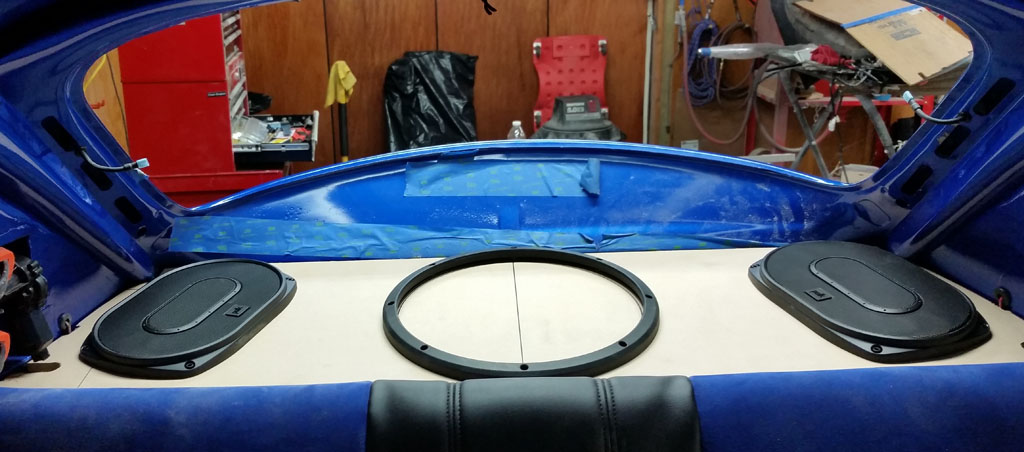
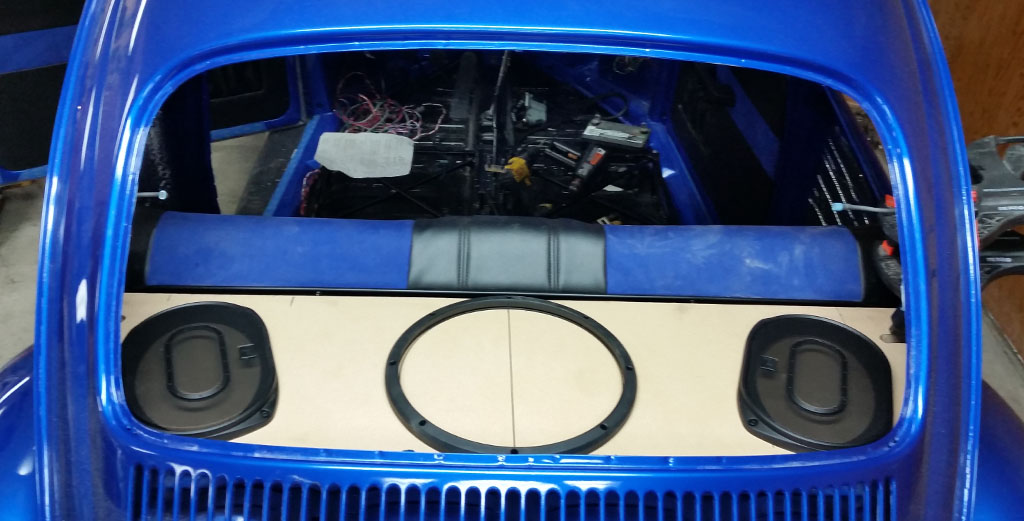
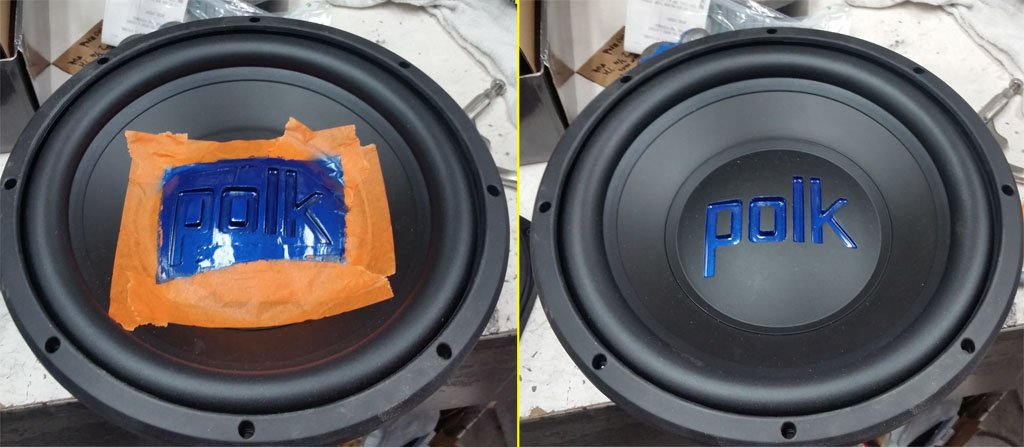
For a little bit of fun, we painted the nearly invisible "POLK" log on the sub to body color:
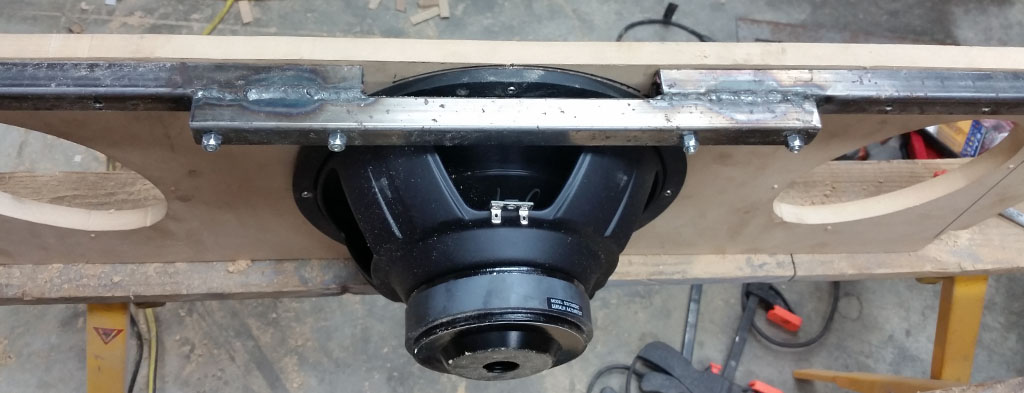
The MDF is very thin at the sub, so we fashioned a brace to strenghten the front of the shelf. The brace comes up and around the sub, because frankly the 12" is just too damn big for this applicaition:
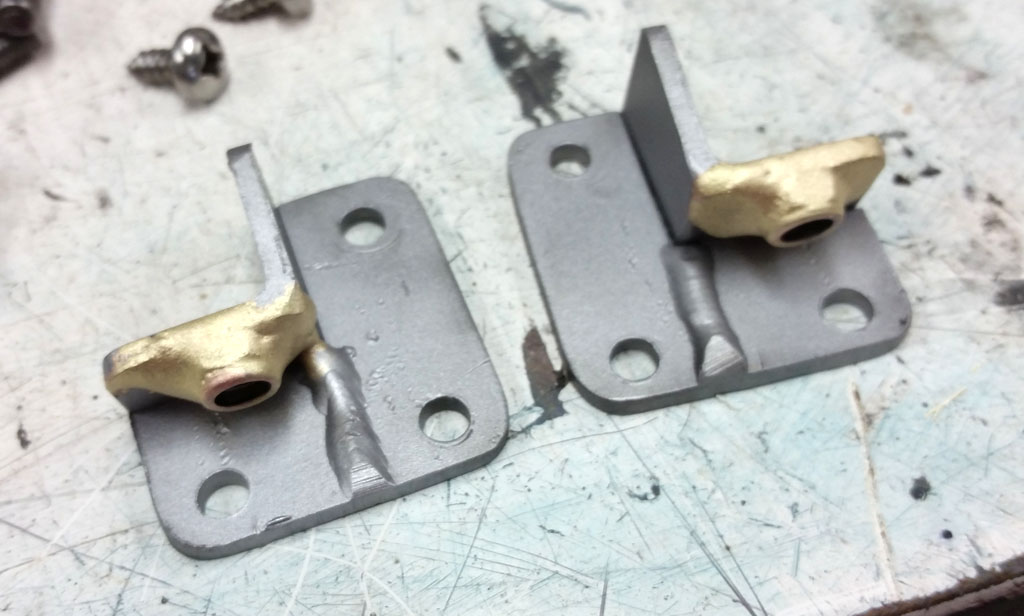
This brace will also anchor the shelf in, through these brackets:
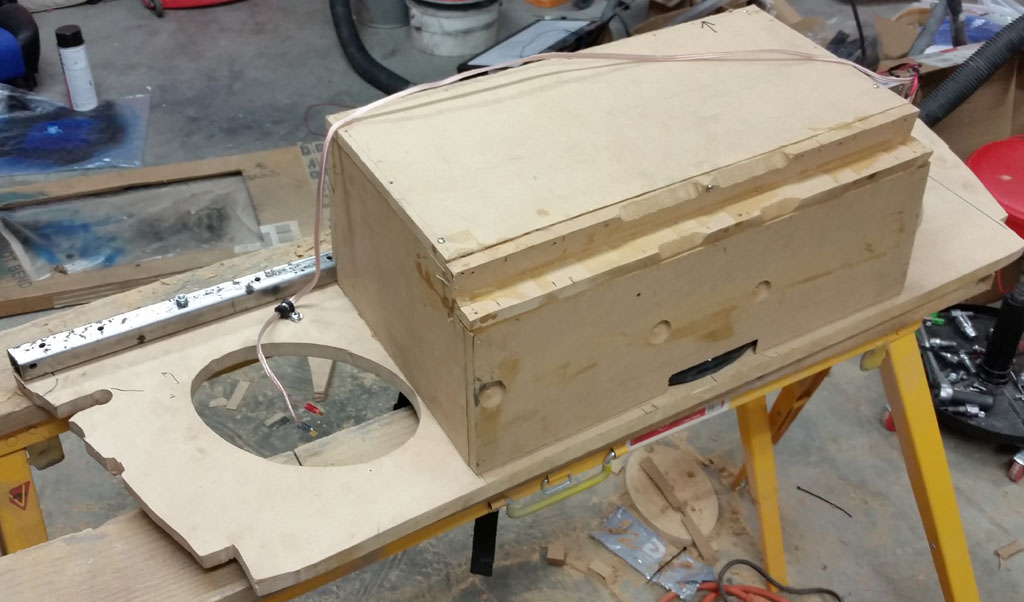
The Polk / Crutchfield install calls for a 0.88 cubic foot enclosure. We made one from 1/2" MDF, everything glued and stapled or screwed:
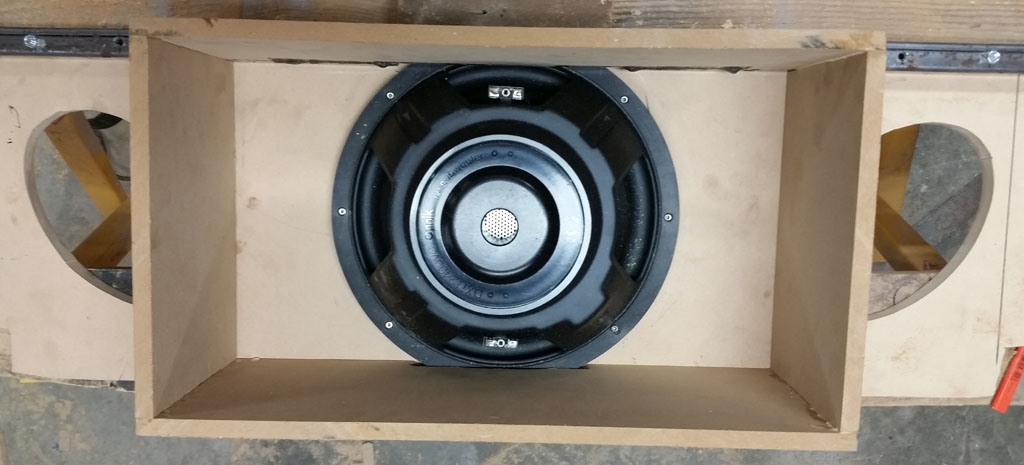
Overall shot of shelf, box and brace. After upholstery, we will seal the gaps with some closed cell weatherstrip:

Checking the clearance over the amps and in front of the Megasquirt:
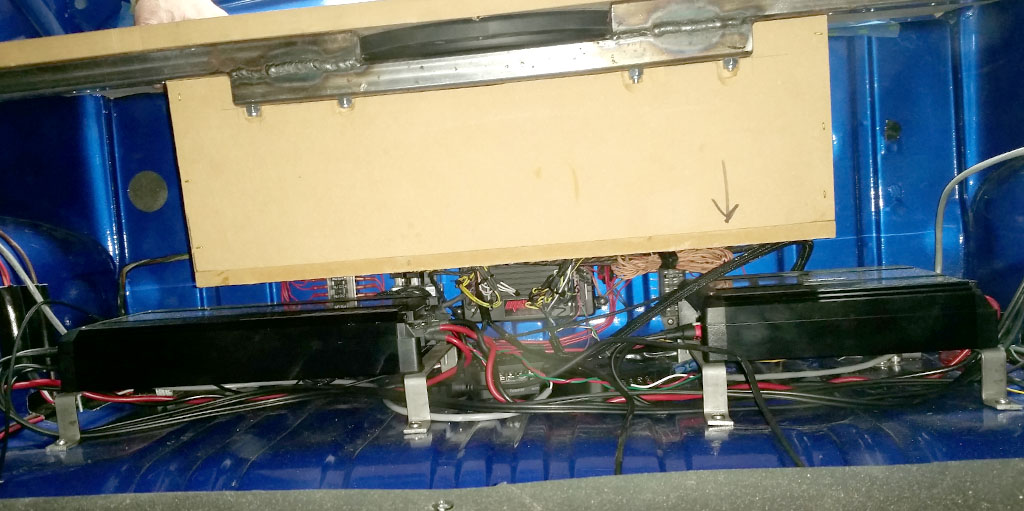
We chamfered some of the corners just to give a little extra room, and made up the wiring harness. The wires all come to one plug, so by removing that plug and the two screws of the brace, the shelf can be removed to service the EFI or amps:
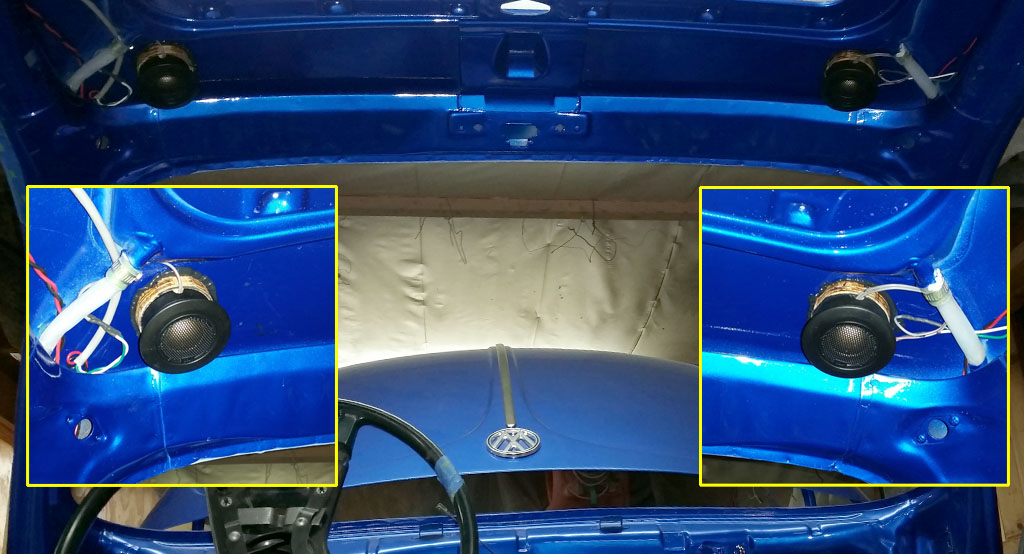
For the front, we used Polk Audio 6 1/2-inch component mobile loudspeaker. These have a separate tweeter and include a separate crossover. We mounted the tweeters high and separated in the front. It is a bit cheesy to use automotive grade seam sealer and plywood, but it seems to be very secure and I think it will work and look awesome once the headliner is installed:
 |
|
| Back to top |
|
 |
Baxsie
Joined: 12 Apr 2012
Posts: 253
|
 Posted: Wed Mar 04, 2015 7:49 pm Post subject: Clutch Disengaged Neutral Switch for Cruise Control Posted: Wed Mar 04, 2015 7:49 pm Post subject: Clutch Disengaged Neutral Switch for Cruise Control |
 |
|
NOTE: WE HAVE NOT TESTED THIS CRUISE STUFF !
We are getting to the Cruise Control install. We are using a "Universal Cruise Control System by Rostra":
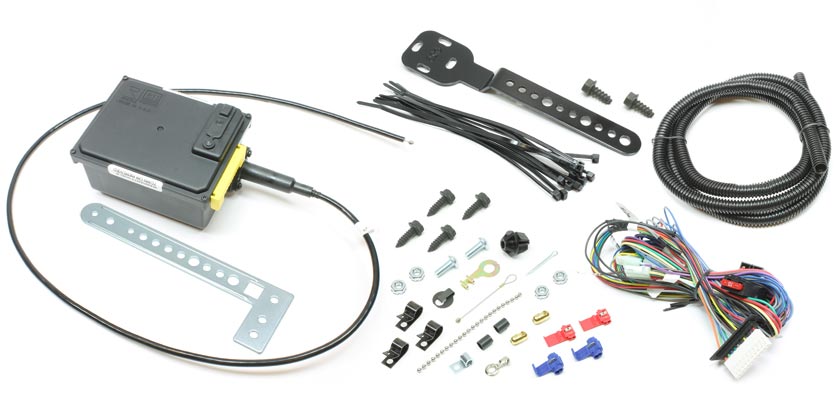
Manufacturer Page: http://www.rostra.com/universal-aftermarket-cruise-control-by-rostra.php
Amazon: http://www.amazon.com/Rostra-Universal-Electronic-Control-250-1223/dp/B007ZCQD9S
For the Cruise Control, there is an input that will disengage it if the clutch is depressed. This keeps the engine from over-reving if the clutch is pressed in. A light tap on the clutch will also kick the cruise out -- like the brake but without flashing the brake lights.
We used a momentary SPDT pushbutton switch, covered in the sealed, hot-glue heatshrink, attached to a bracket clamped under the engine mounting bolt:
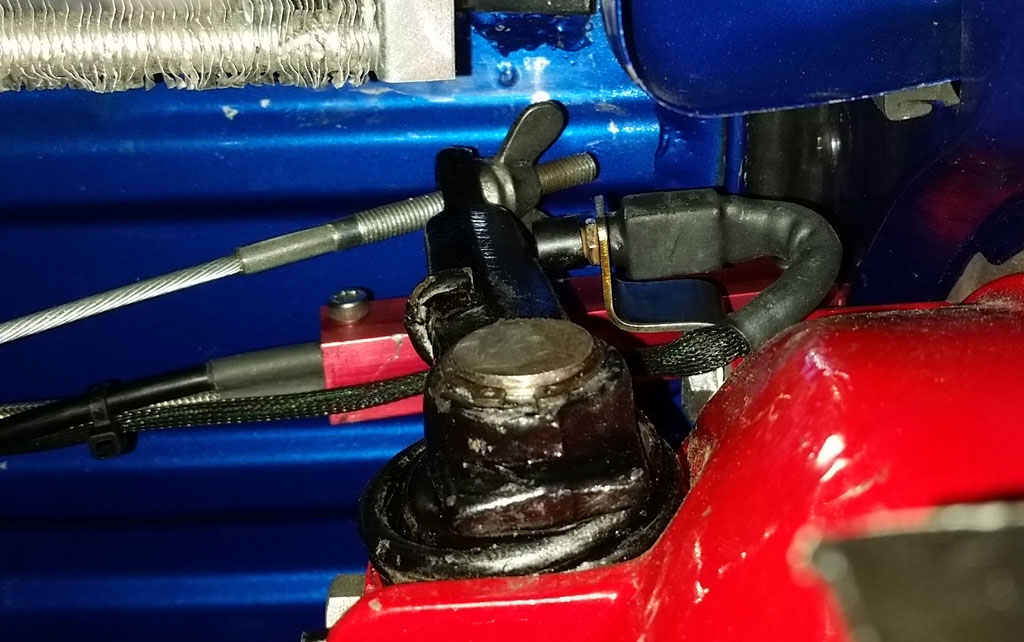
It would have been much easier if I'd have thought about it before the engine and transmission were in!
Last edited by Baxsie on Wed Mar 04, 2015 8:26 pm; edited 3 times in total |
|
| Back to top |
|
 |
Baxsie
Joined: 12 Apr 2012
Posts: 253
|
 Posted: Wed Mar 04, 2015 8:09 pm Post subject: Axle Speed Sensor Cruise Control Aircooled VW Posted: Wed Mar 04, 2015 8:09 pm Post subject: Axle Speed Sensor Cruise Control Aircooled VW |
 |
|
The Cruise Control needs to get the vehicle speed. We decided to use the Rostra 250-4165 Speed Signal Generator:
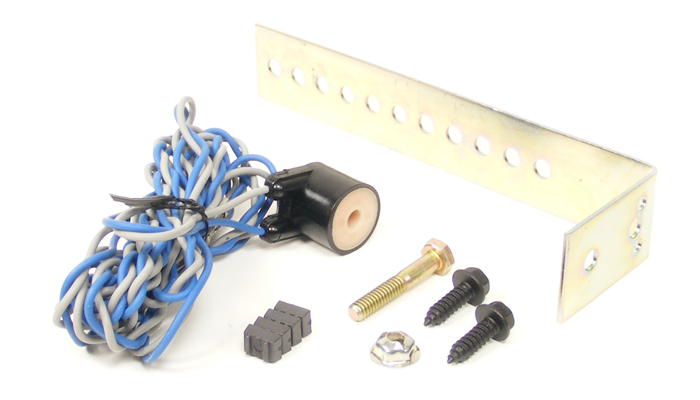
Amazon: http://www.amazon.com/250-4165-Magnetic-Generator-Rostra-Audiovox/dp/B0009GVUG8/
The kit comes with a pickup coil, magnets and a "special" zip tie.
We built a bracket to hold the sensor coil:
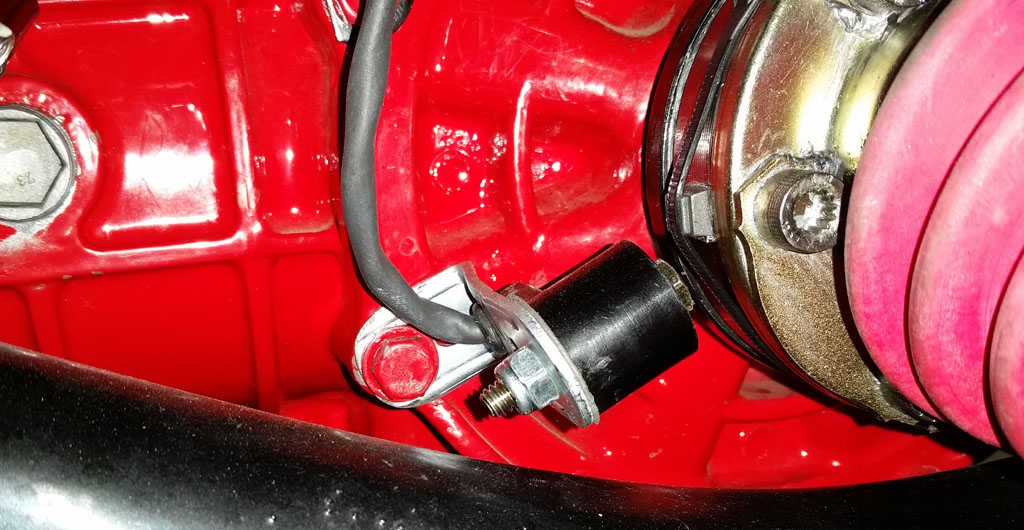
I am not at all happy with the magnets. Supposedly you just stick them to the CV joint and wrap a "special" zip tie around them. What is special about the zip tie? It breaks before it feels tight! So we put the magnets on with a little square of VHB under each one and used a regular, high-quality name brand zip tie.
Later I may switch to some other magnets and just glue them on with seam sealer -- but I guess we will see how long these last first. |
|
| Back to top |
|
 |
Baxsie
Joined: 12 Apr 2012
Posts: 253
|
 Posted: Wed Mar 04, 2015 9:01 pm Post subject: Steering Mounted Cruise Control Switch Aircooled VW Posted: Wed Mar 04, 2015 9:01 pm Post subject: Steering Mounted Cruise Control Switch Aircooled VW |
 |
|
We wanted to use a Rostra 250-3743 Universal Right-Hand Mount Open Circuit Cruise Control Switch:
Manufacturer Site: http://www.rostra.com/aftermarket-cruise-control-switches-by-rostra.php
Amazon: http://www.amazon.com/Rostra-Universal-Column-Control-250-3743/dp/B007ZDDXUY
Since it was the closest thing to a "modern" crusie swich we could find.
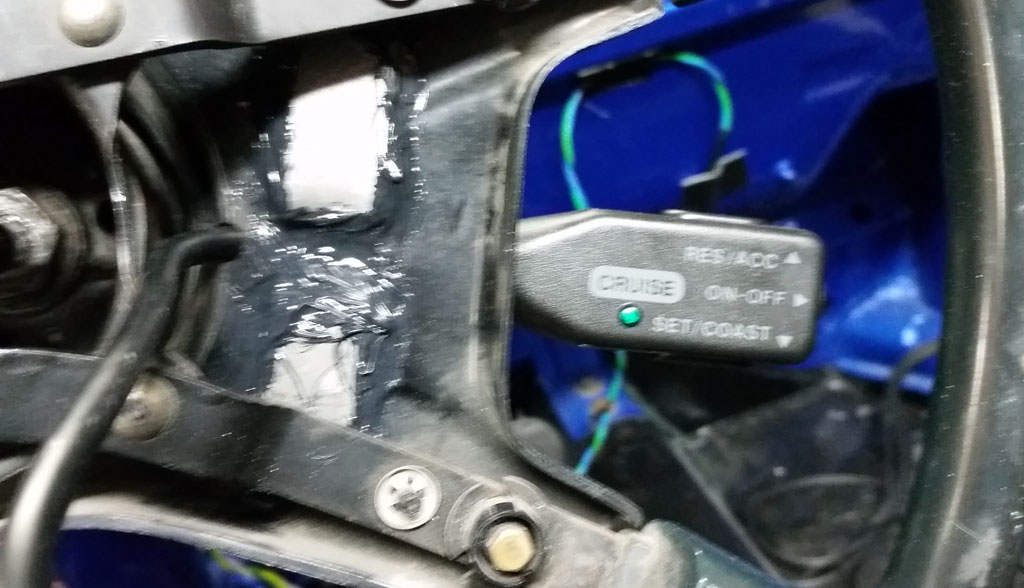
First off was making a bracket to mount it to the steering wheel. I'll let the pictures tell the story:
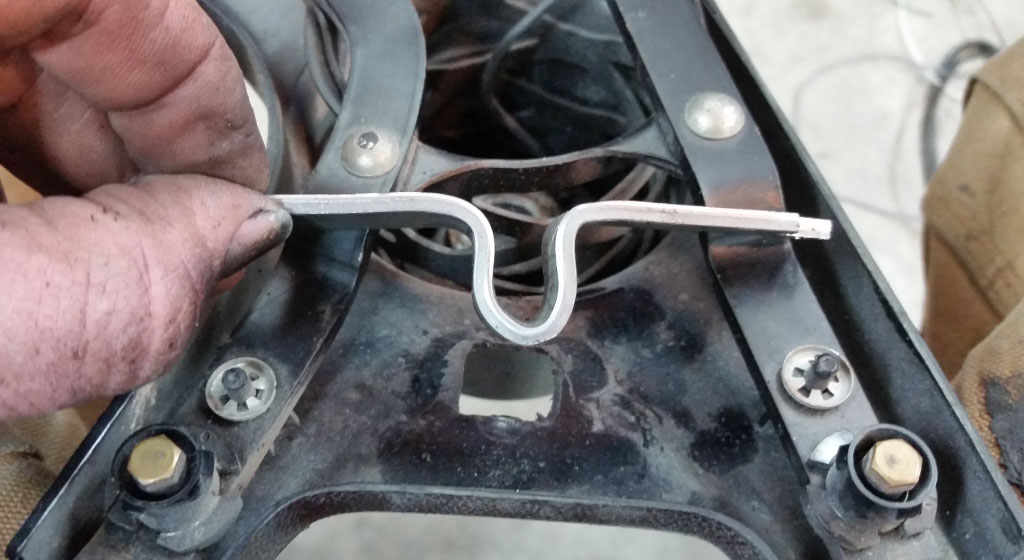
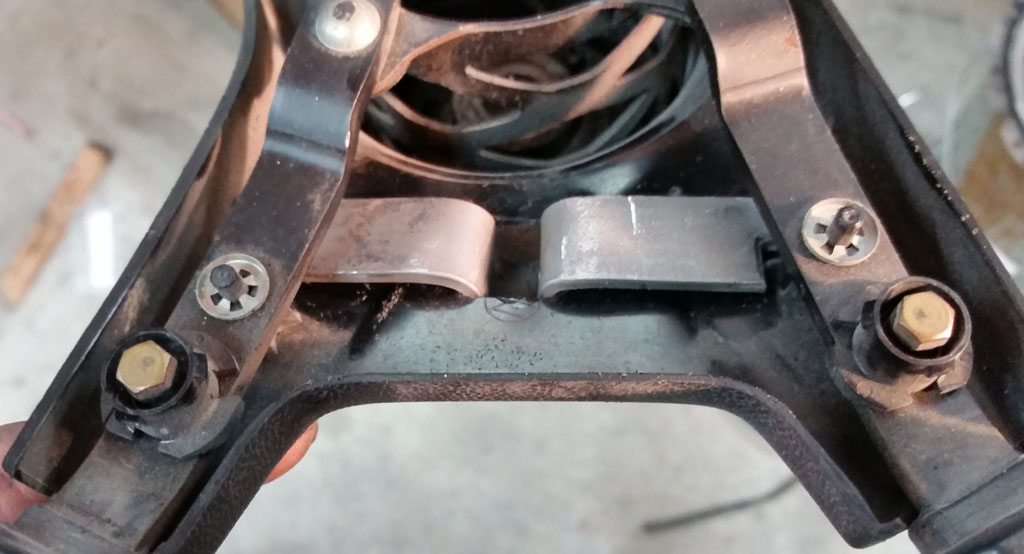
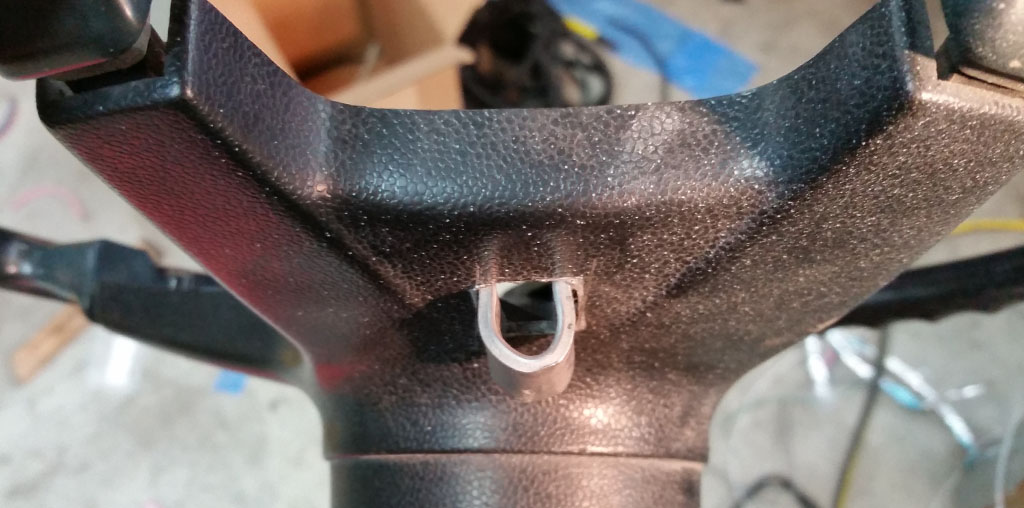
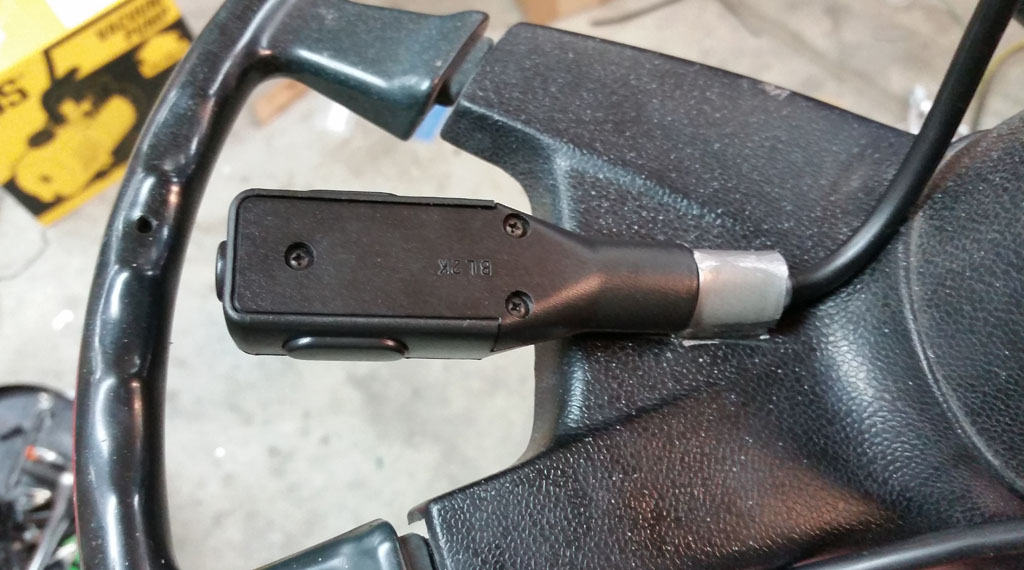
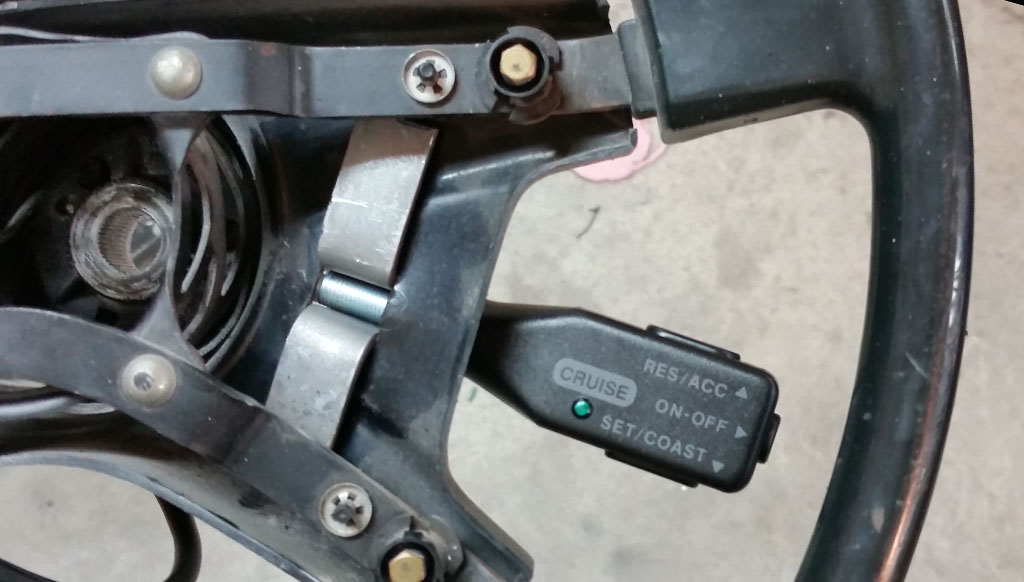
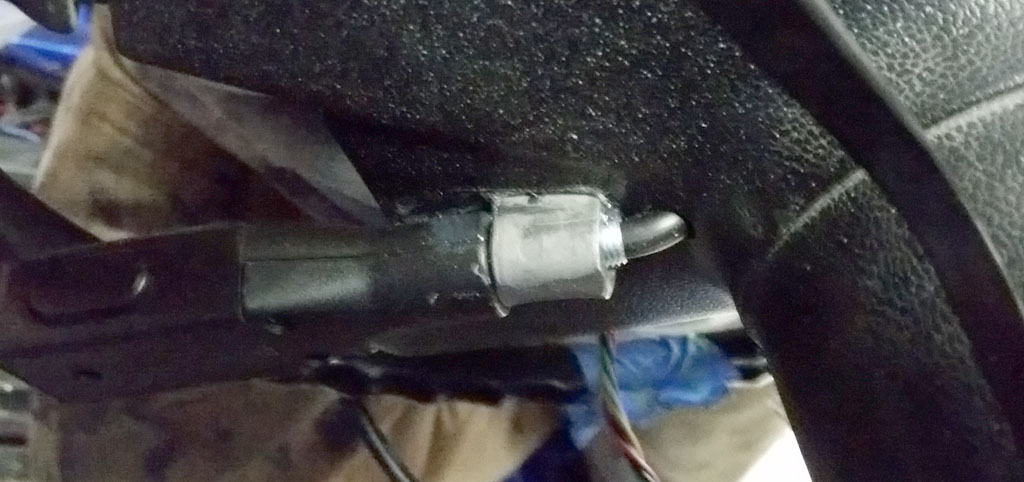
I used my favorite 1K Seam Sealer as the glue. That stuff is great!
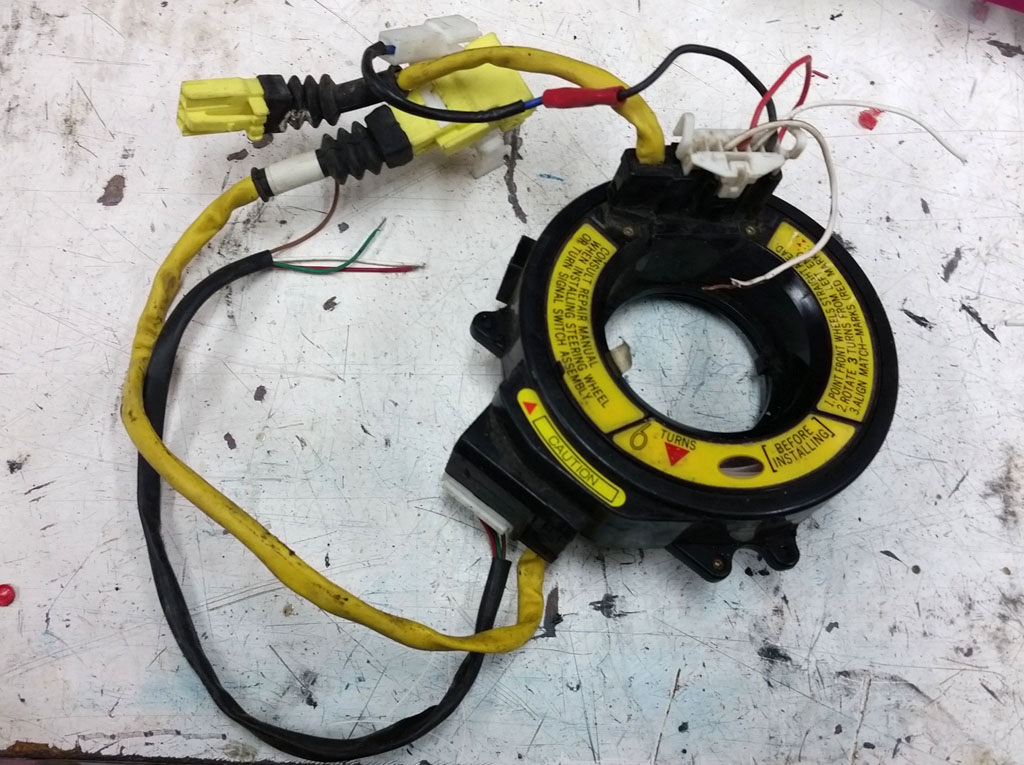
Now the trick. How do you get 6 conductors needed by the switch from the rotating steering wheel to the hopefully not rotating car? Modern cars, especially if thaey have air bags use one of these "slip ring" things:
They are not really a slip ring, they are more than 15 feet of 8-conductor flat flexible cable:
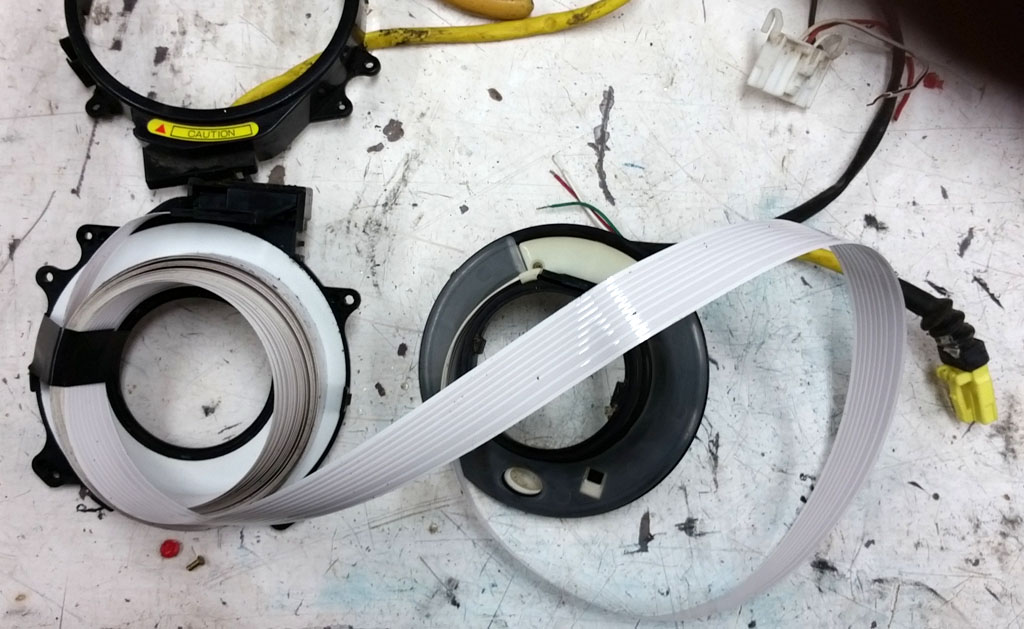
Basically the cable is expanded to the outside of the case, as the wheel turns, it wraps down to the inside of the case. Neat.
We only need 6 conductors, so we trimmed 2 off. OK, let's make our own "connectors":
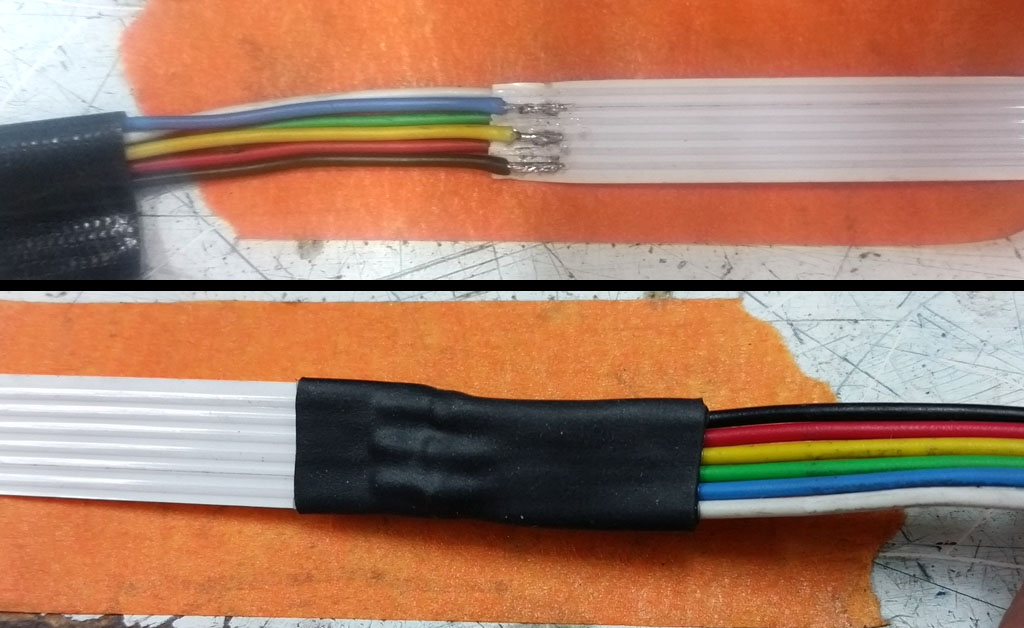
Punch a hole in the steering shaft for the cable inside the shaft to come out between the shaft and the steering column tube:
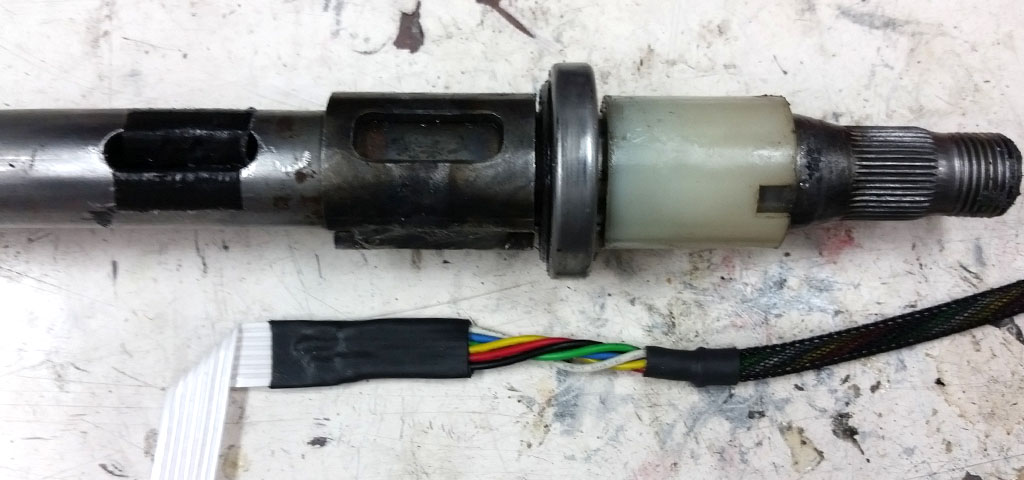
Then wrap it around in a spiral:
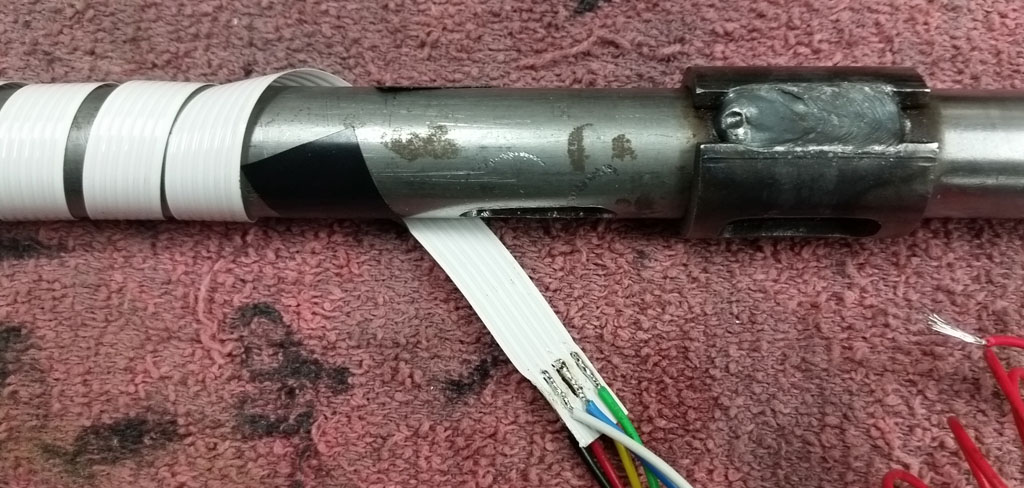
And bring it back out of the steering column tube:
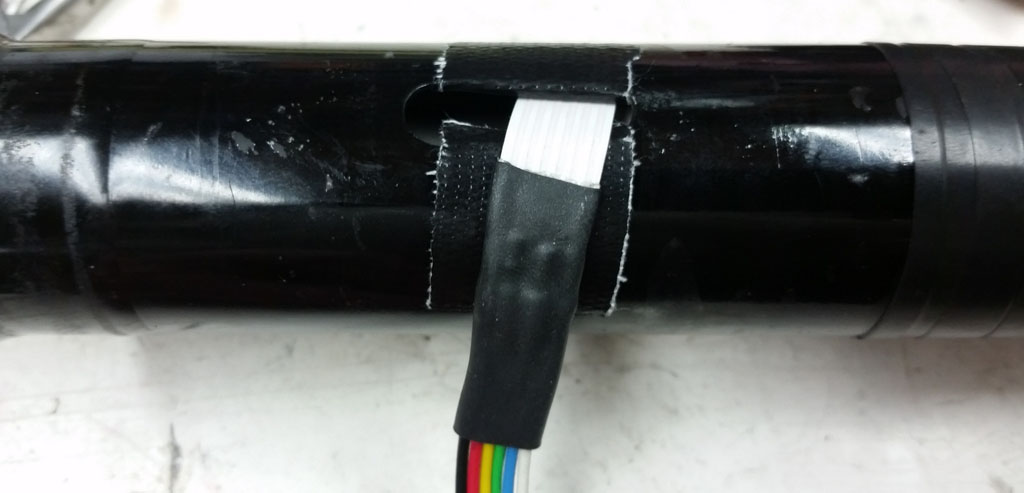
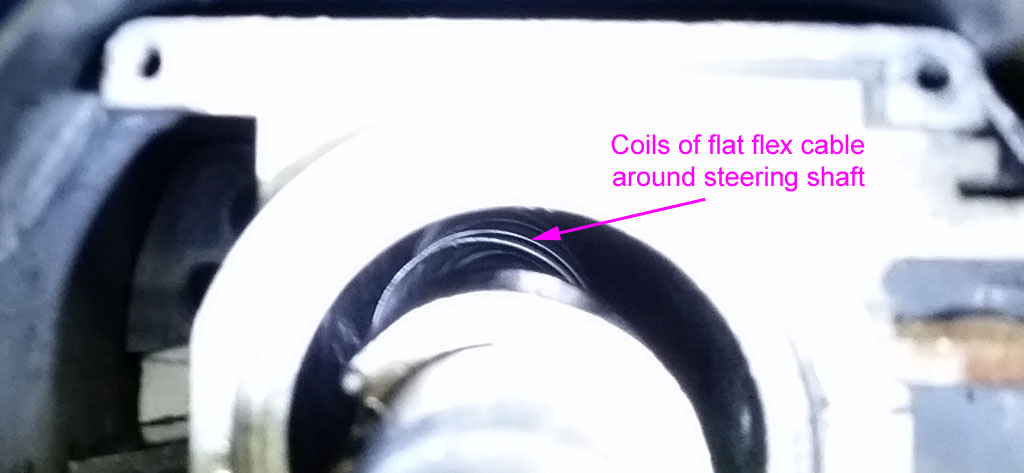
Peering inside, between the steering column and the steering shaft, you can see the nice coils of the flex spiraled around the shaft:
Tape everything up with good 3M electrical tape, and install:
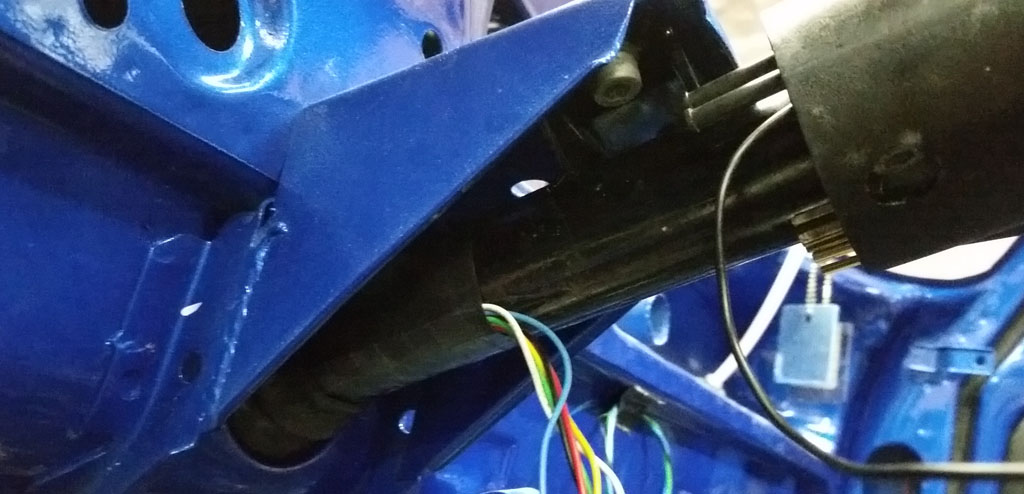
See? Easy as that there are 6 conductors inside the horn button:
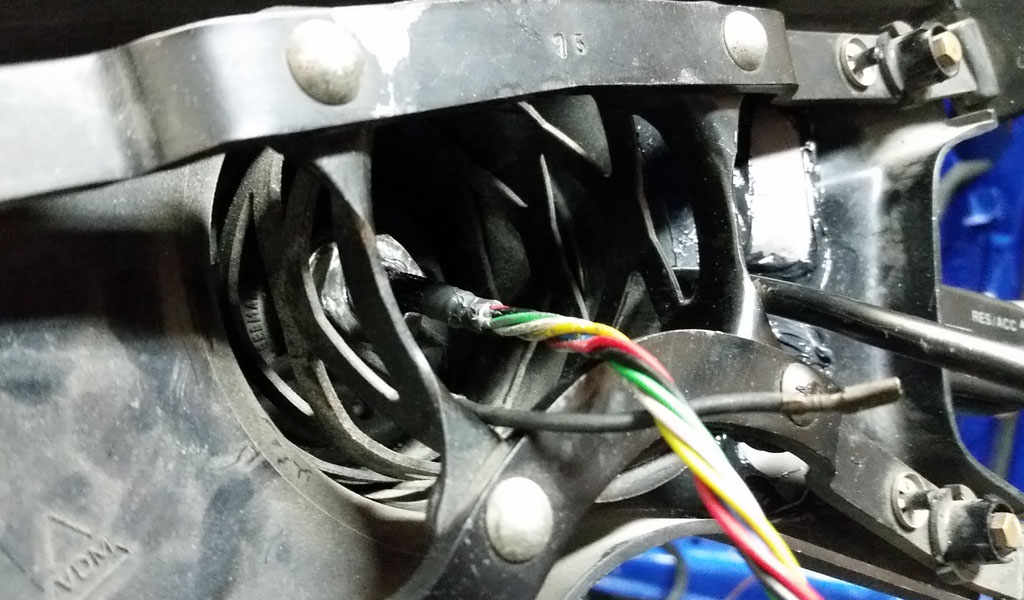
In real life, this took several experiments to figure out the coiling / spiral wrap. Even after that was determined, I somehow slipped the shaft on the first one that I had "right" and broke it testing the wheel travel. My 1975 rack-and-pinion steering has about 3.25 turns lock-to-lock, the spiraled coils give about 4.75 turns, so you have to be careful to have the wheels pointed dead ahead, and the steering shaft exactly at the middle of its travel.
Knowing all this, the second one worked perfect! Oh, remember how there was 15 feet of flex to start with . . . there was none left over after all the mistakes. |
|
| Back to top |
|
 |
Baxsie
Joined: 12 Apr 2012
Posts: 253
|
 Posted: Wed Mar 04, 2015 9:26 pm Post subject: Cruise Control Mounting Under Seat Aircooled VW Posted: Wed Mar 04, 2015 9:26 pm Post subject: Cruise Control Mounting Under Seat Aircooled VW |
 |
|
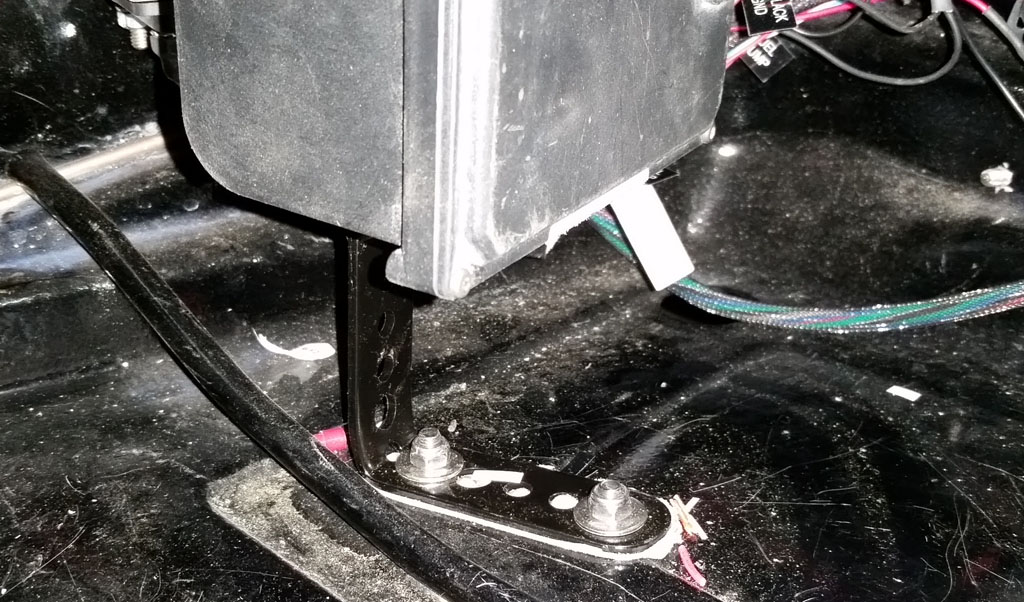
The main cruise control box is under the back seat. It is mounted so that there is nearly a straight shot to the throttle splitter:
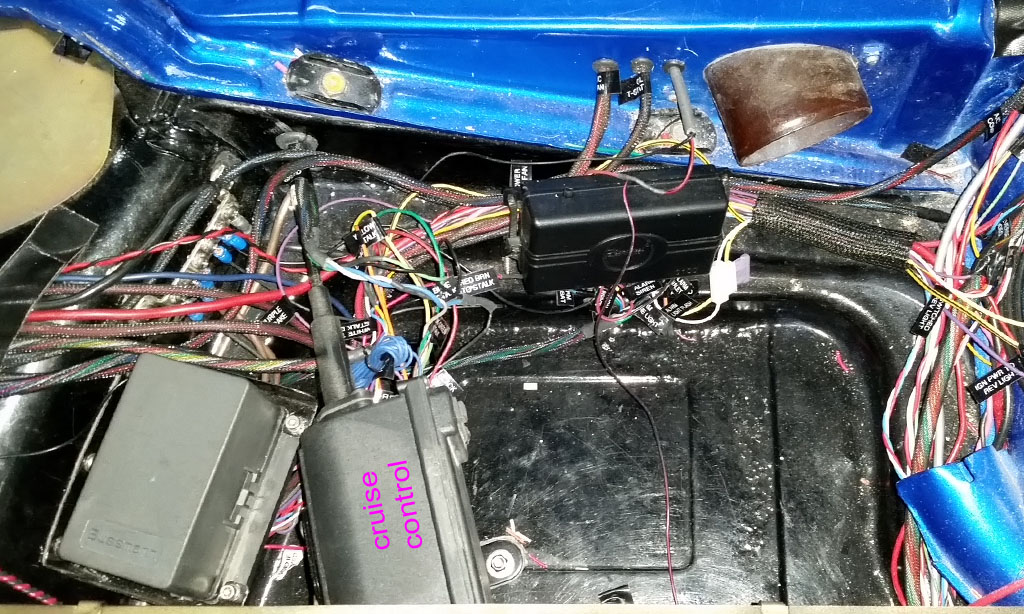
I used the supplied Rostra bracket, with 3M heavy duty mounting tape and bolted through the floor pan:
 |
|
| Back to top |
|
 |
Baxsie
Joined: 12 Apr 2012
Posts: 253
|
 Posted: Wed Mar 04, 2015 9:39 pm Post subject: Wiring under the back seat: a self-guided tour Posted: Wed Mar 04, 2015 9:39 pm Post subject: Wiring under the back seat: a self-guided tour |
 |
|
Here is an overall picture of the wiring under the back seat:
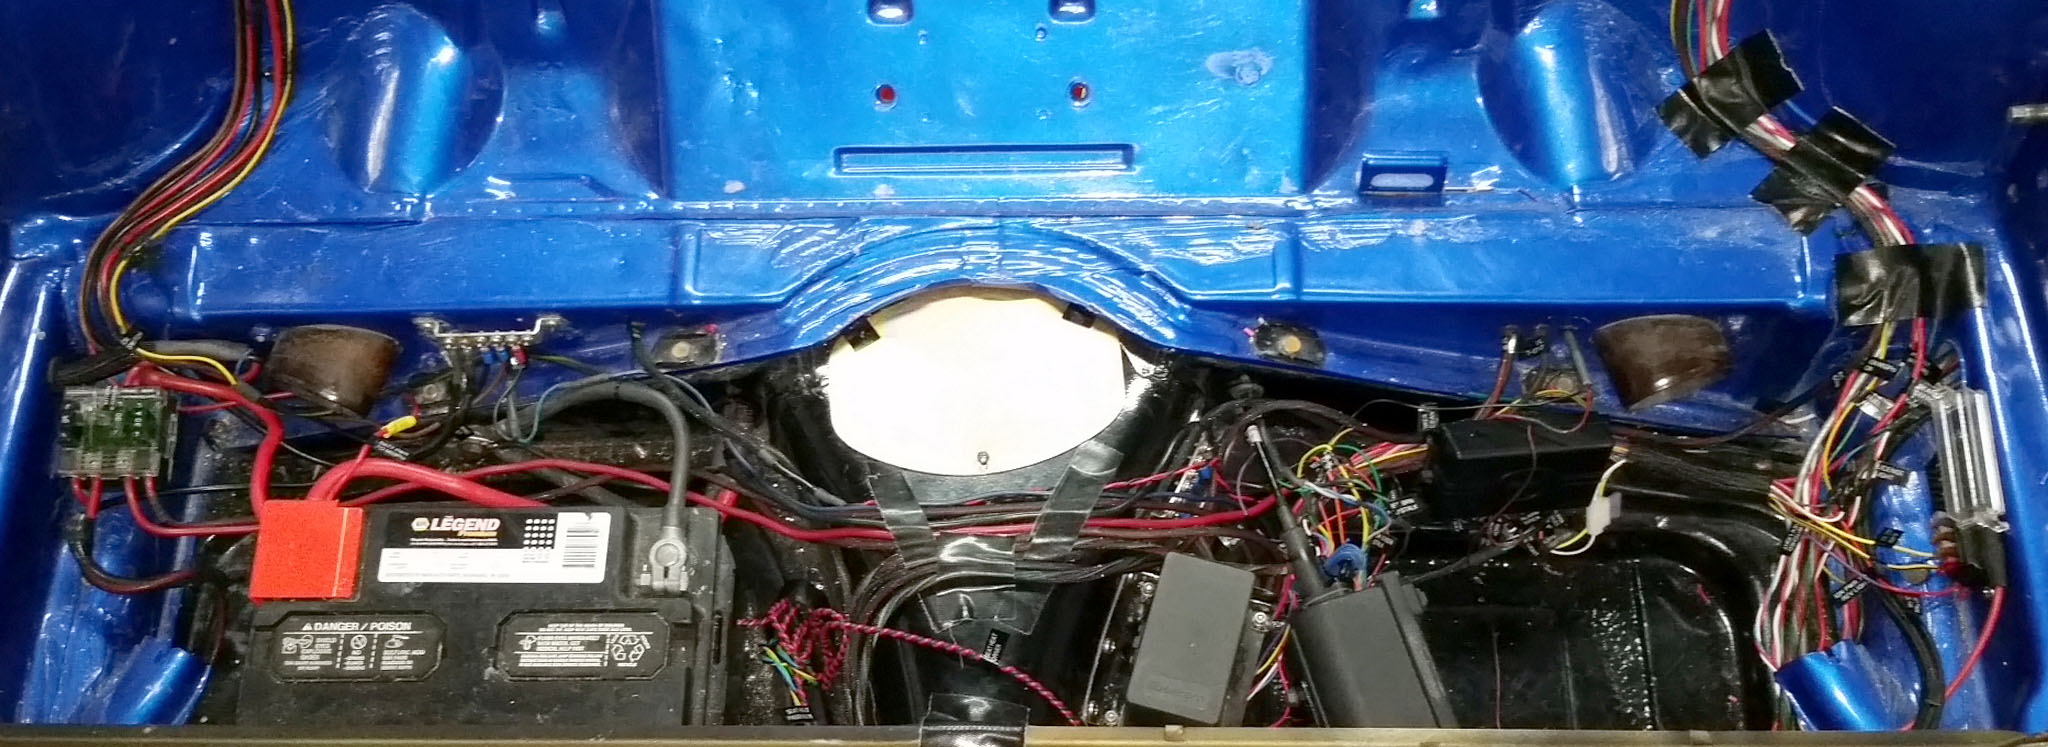
Closer view of the battery / passenger side:
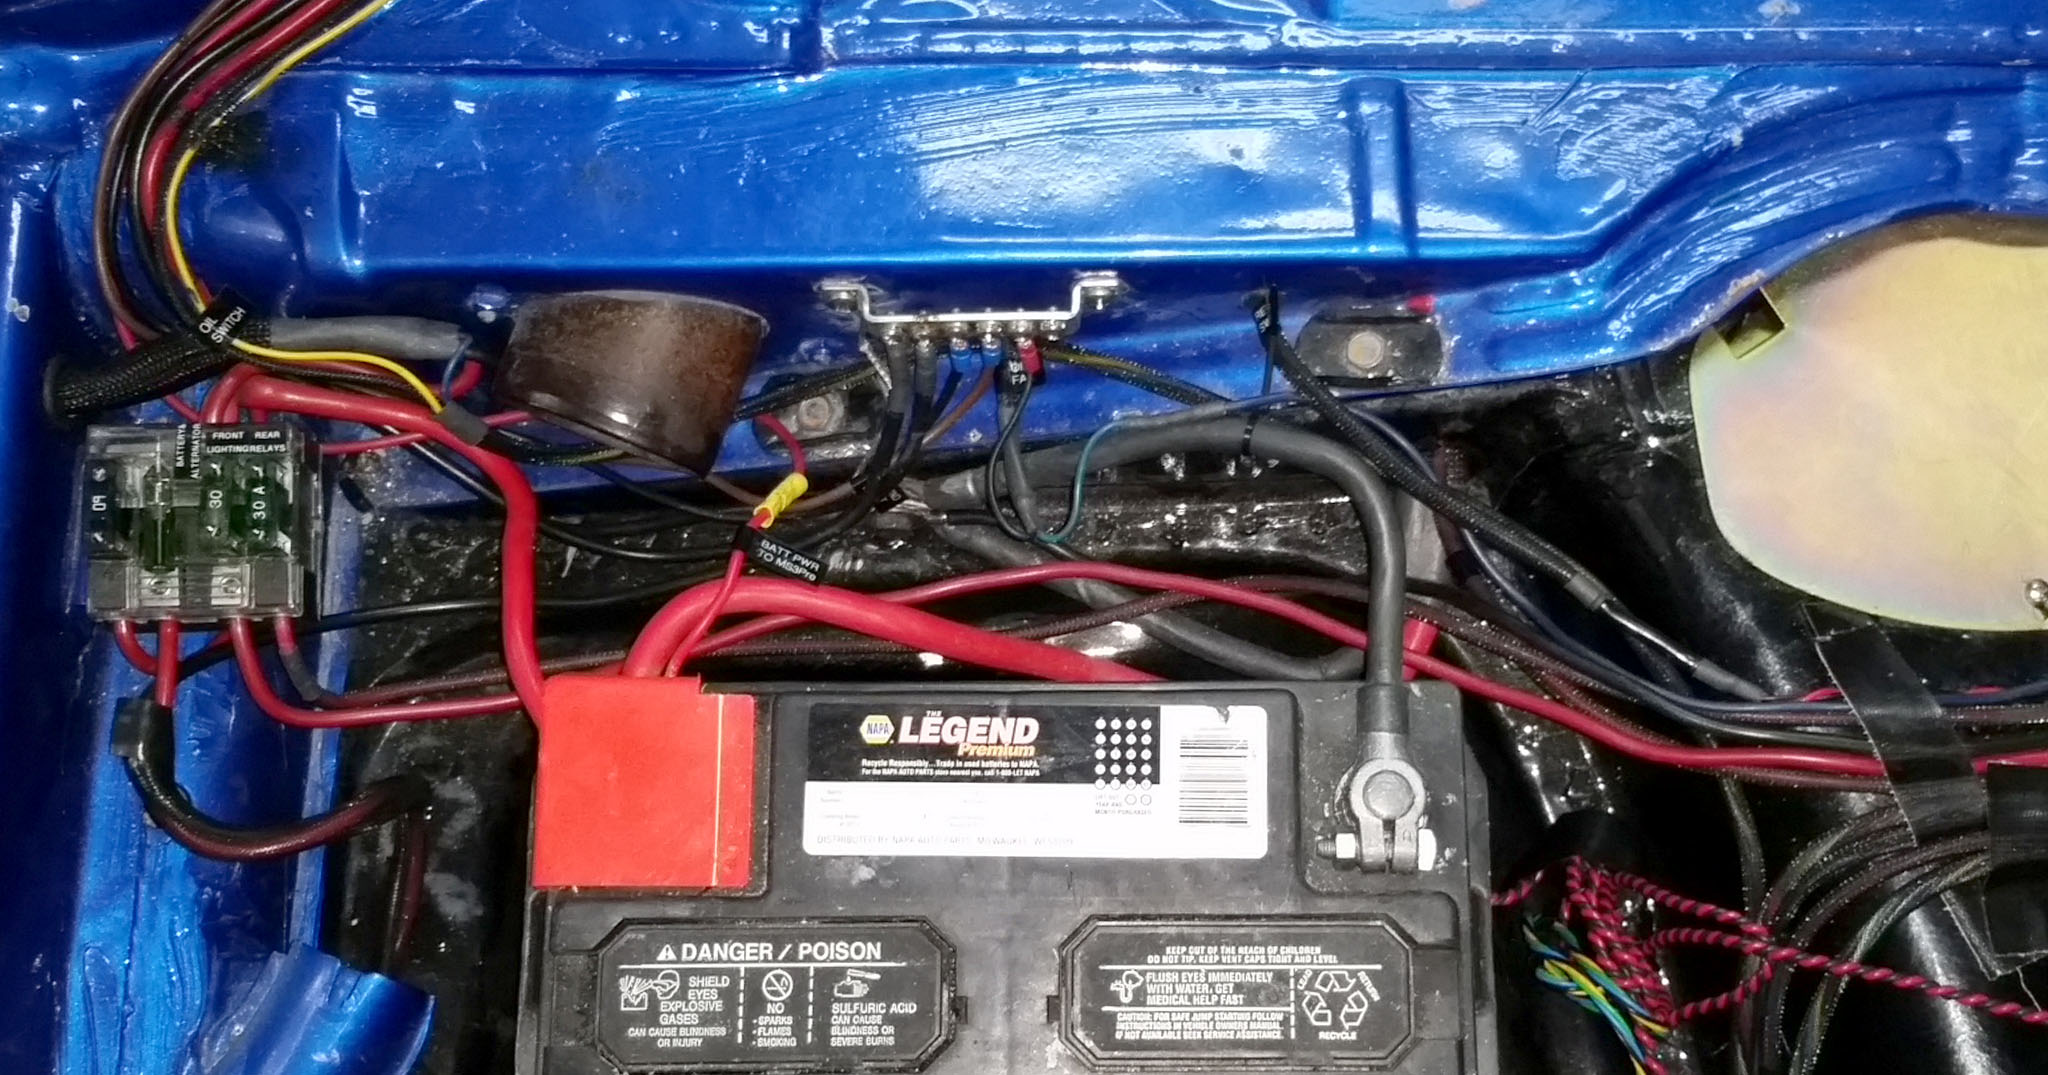
Closer view of the driver side:
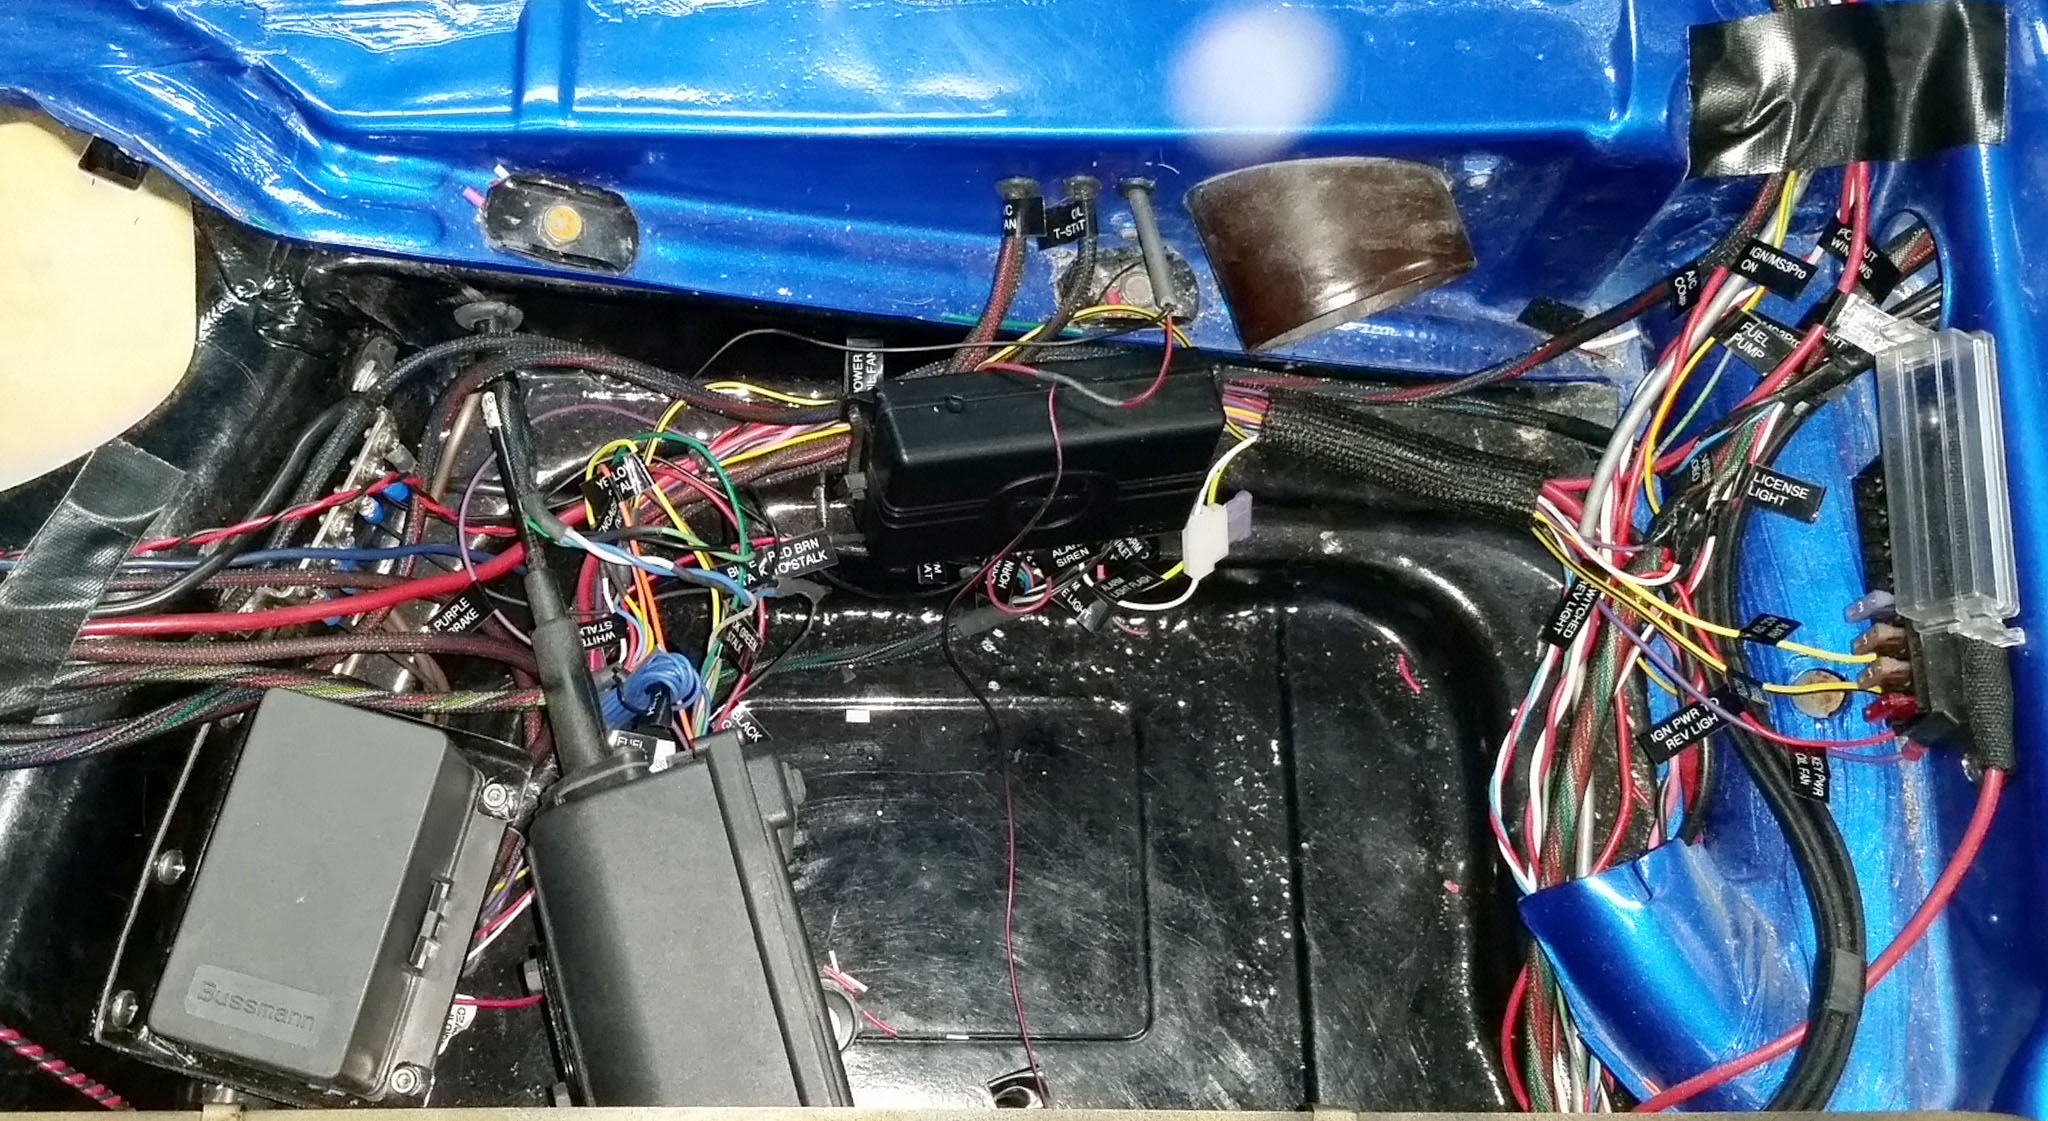
I won't bore you with the details, but if you have a question I'll try to answer it. |
|
| Back to top |
|
 |
Baxsie
Joined: 12 Apr 2012
Posts: 253
|
 Posted: Wed Mar 11, 2015 7:47 pm Post subject: Getting close to wrapping up the wiring: Dash & Trunk Posted: Wed Mar 11, 2015 7:47 pm Post subject: Getting close to wrapping up the wiring: Dash & Trunk |
 |
|
More of a photo-stream than a proper post, but better than nothing I suppose.
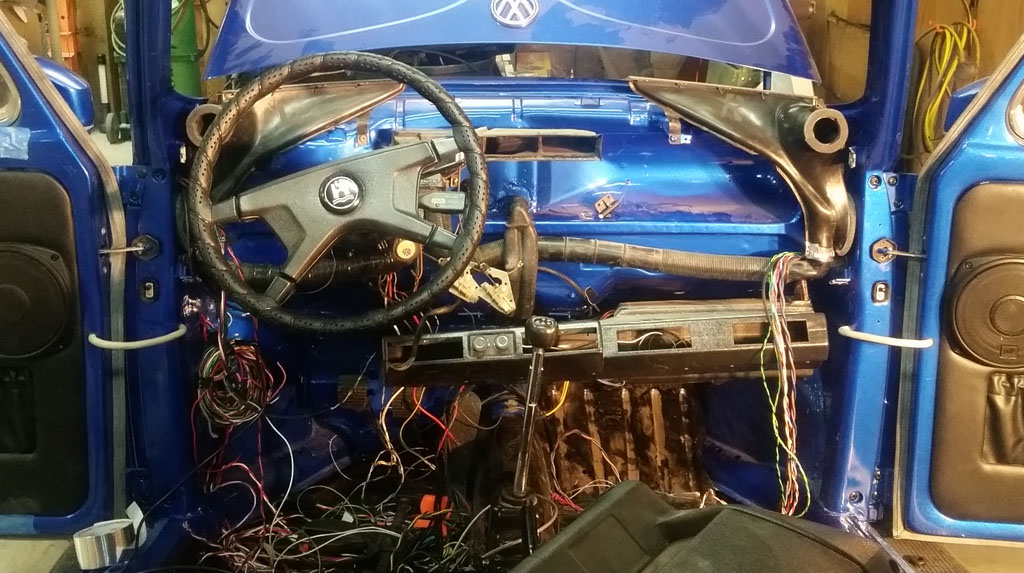
In this shot, the wiring has been brought in from the doors, up from the rear, and back from the trunk. It all ends under the dash:
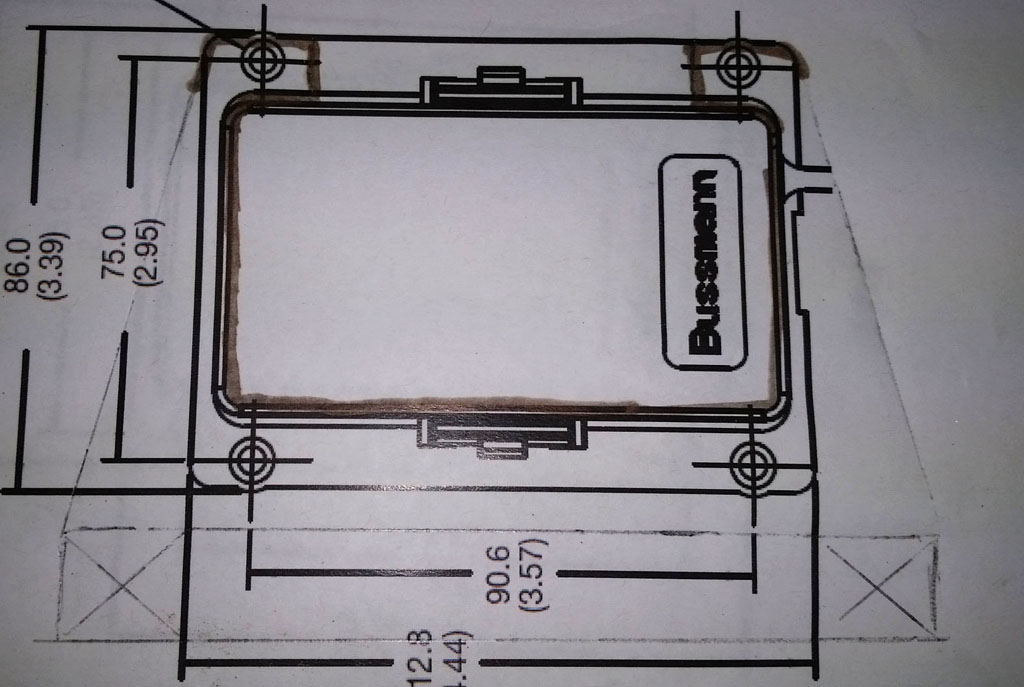
First up, I need some relays and fuses. We used these brilliant Bussman sealed fuse panels from DelCity. Paper sketch of the bracket:
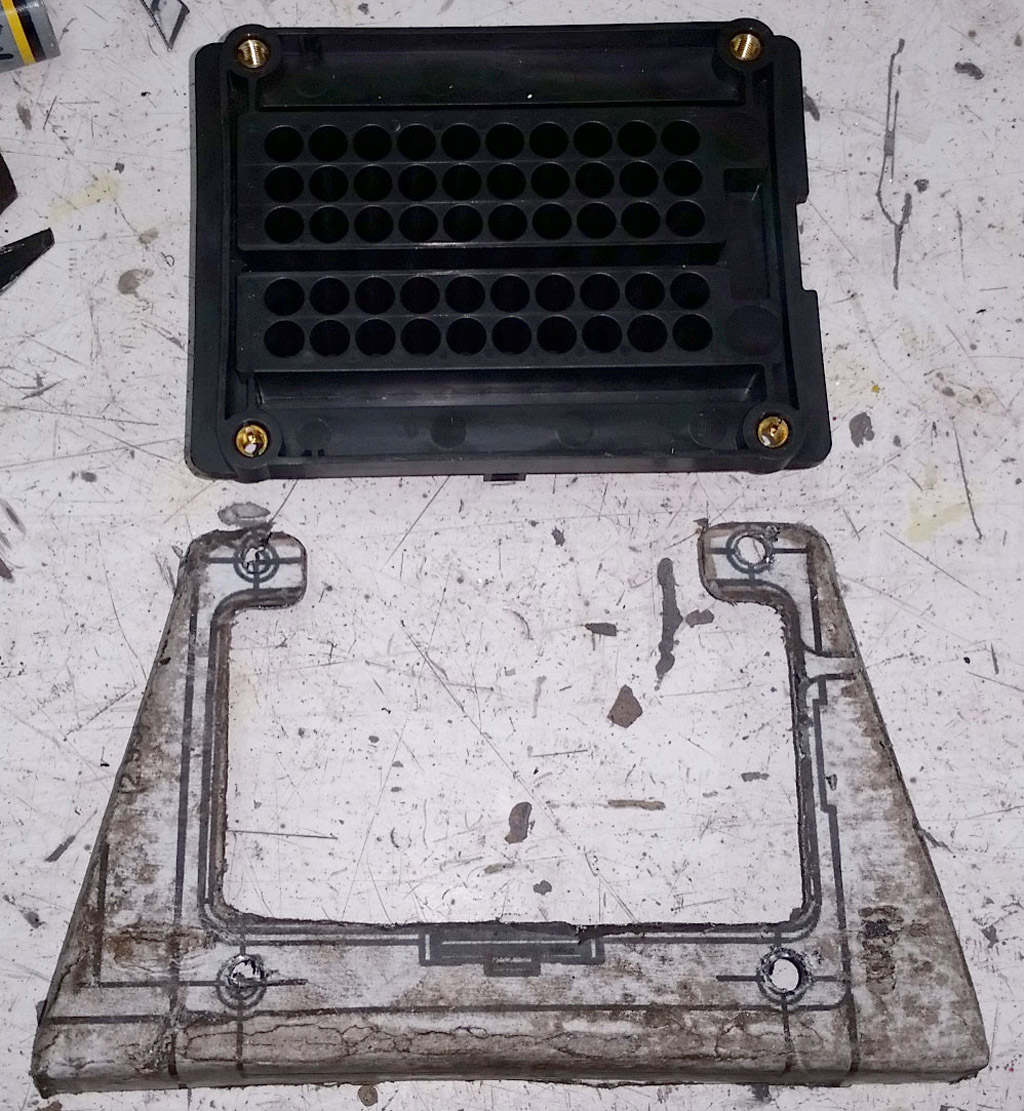
Glued the sketch to some sheet metal, cut out and bent:
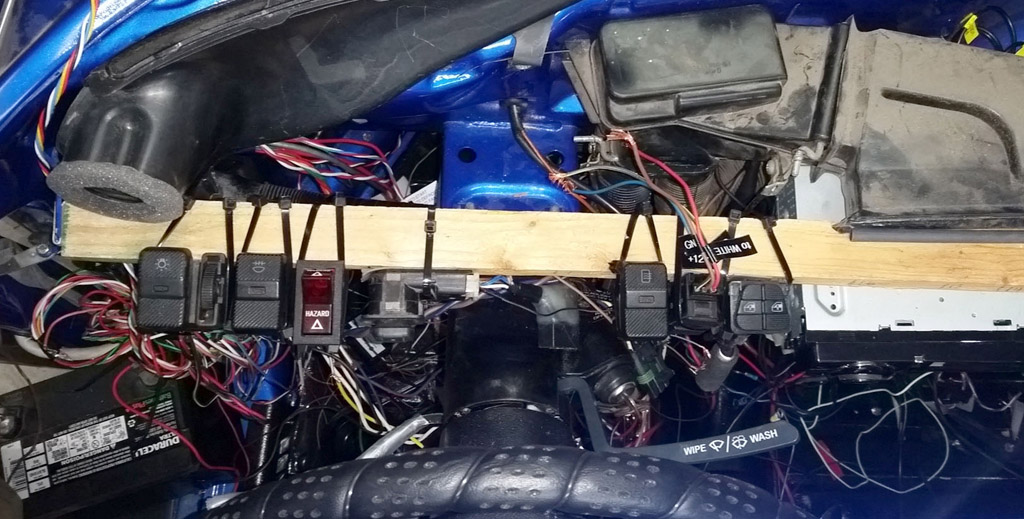
Temporary switch placement. The dash is a whole 'nother project, but I want to make sure the wiring works first!
There are four of these ground buss bars in through the car, all tied with 8 AWG wire, as well as bonded to the metal. This one is behind the speedo:
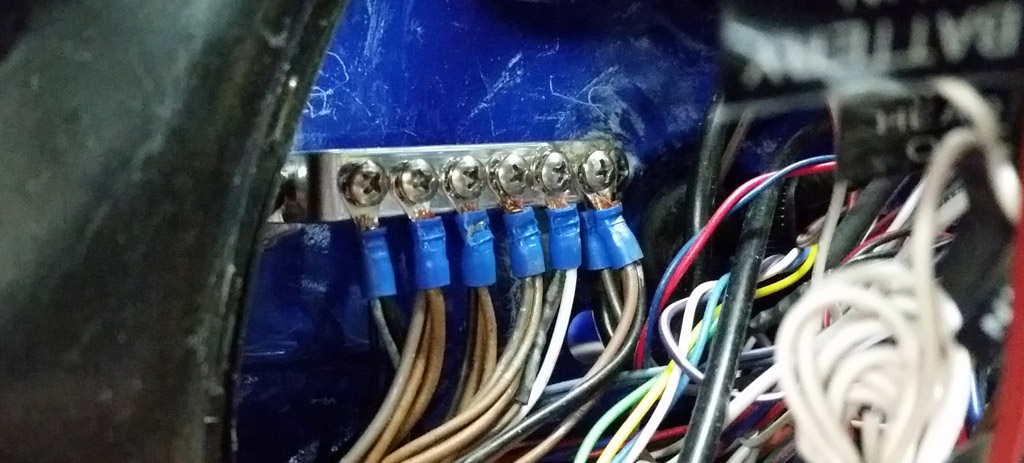
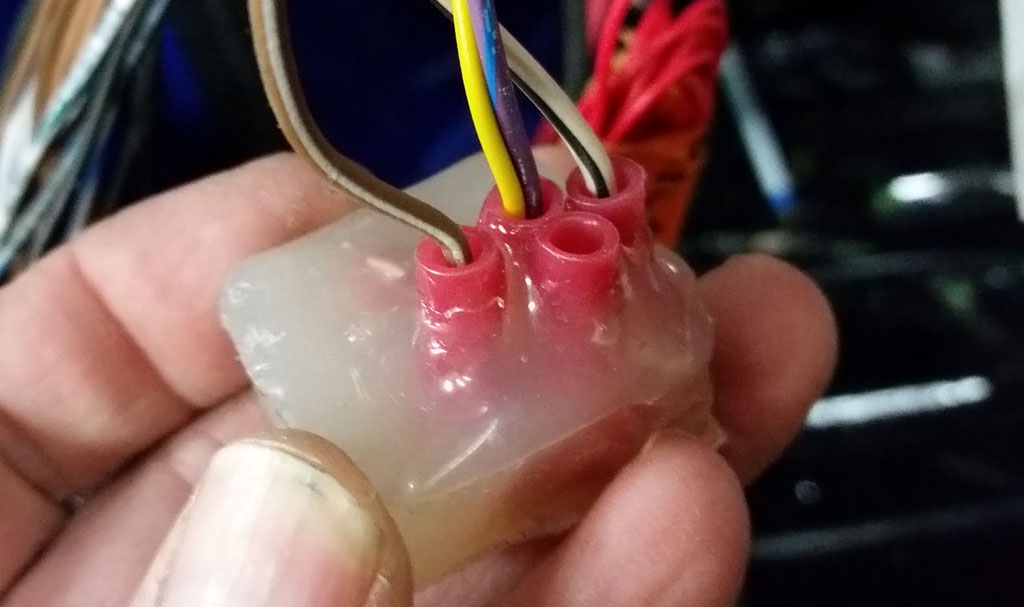
We made a socket for the OG high/low flasher . . . this one had a bad crimp, so there is a version 2 being used:
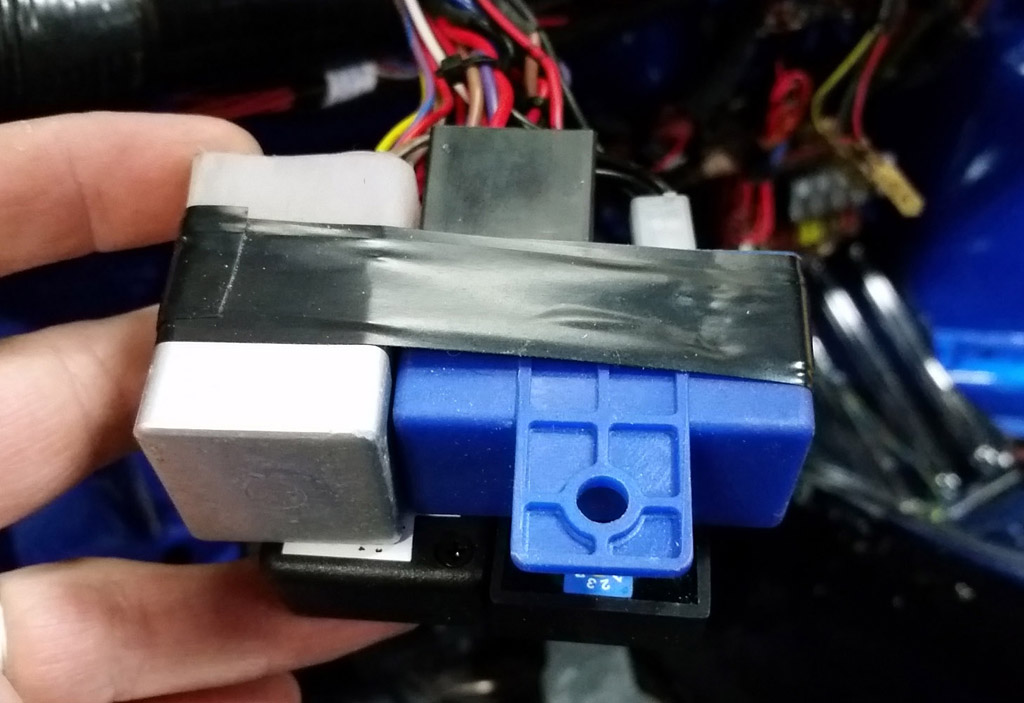
The logic cluster: High/Low headlight clicker, lock relays, brake flasher, turn flasher. This mess nests nicely to the left and below the speedo:
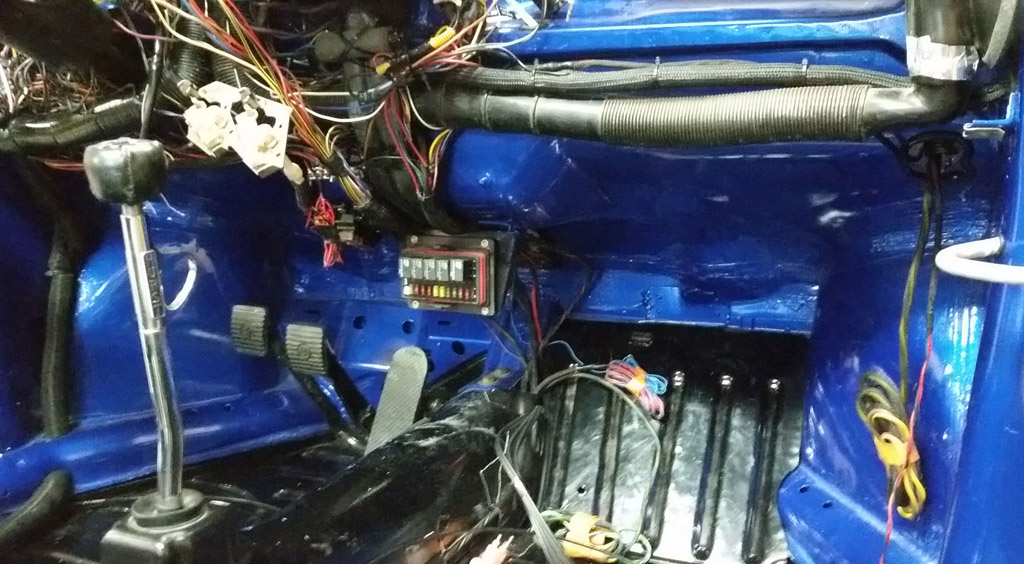
This is where the Relay and fuse panel goes, tucks in with the air conditioner:
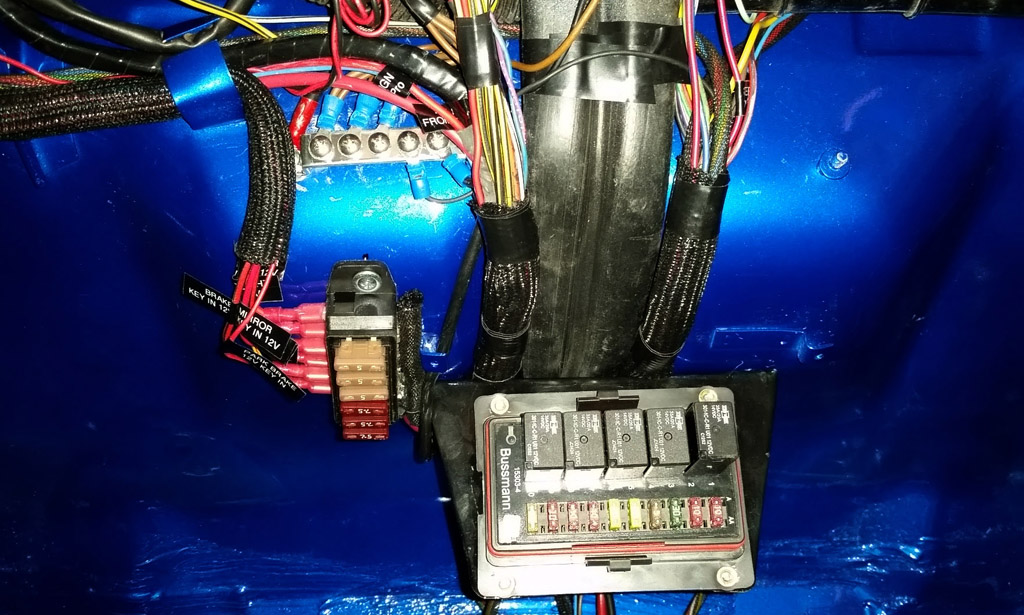
Closer shot of the dash relays and fuses, along with MOAR FUSES ! As much as possible, each element in the car has its own fuse:
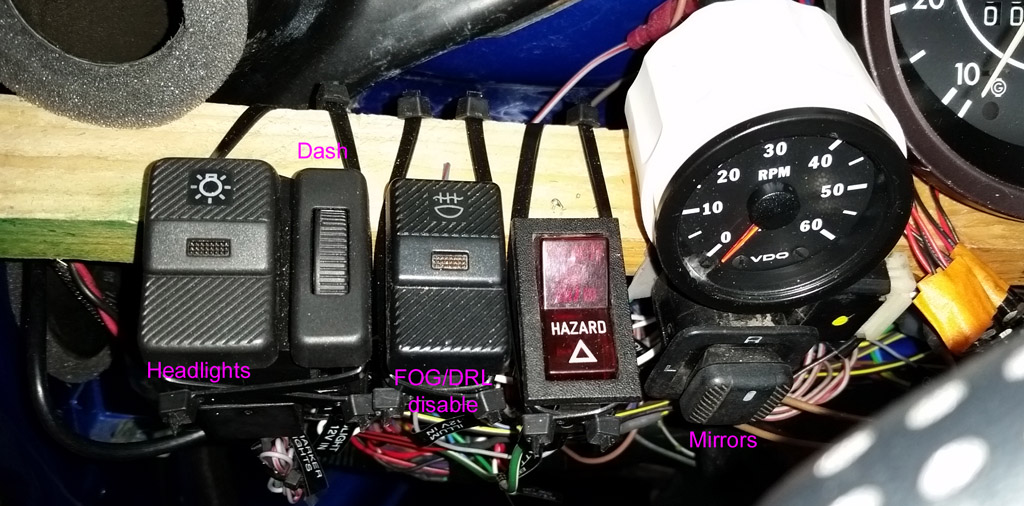
These are the left-hand switches. The Passat fog switch we selected had two positions (?), so the fogs come on in position 1, moving to position 2 leaves the fogs on, but also cuts the DRL so the DRL does not cause glare in the fog:
Gauge "cluster":
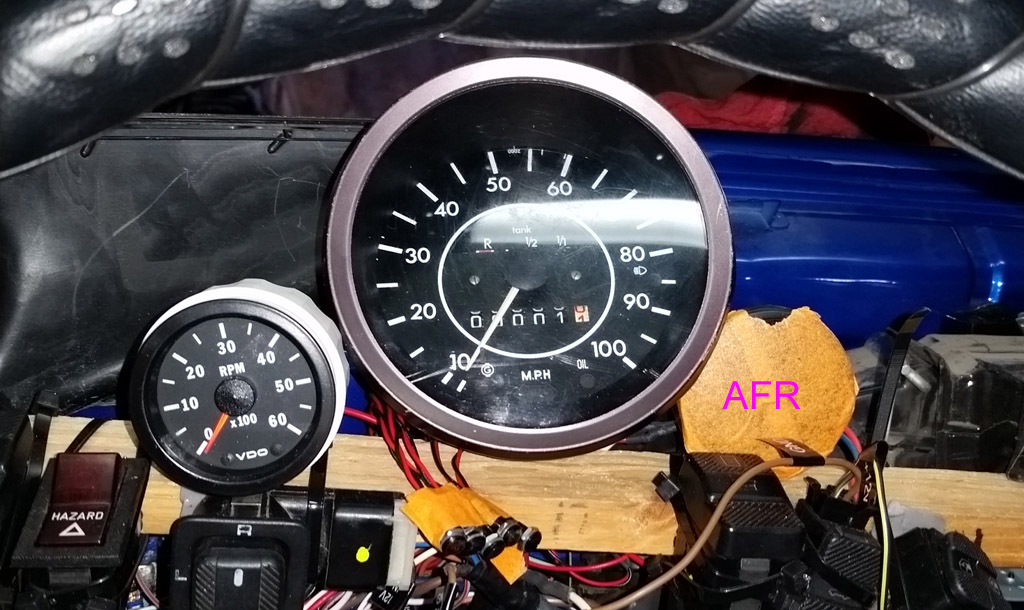
The speedo illumination and indicator lights are all LED.
There are 5 indicator LEDs that will be mounted under the speedo in the dash:Red: Brake fail circuit #1
Red: Brake fail circuit #2
Amber: Parking Brake
Green: Cruise engaged
Blue: Alarm The right-hand switches:
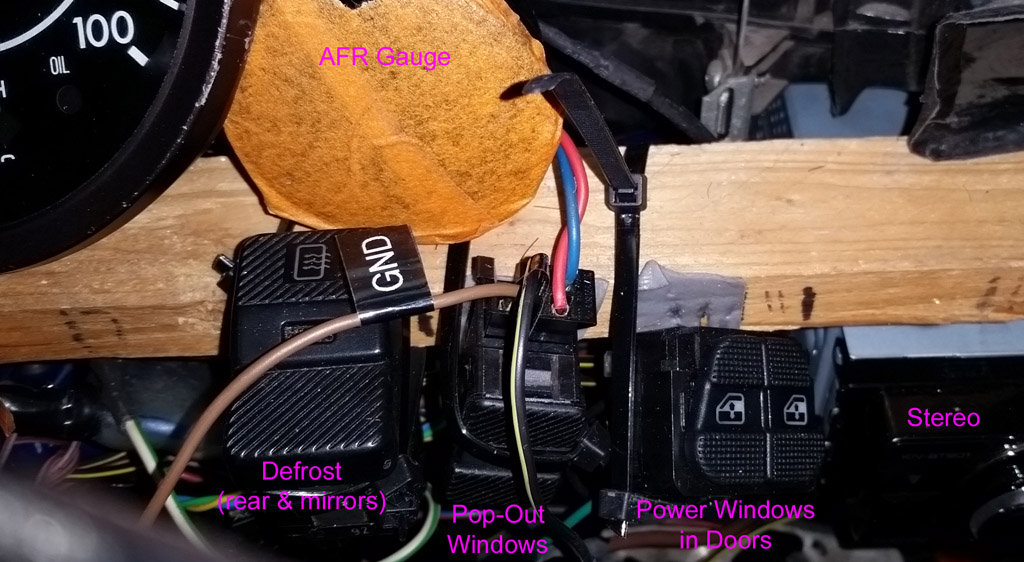
Here is a shot of the dash with the wiring 95% complete:
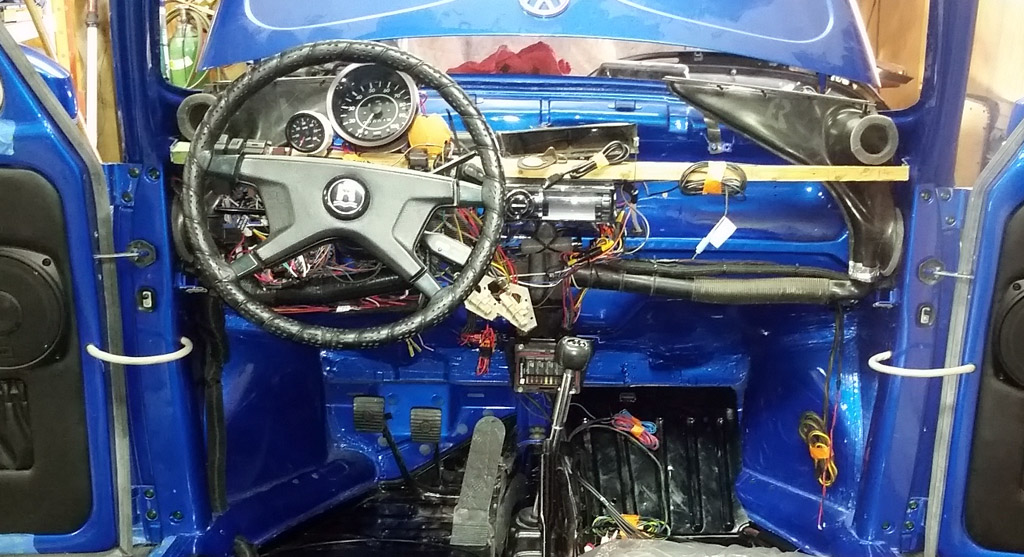
All that is left of the electrical is:AC stuff (all wires run, just need to connect)
equalizers (need to create a sub panel)
some accessory switches (on sub panel)
USB outlets (on sub panel) Here are some shots of the trunk wiring, for reference before the fuel tank goes in:
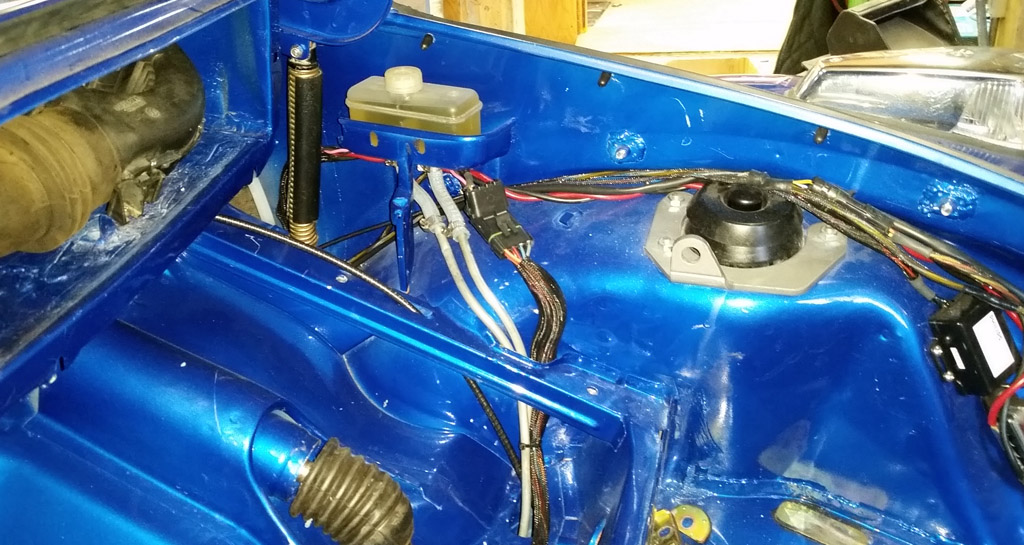
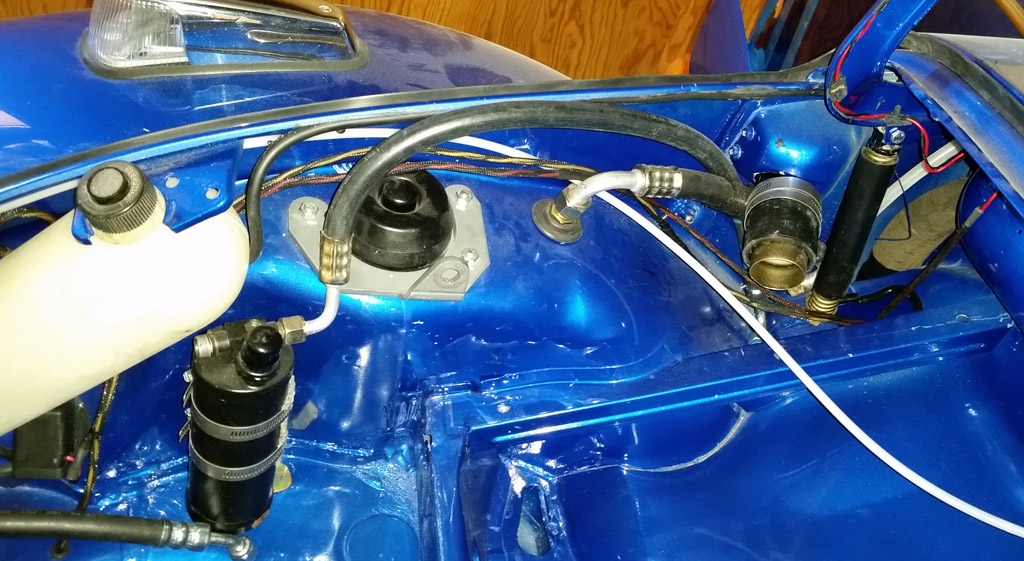
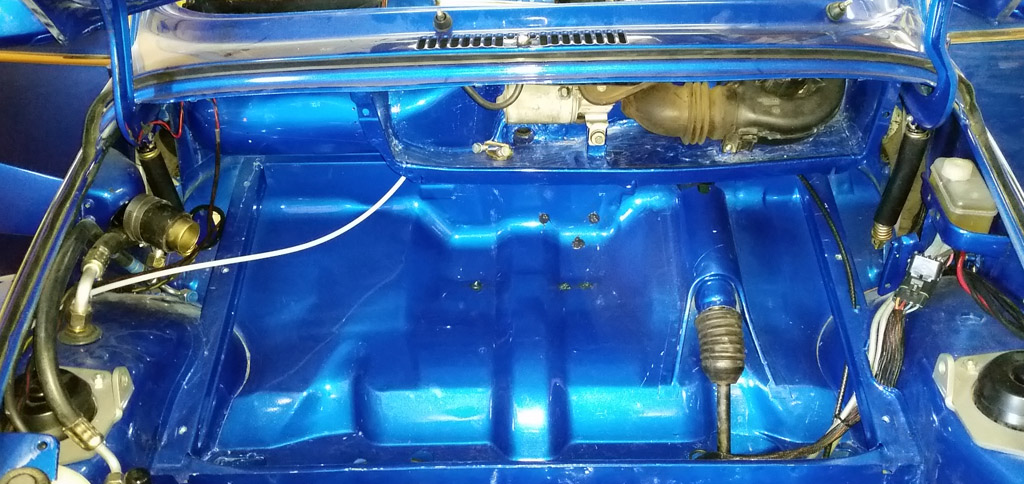
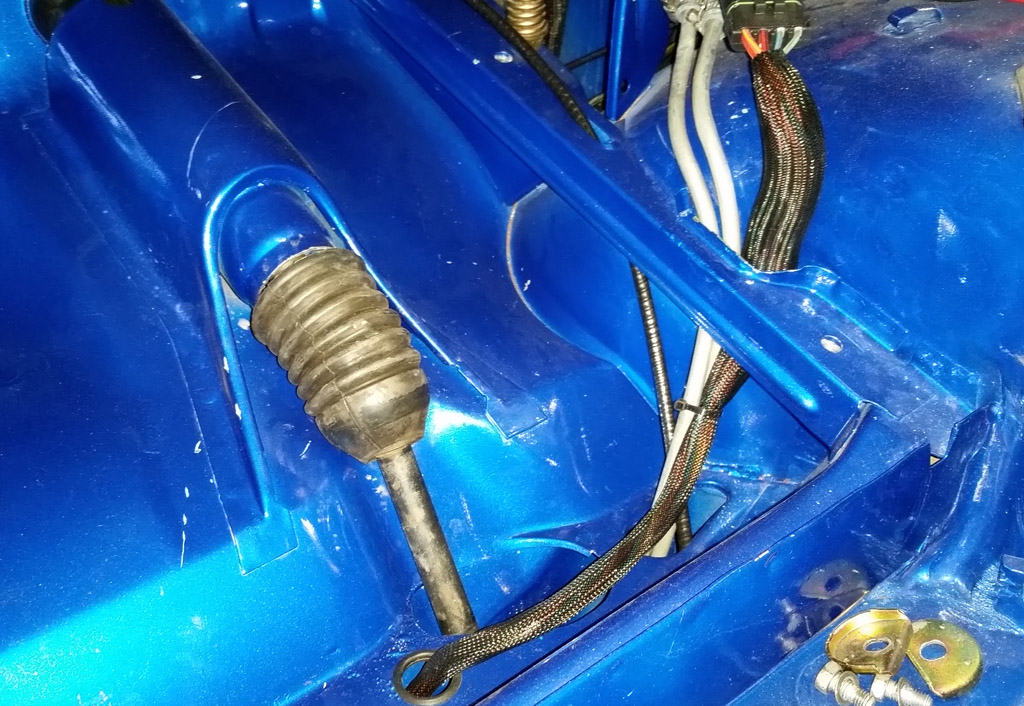
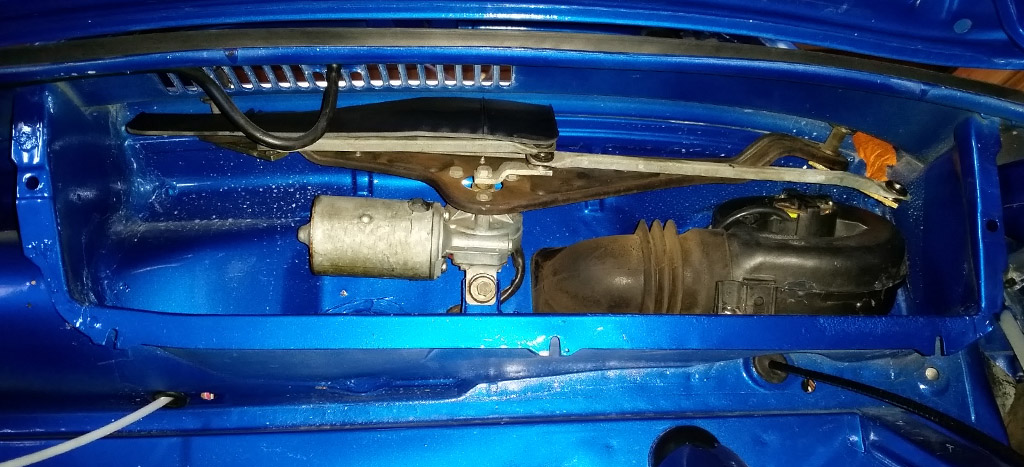
Closer, closer . . . |
|
| Back to top |
|
 |
|
|
You cannot post new topics in this forum
You cannot reply to topics in this forum
You cannot edit your posts in this forum
You cannot delete your posts in this forum
You cannot vote in polls in this forum
You cannot attach files in this forum
You can download files in this forum
|
|


